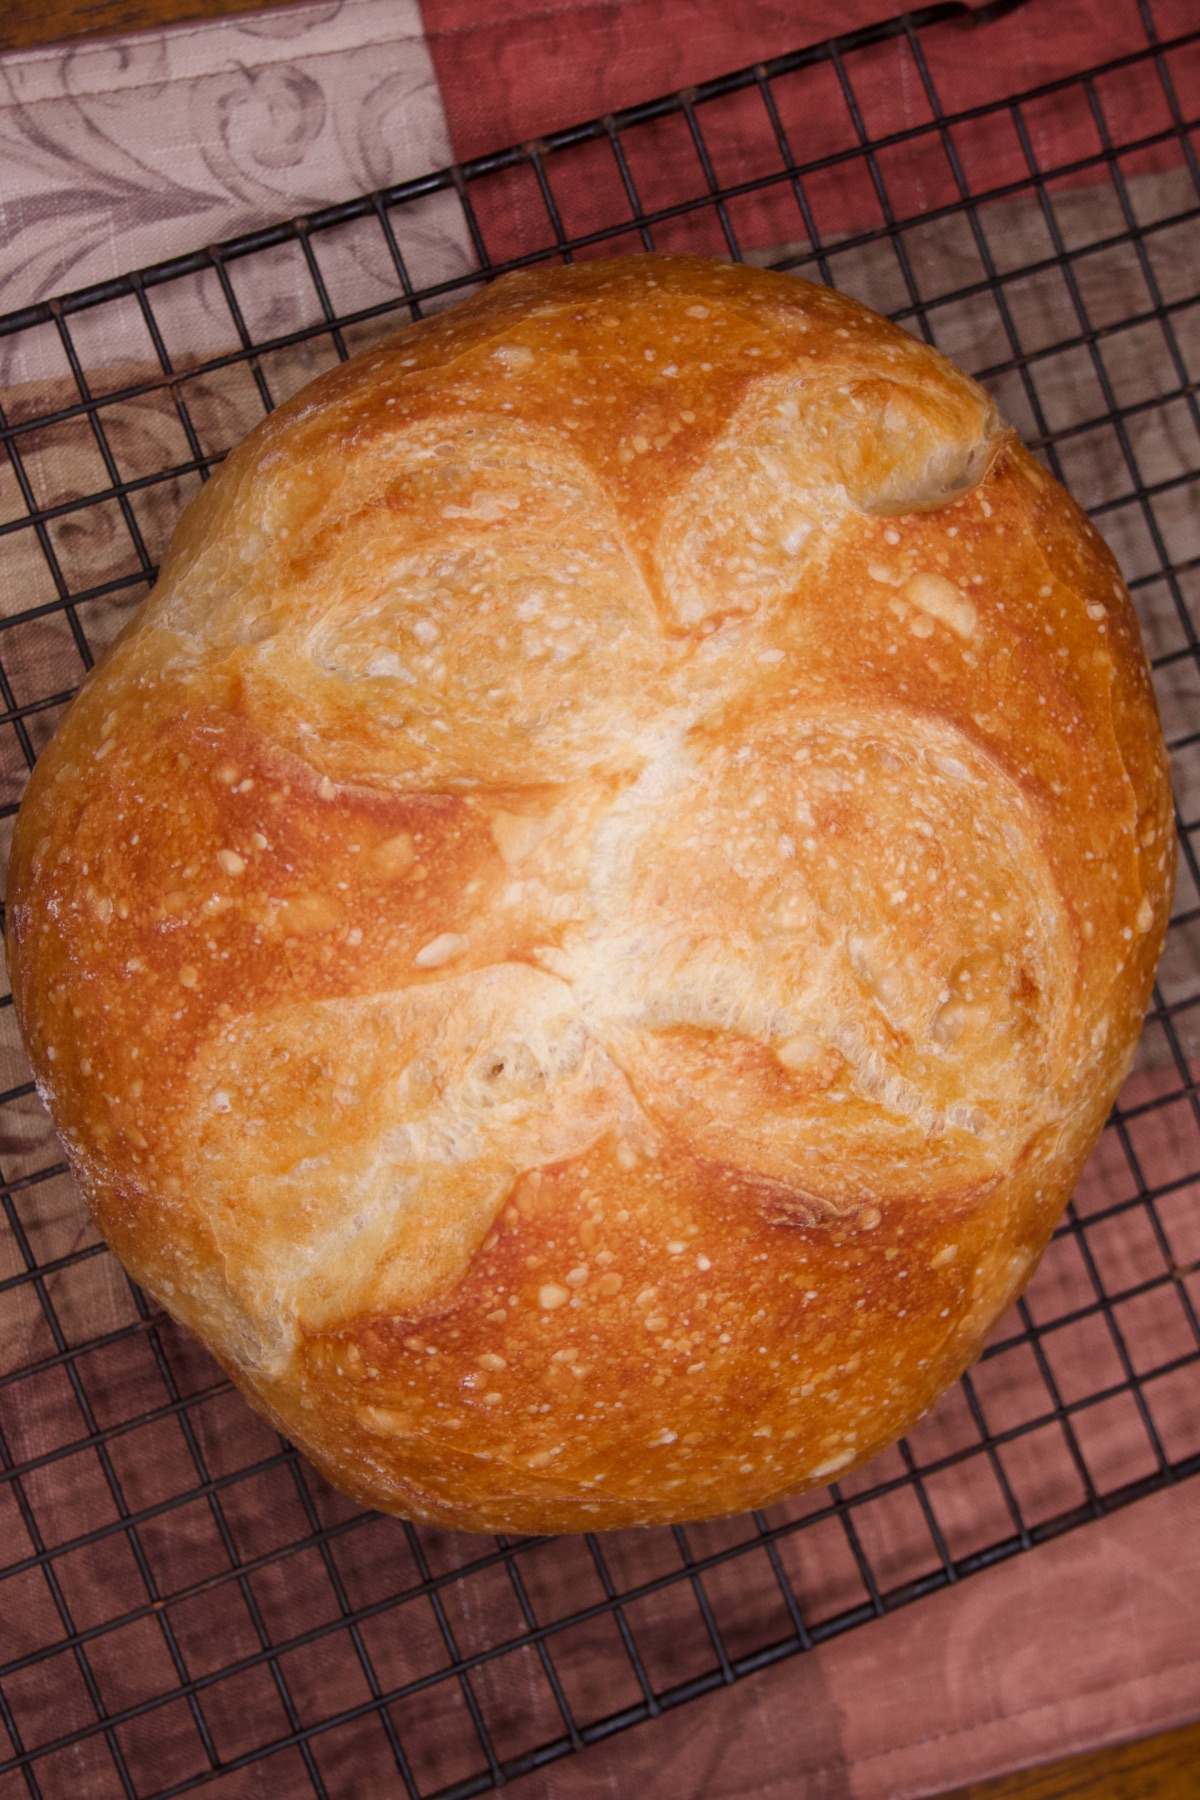
This no knead rustic bread recipe is SO EASY! But don't let that fool you: the flavor and texture will rival any artisan breads you buy today. Added bonus: each loaf costs under $0.75!
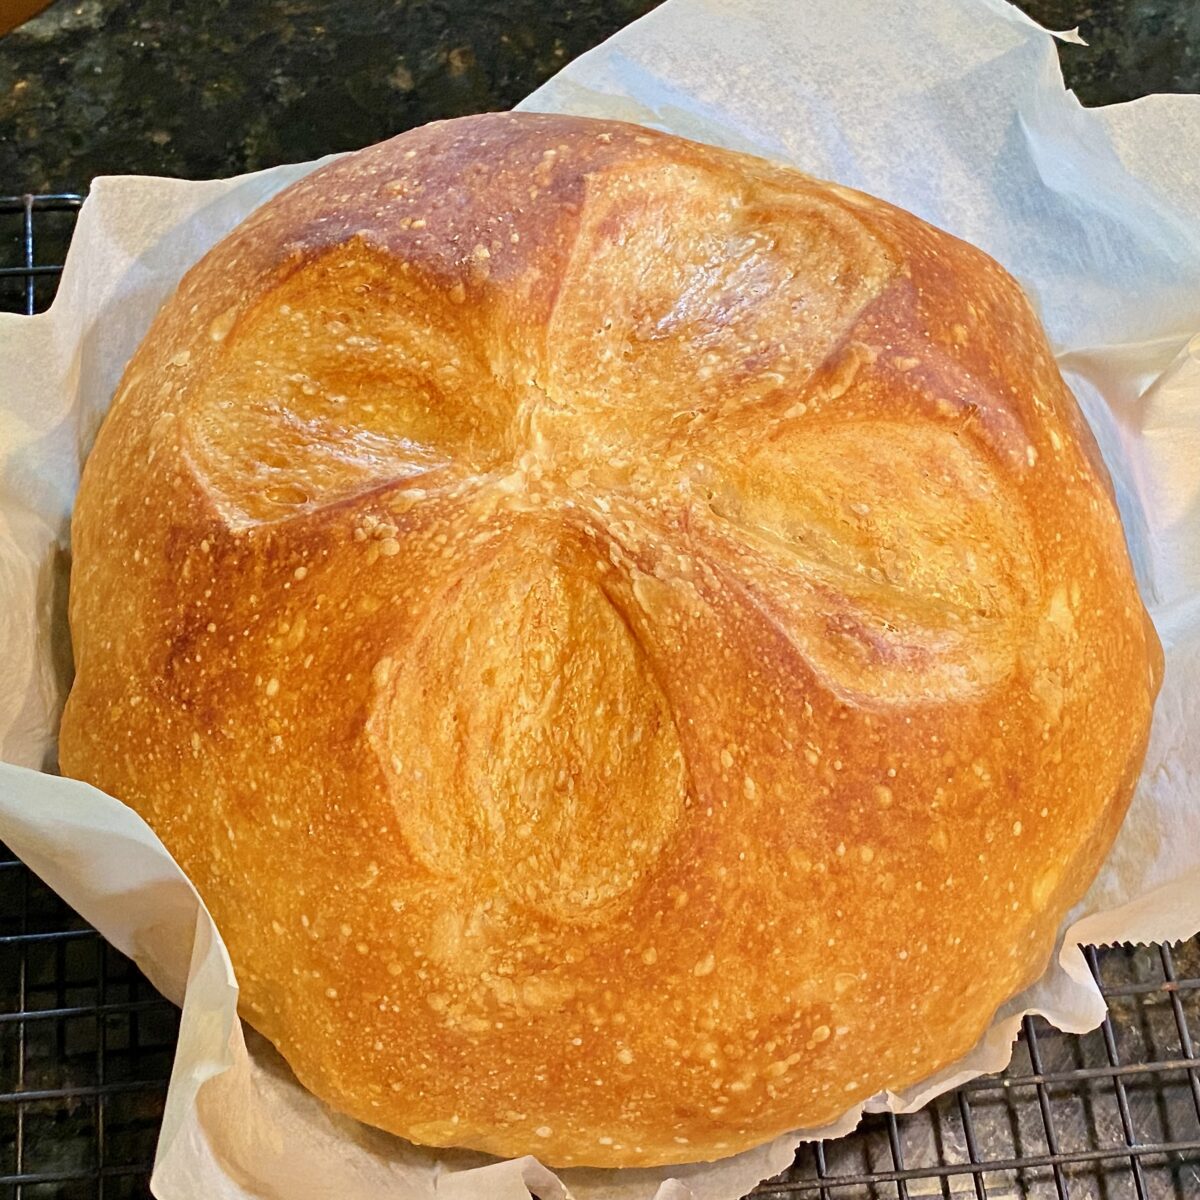
This recipe is adapted from the original Jim Lahey recipe from his book, My Bread.
Don't be intimidated by making homemade bread. It's so simple that ANYONE can do it.
Do you have a large mixing bowl?
Do you have a spatula?
Do you have an oven?
There you go...you can make this bread dough and bake a beautiful, rustic loaf.
No stand mixer required!
But you will need a 6-Quart Cast Iron Dutch Oven to bake the bread.
This type of pan is necessary to create an environment that forms that crunchy exterior crust...a signature element for any rustic bread boule.
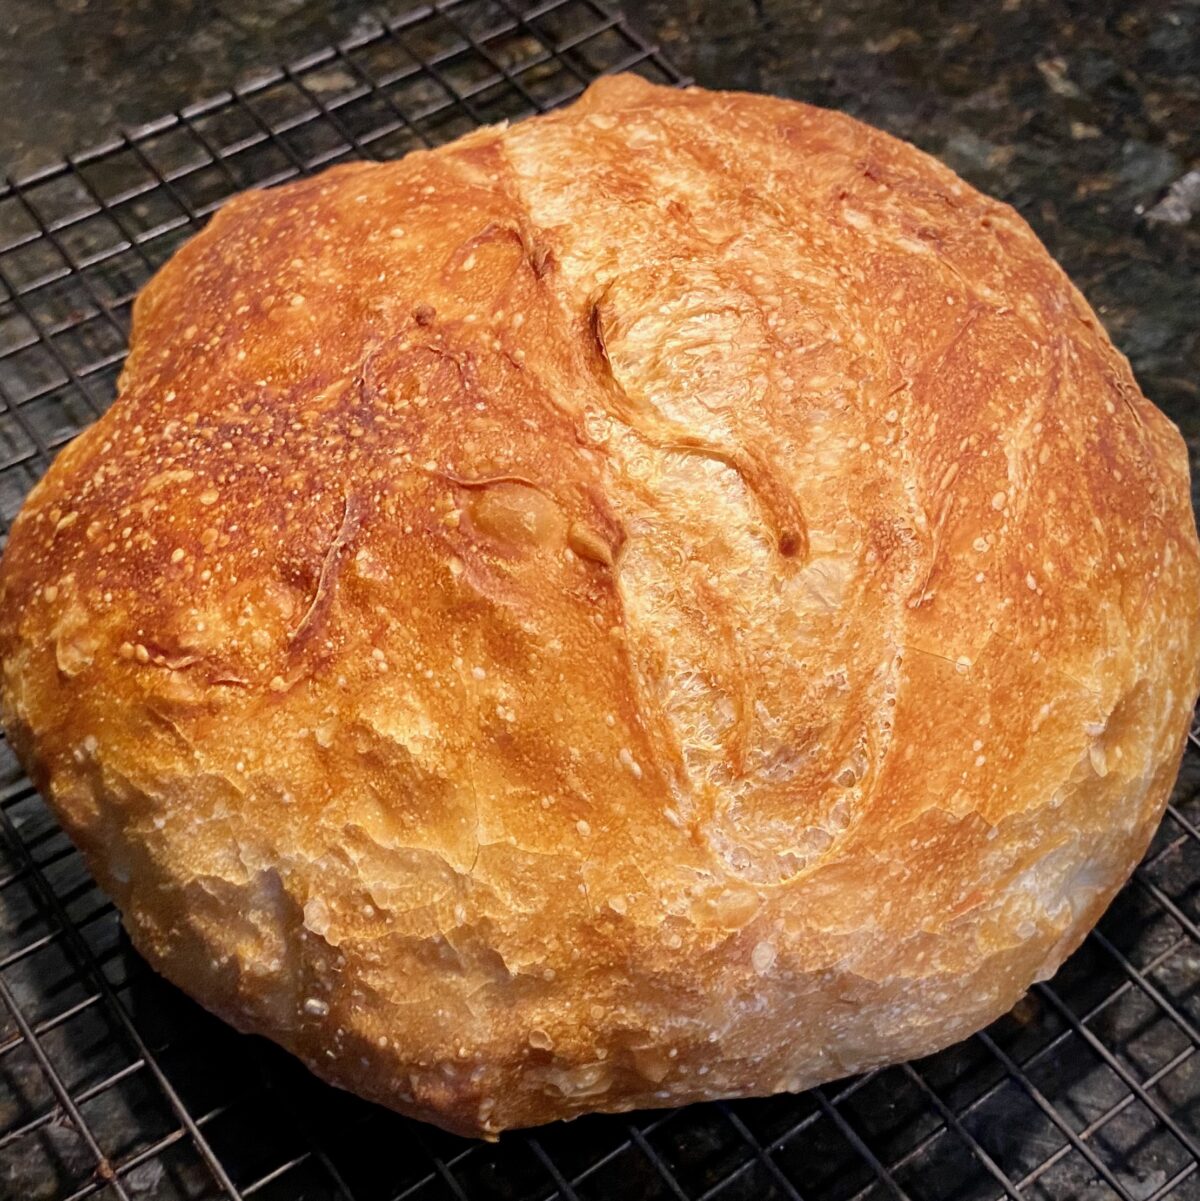
And talk about easy! Mixing the dough literally takes about a minute.
After that, there is a long room-temperature proof (12+ hours). This extended time creates all the gluten we need, which means...
No Kneading is Required!
More importantly, this room-temperature proof creates a ton of flavor.
Once proofed, we spend another minute or so to shape the dough into a ball before its final proof...but this one is only 2 hours.
After that, we're baking. It's as simple as that.
I make this rustic bread just about every week. It's a must serve with all my italian dishes, like Pasta alla Vodka Sauce and Baked Lasagna Bowls. And don't forget to use it for fantastic grilled cheese sandwiches and homemade croutons!
So go ahead, do something spontaneous and impress your family with homemade rustic bread!
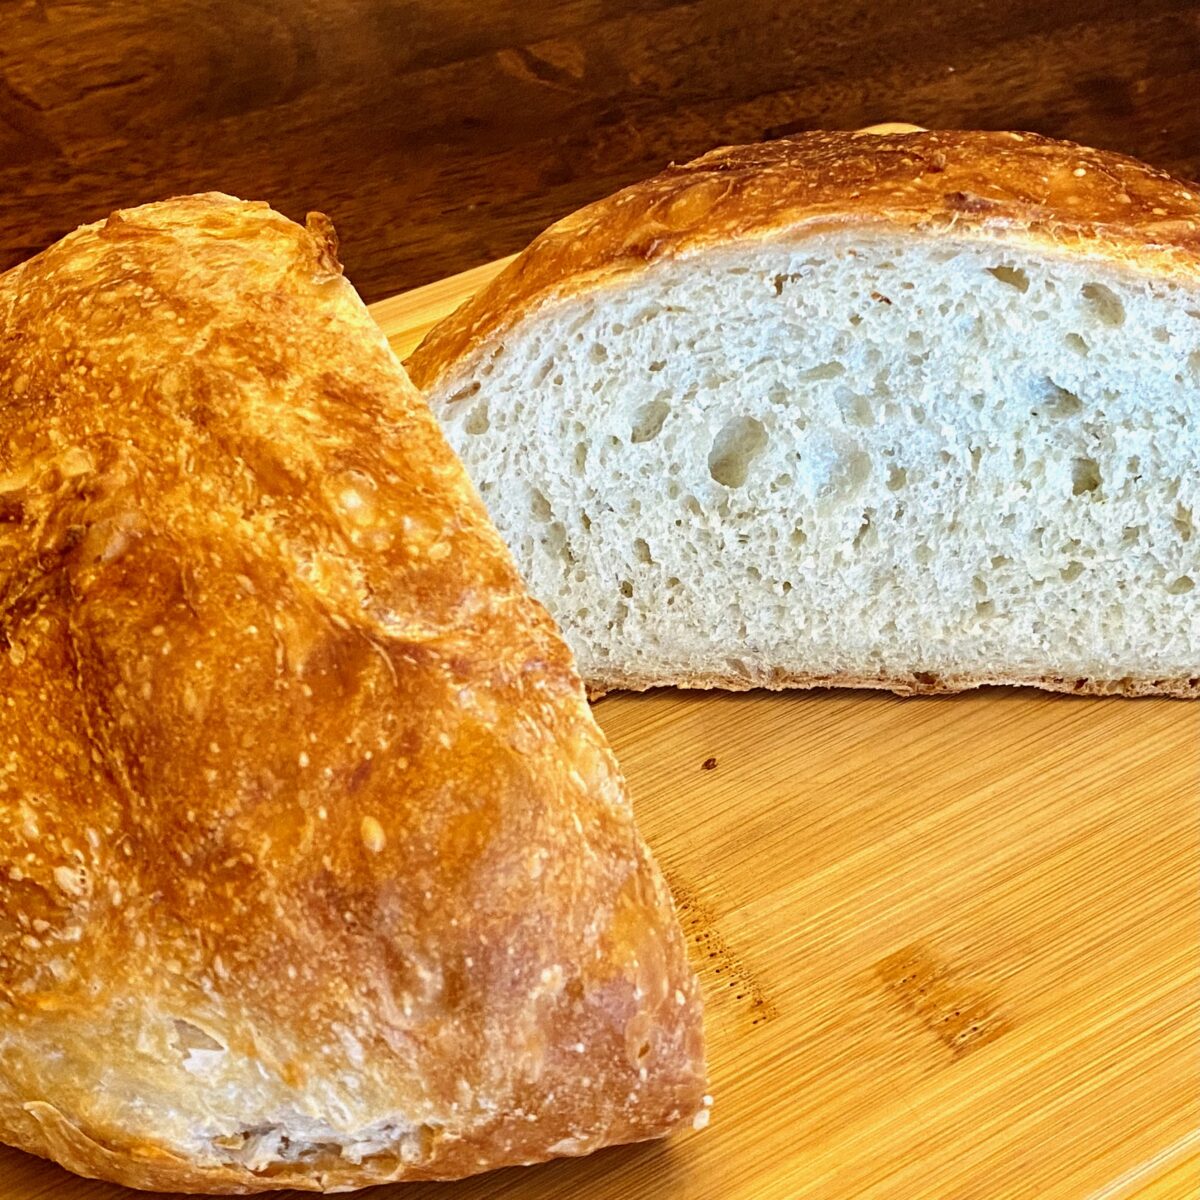
Interested in other bread dough recipes? Check these out:
- Homemade Naan Bread
- Neopolitan Style or Pan Pizza
- Easy Dinner Rolls
Basic ingredients for rustic bread
You will need flour, yeast, water and salt. This is so basic and inexpensive!
| 3 C (400g) | Flour |
| 1 ⅓ C (300g) | Water |
| 1 ¼ teaspoon (7g) | Salt |
| ¼ teaspoon (0.8g) | Yeast |
What type of flour?
I prefer bread flour but have also made it with basic all-purpose flour. Both turn out fantastic, but the bread flour will provide a bit more chew.
What type of yeast?
Use instant dry yeast (also called rapid or quick rise).
Instant yeast is much easier to work with. There's no need to activate it and you don't have any issues with adding it directly with salt.
What type of salt?
Use a fine sea salt or table salt.
The smaller crystals dissolve more easily and distribute more thoroughly than the coarser kosher salt.
Water temperature?
Use cold water in the 55º F - 65º F range. An instant read thermometer will be needed for this.
It's ideal to use purified bottled water, but if your tap water tastes good, use that. (That's what I use)
Now let's make
some bread!
How to make no knead rustic bread
Begin by making the dough
Add the dry ingredients
In a large mixing bowl add your flour, salt and yeast.
IMPORTANT: If you are using a measuring cup for the flour, use the 'fluff, sprinkle & scrape' method to fill it.
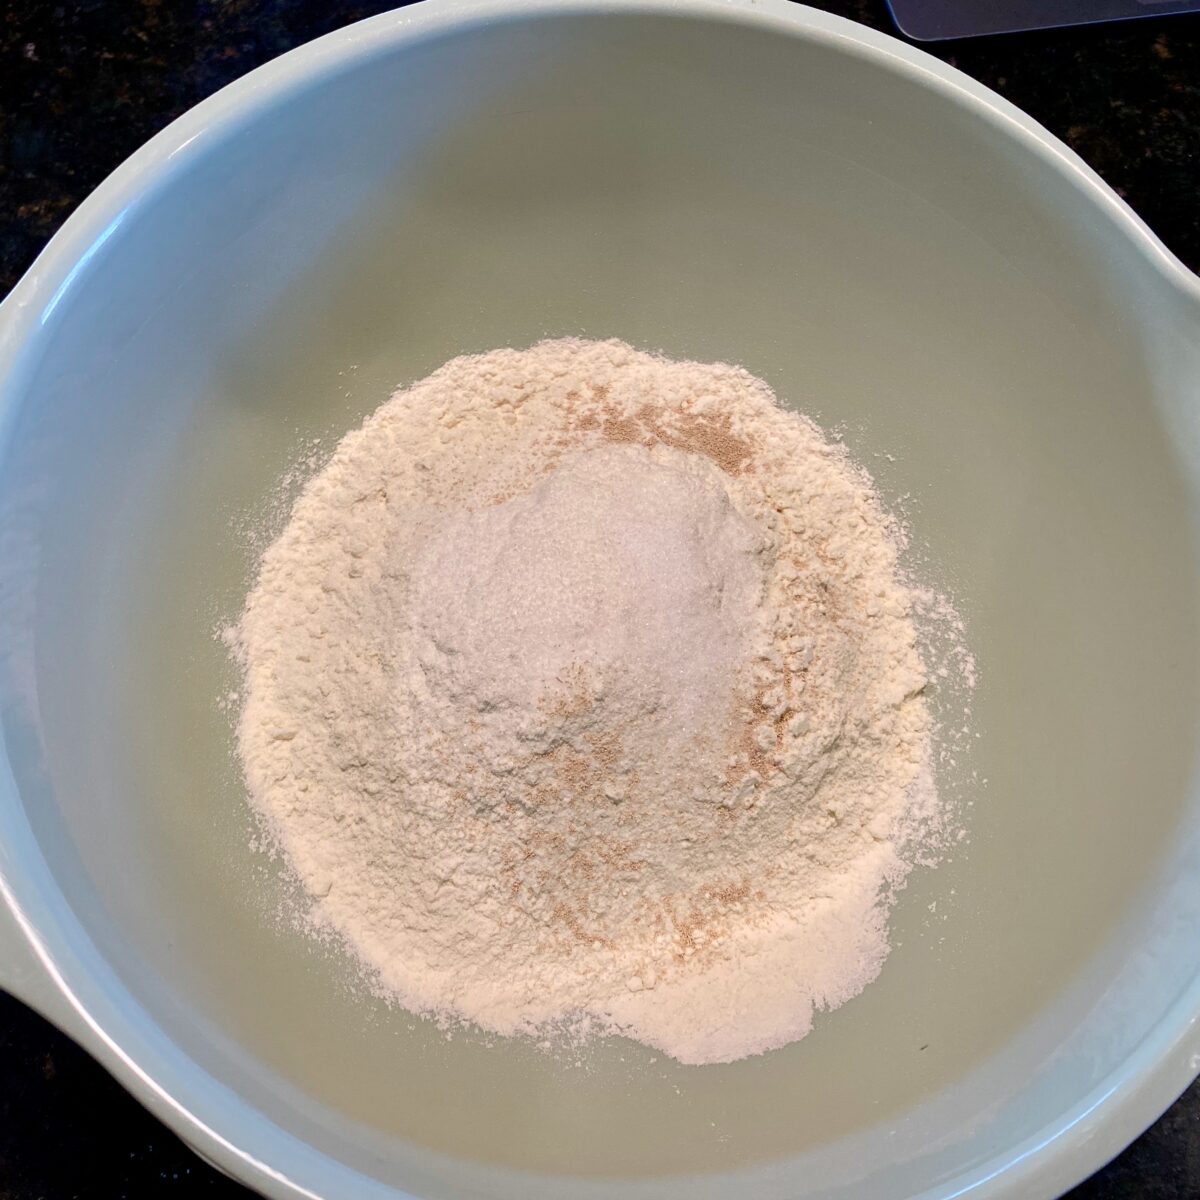
Stir these dry ingredients around with a spatula or whisk until the salt and yeast have been thoroughly and evenly distributed in the flour. (30 seconds)
Add the water
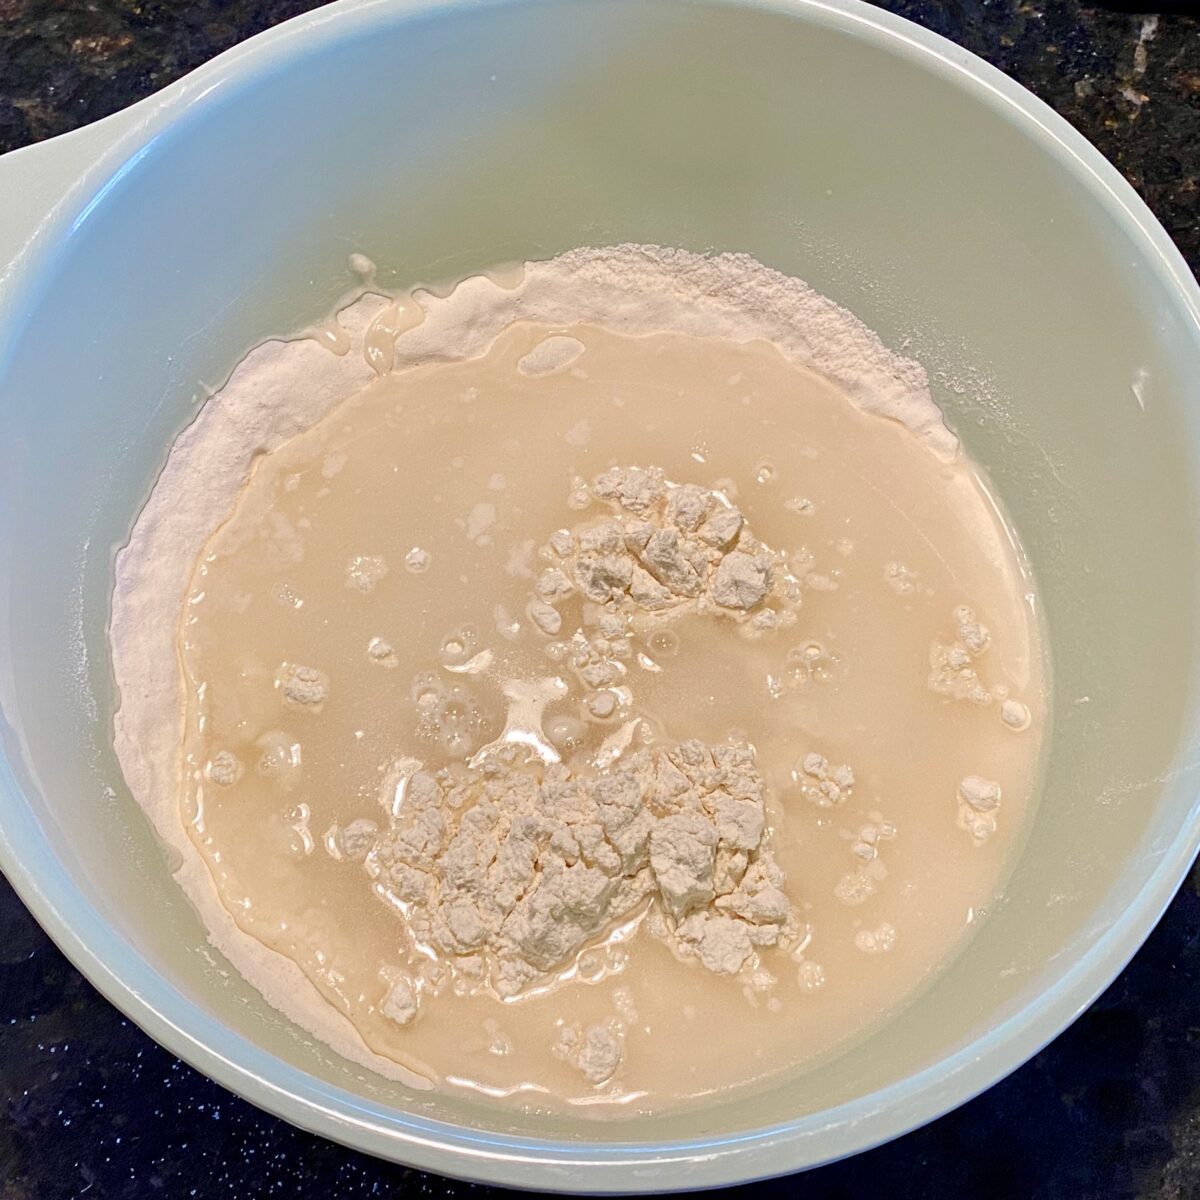
Now add the cold water on top of the mixed dry ingredients.
Mix together
Using a spatula or wooden spoon, stir the mixture until there is no more dry flour visible.
Make sure to incorporate all the dry flour from the sides and bottom of the bowl.
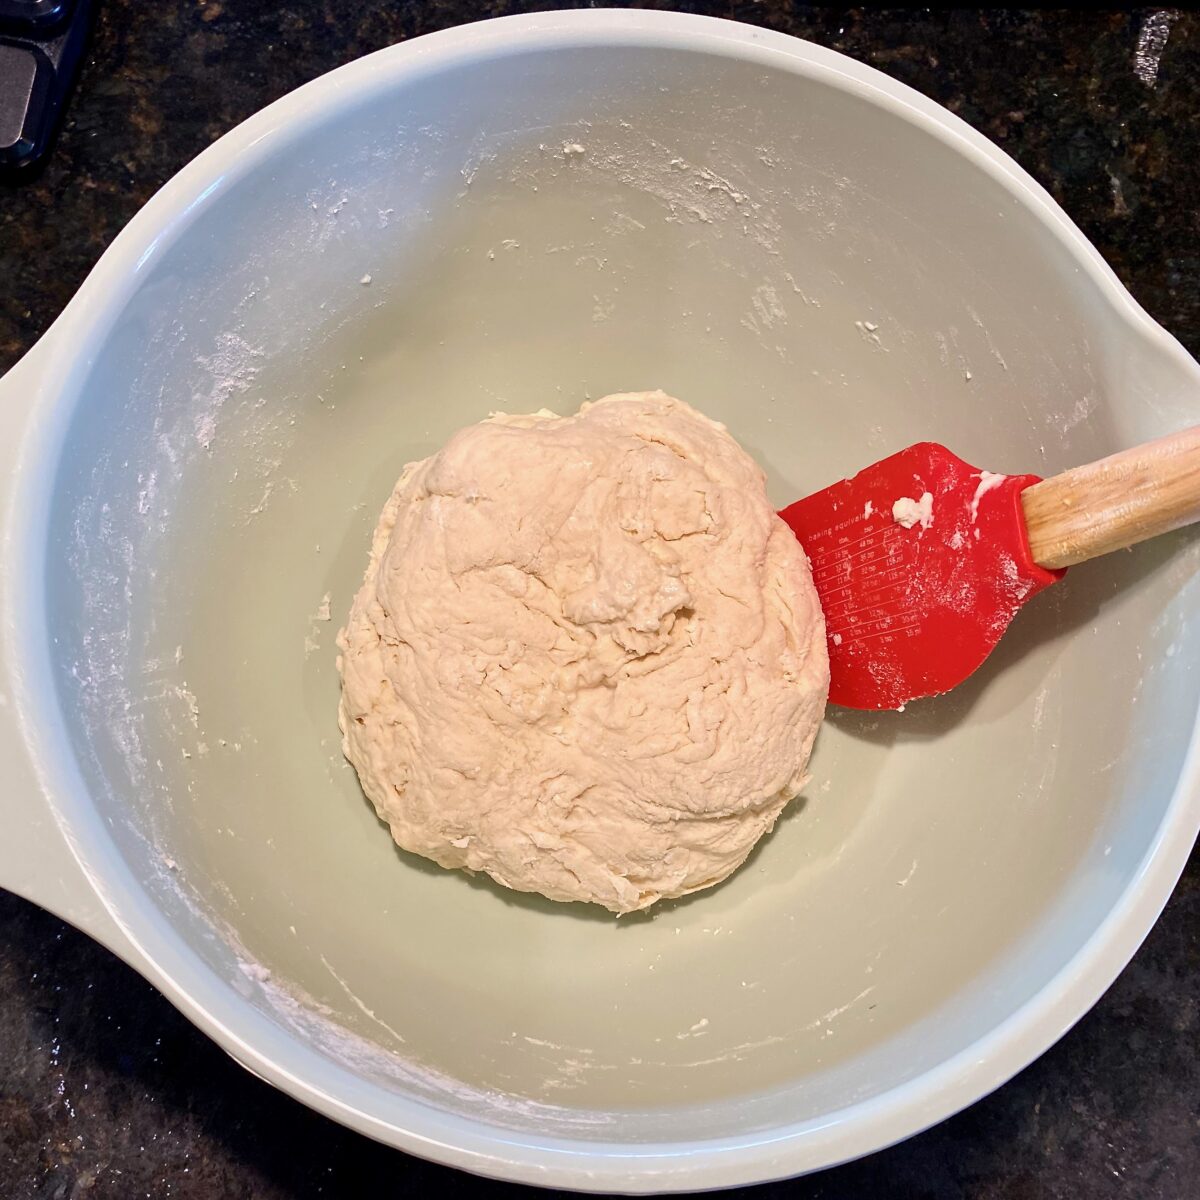
Once all the flour is incorporated, use the spatula to press it into a shaggy ball.
All this mixing should take
only about 60 seconds.
The picture below, shows the dough properly mixed and formed into a shaggy ball.
Let it proof
Now that the dough is done, it's time to let it proof.
First thing to do is cover the bowl with plastic wrap. This will keep the dough from drying out.
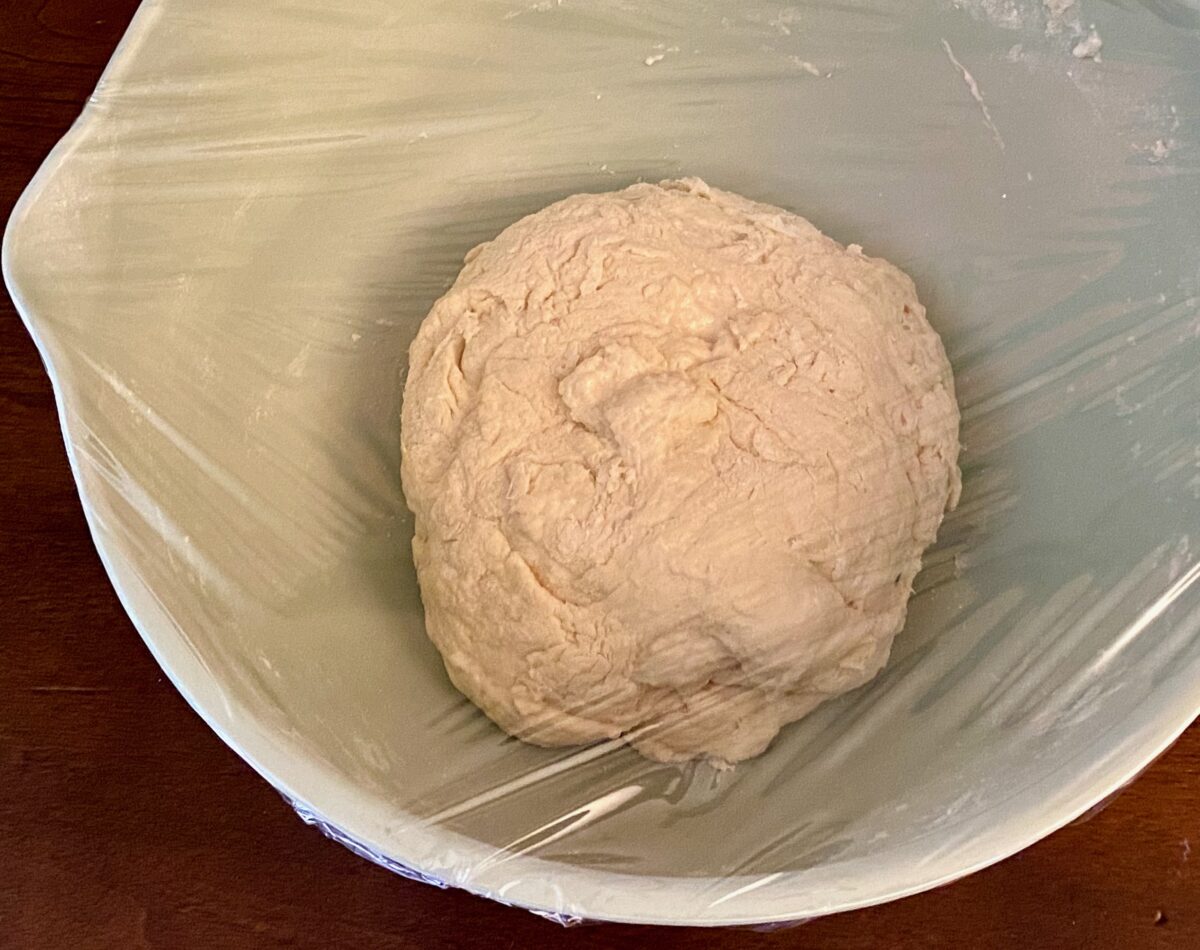
Allow the covered dough to bulk proof at room temperature for 12+ hours.
Depending on the temperature inside your house, the proof time will vary.
| Room Temperature | Proof Time |
|---|---|
| > 80ºF | 12 - 14 hours |
| 72ºF - 79ºF | 16 - 18 hours |
| < 72ºF | 20 - 22 hours |
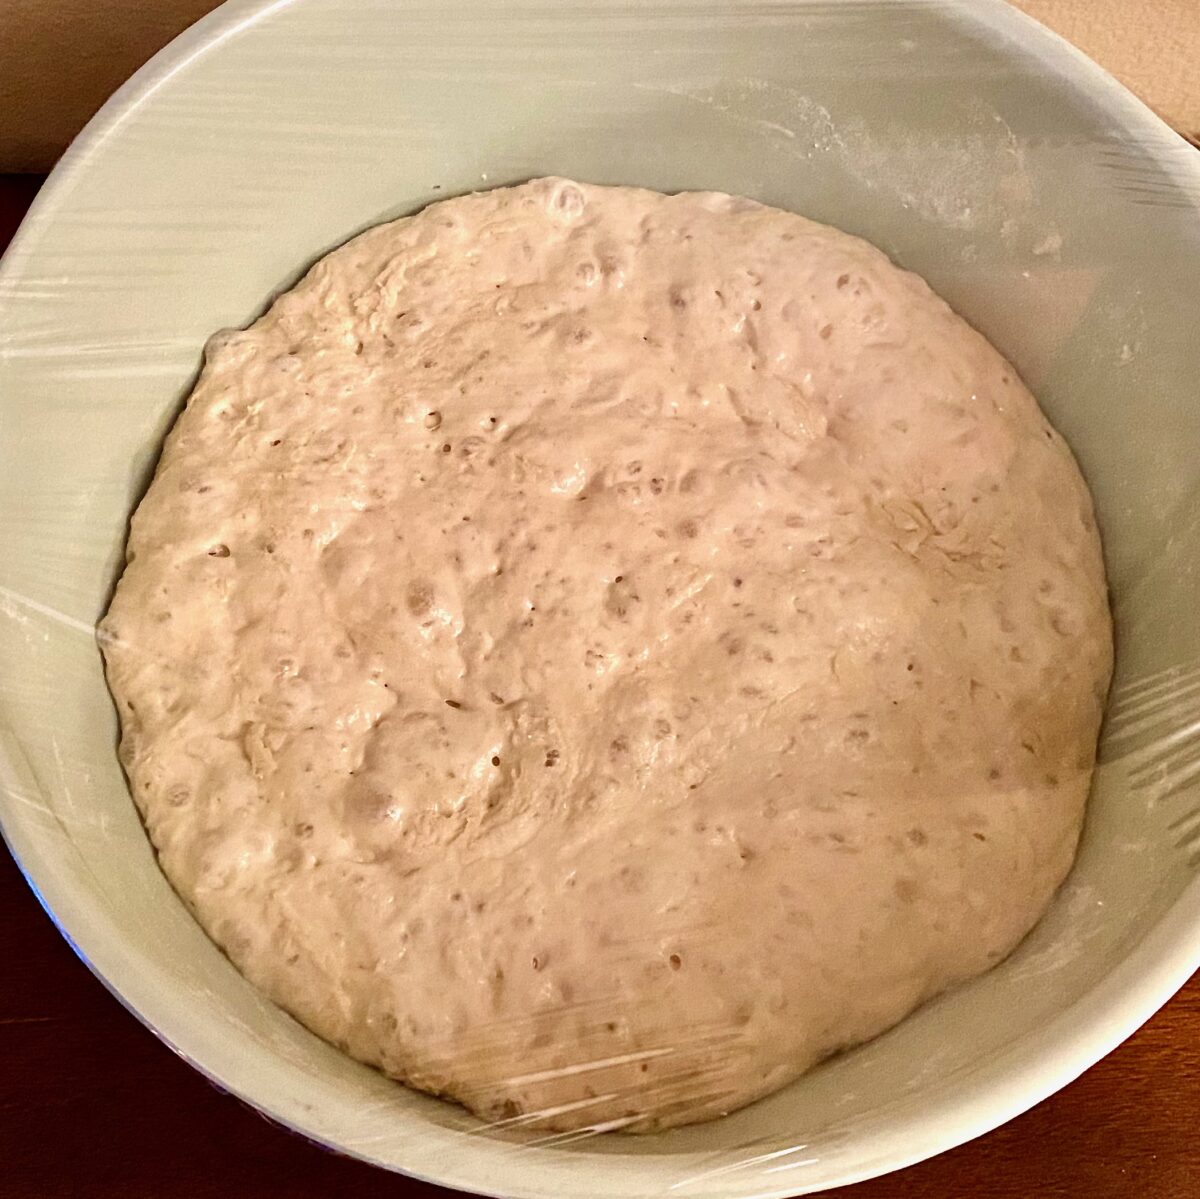
After the long room temperature proof, the dough will have risen quite a bit and bubbles will appear all along the top.
Remove the dough from the bowl
Begin by heavily flouring the top of the dough.
Don't forget to flour along the edges where the dough meets the bowl as well.
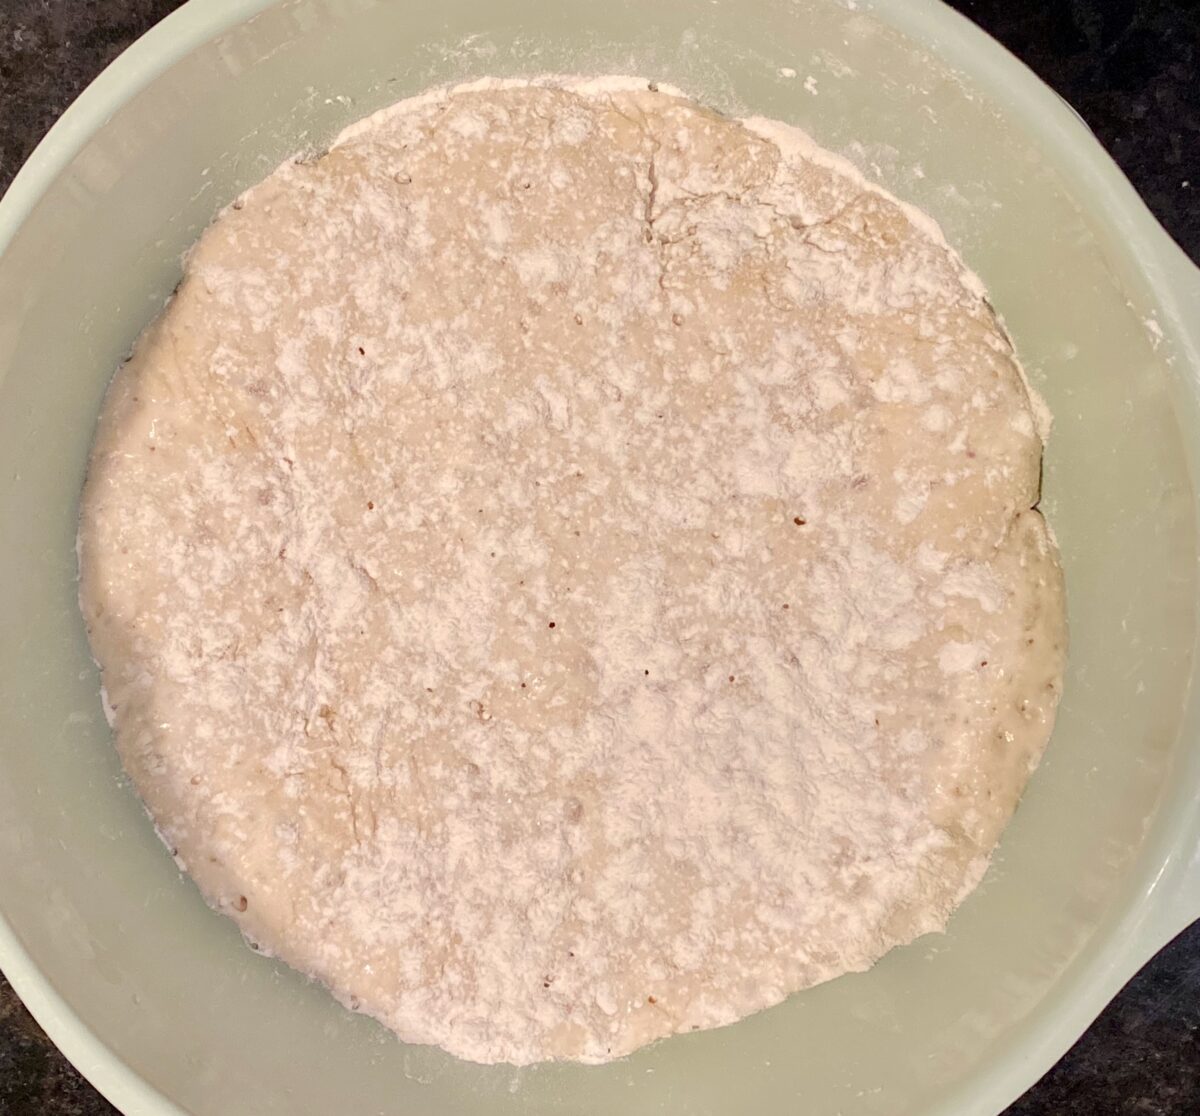
Using a lightly floured non-stick spatula, scrape up and down along the edges of the bowl. This will help loosen the dough when it's time to remove the dough from the bowl.
The spatula should scrape 2-3 inches below where the dough meets the edge of the bowl.
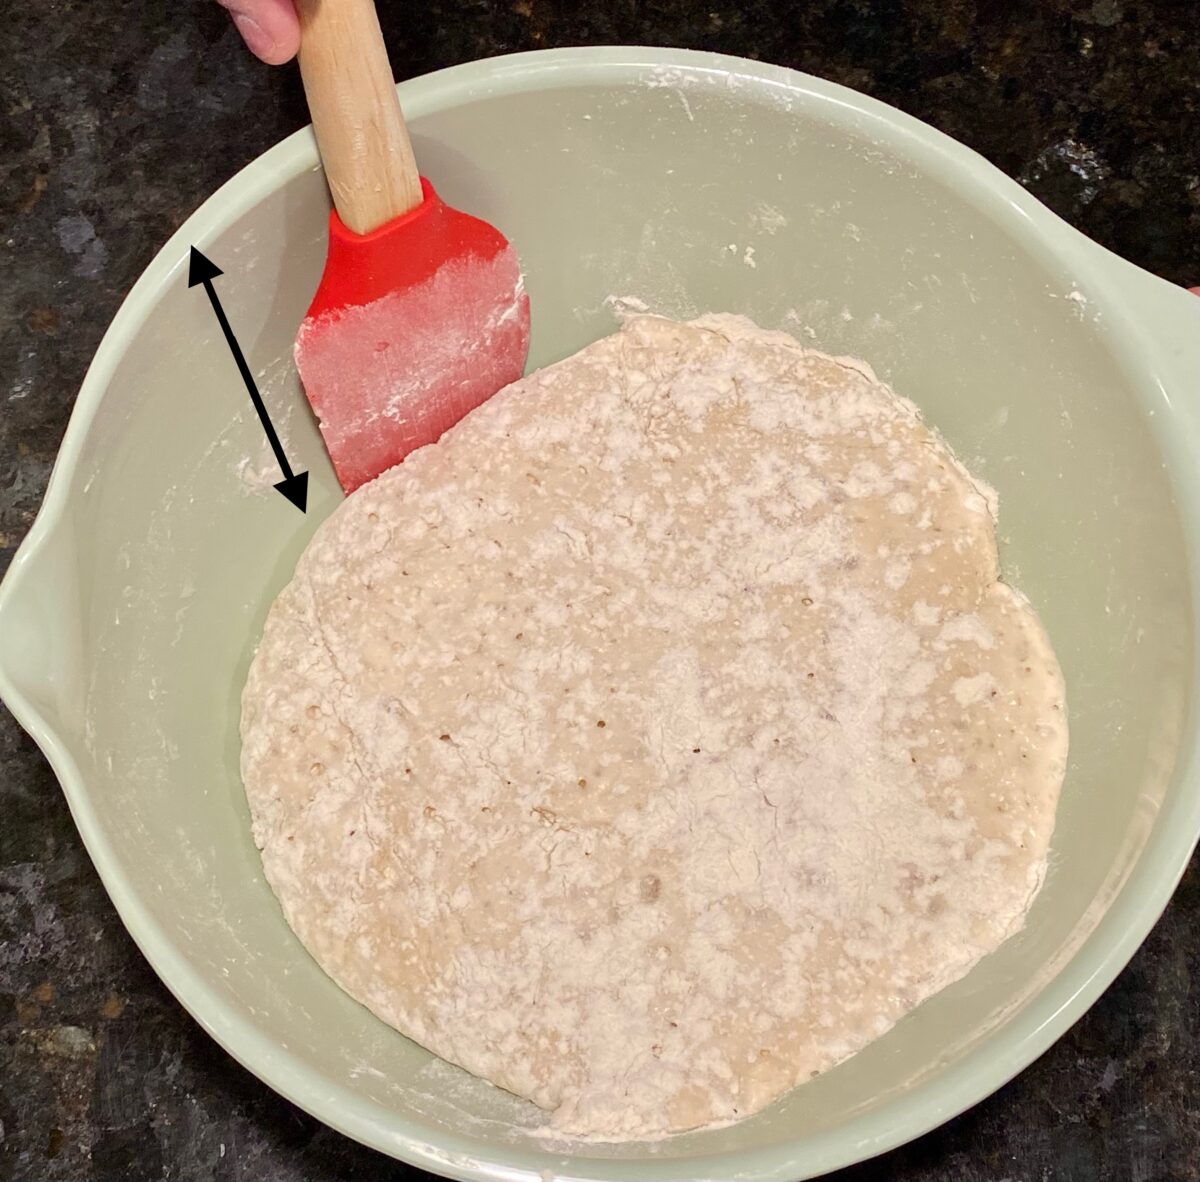
Continue this up and down scraping until you've gone around the entire dough.
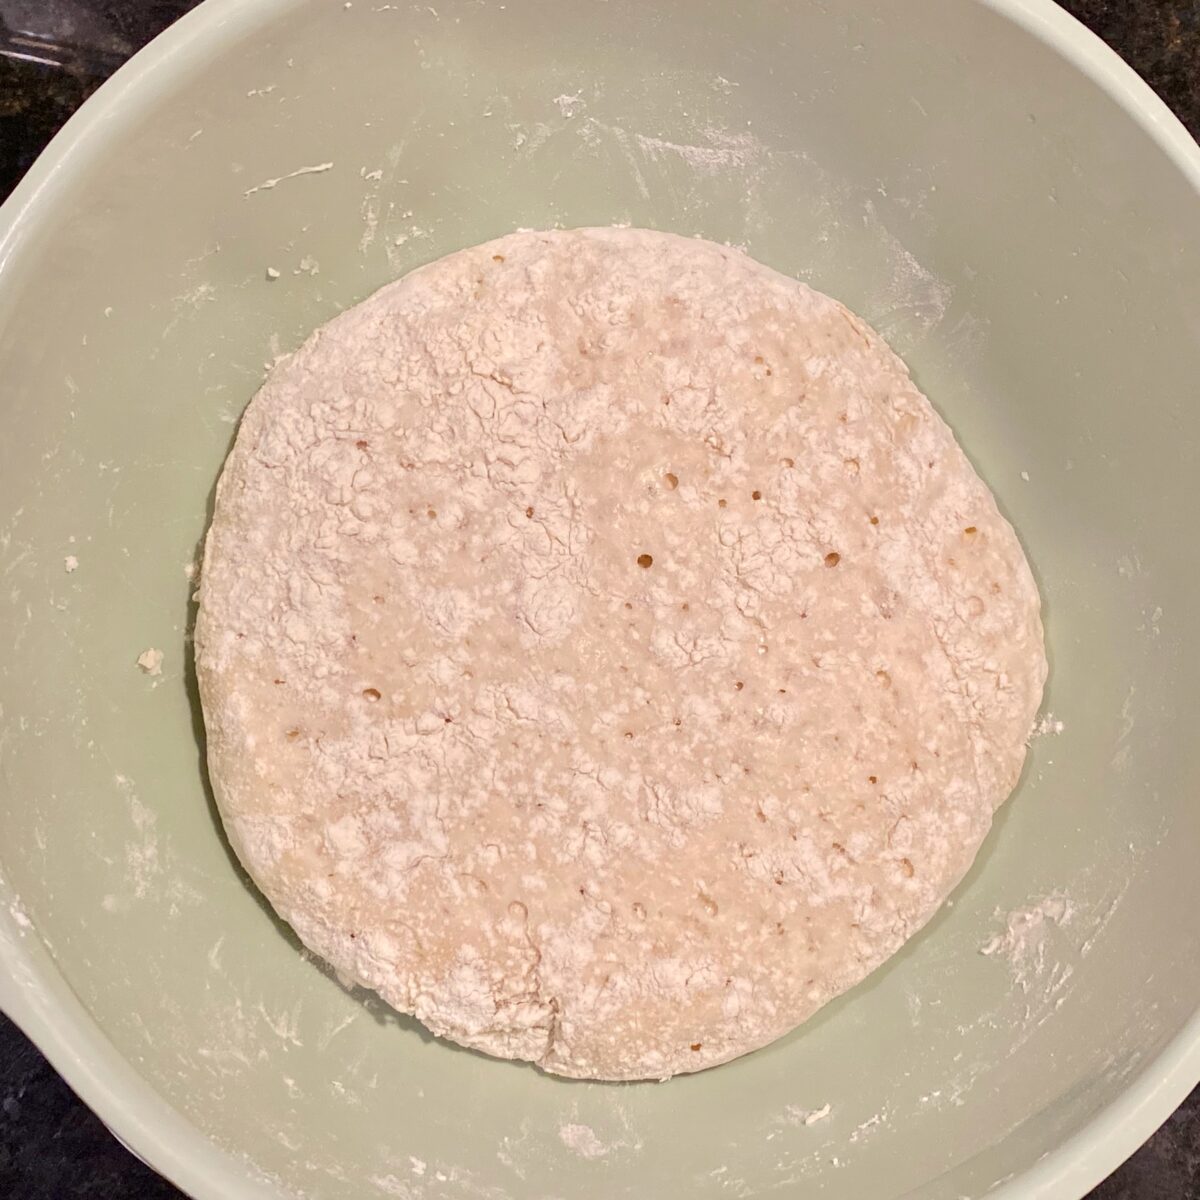
Now the dough is ready to be removed from the bowl.
Tip the bowl upside down on a floured countertop. The dough should plop out quite easily.
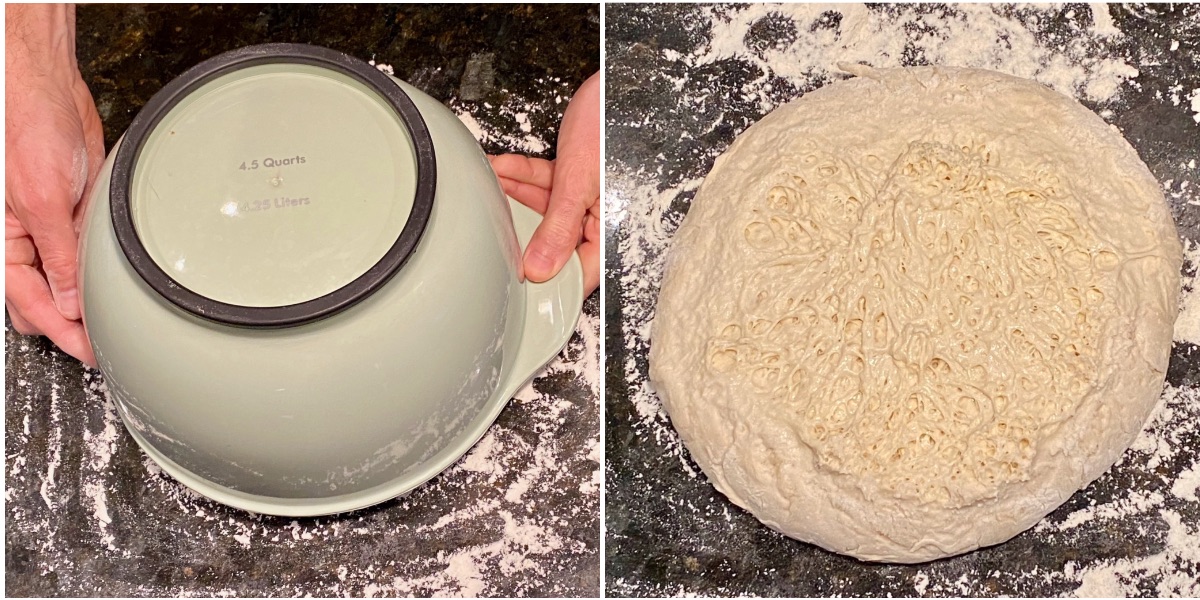
Notice all the gluten strands that developed during the long room temperature fermentation!
Perform some stretch and folds
Be aware that the side of dough that is facing against the countertop will ultimately be the top side of your dough ball.
But before flipping it over, we will be performing some stretch and folds.
Using lightly floured hands, pull one side of the dough out about 6 to 9 inches, then fold it back onto the main dough ball.
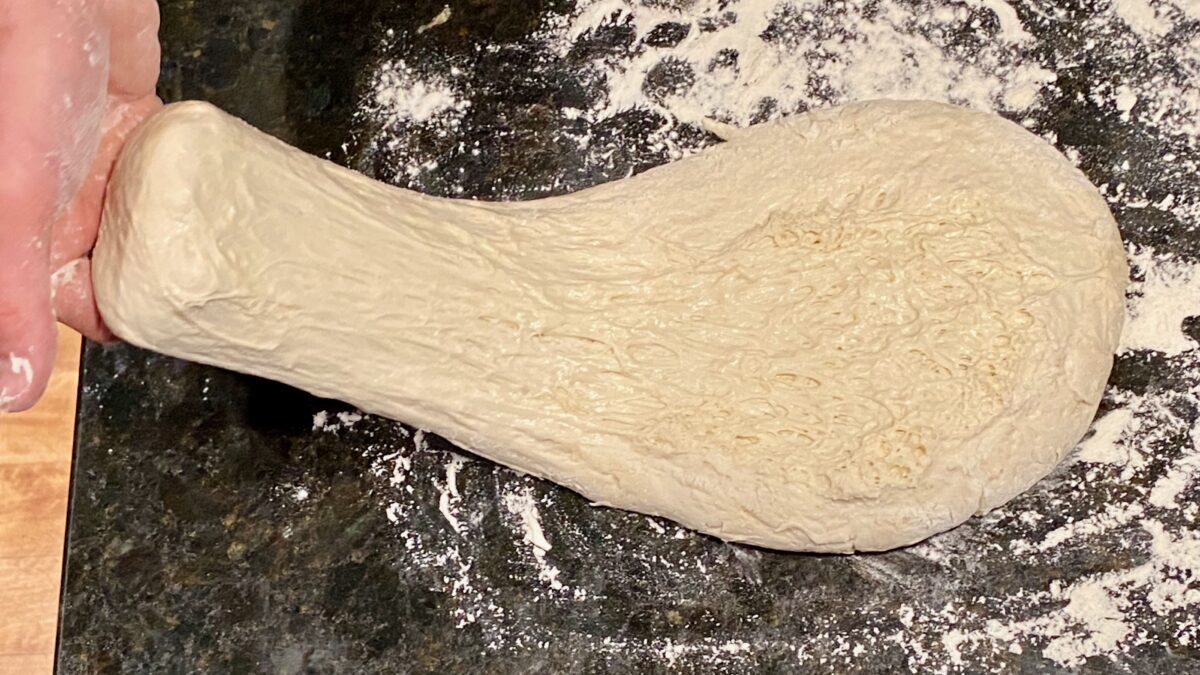
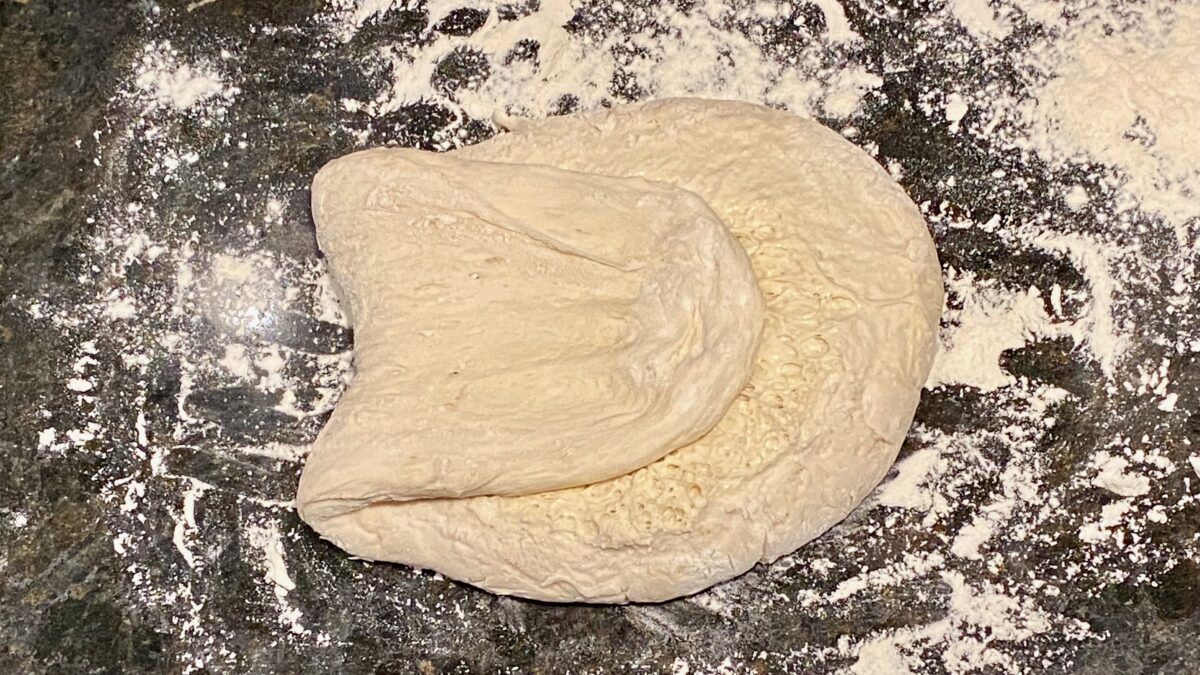
Do this same stretch and fold for the remaining three sides.
Once completed, the dough should look similar to the image below.
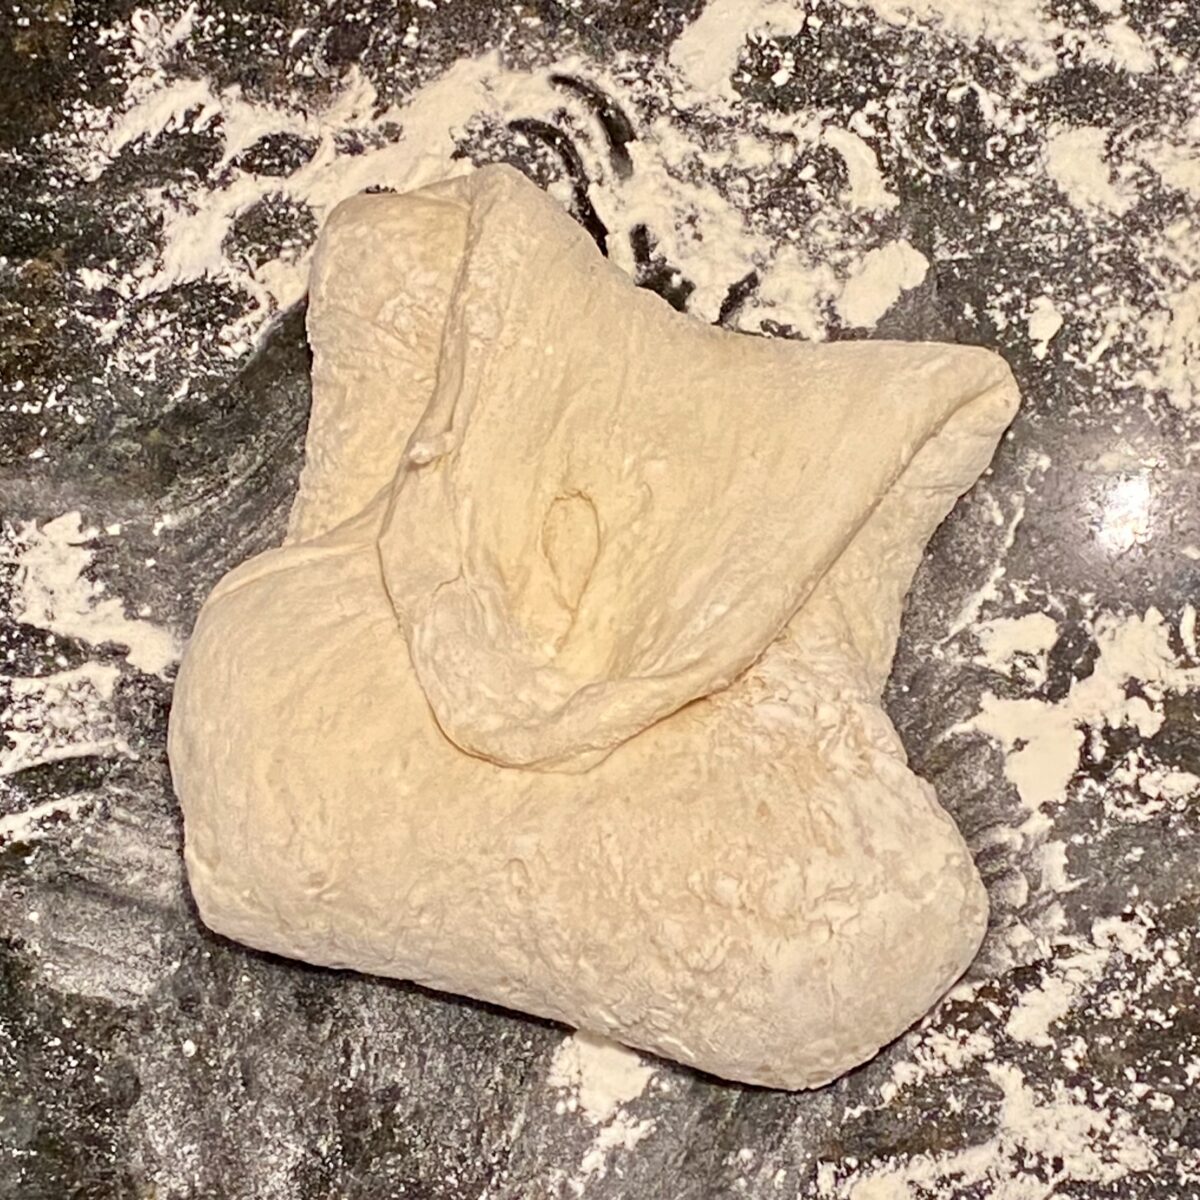
You will now notice that your dough is in roughly a square shape with four distinct corners.
Perform those same stretch and folds at all four of these corners.
You will notice that it won't stretch quite as far as before, and that is fine.
Once these are done, your dough will look similar to the image below.
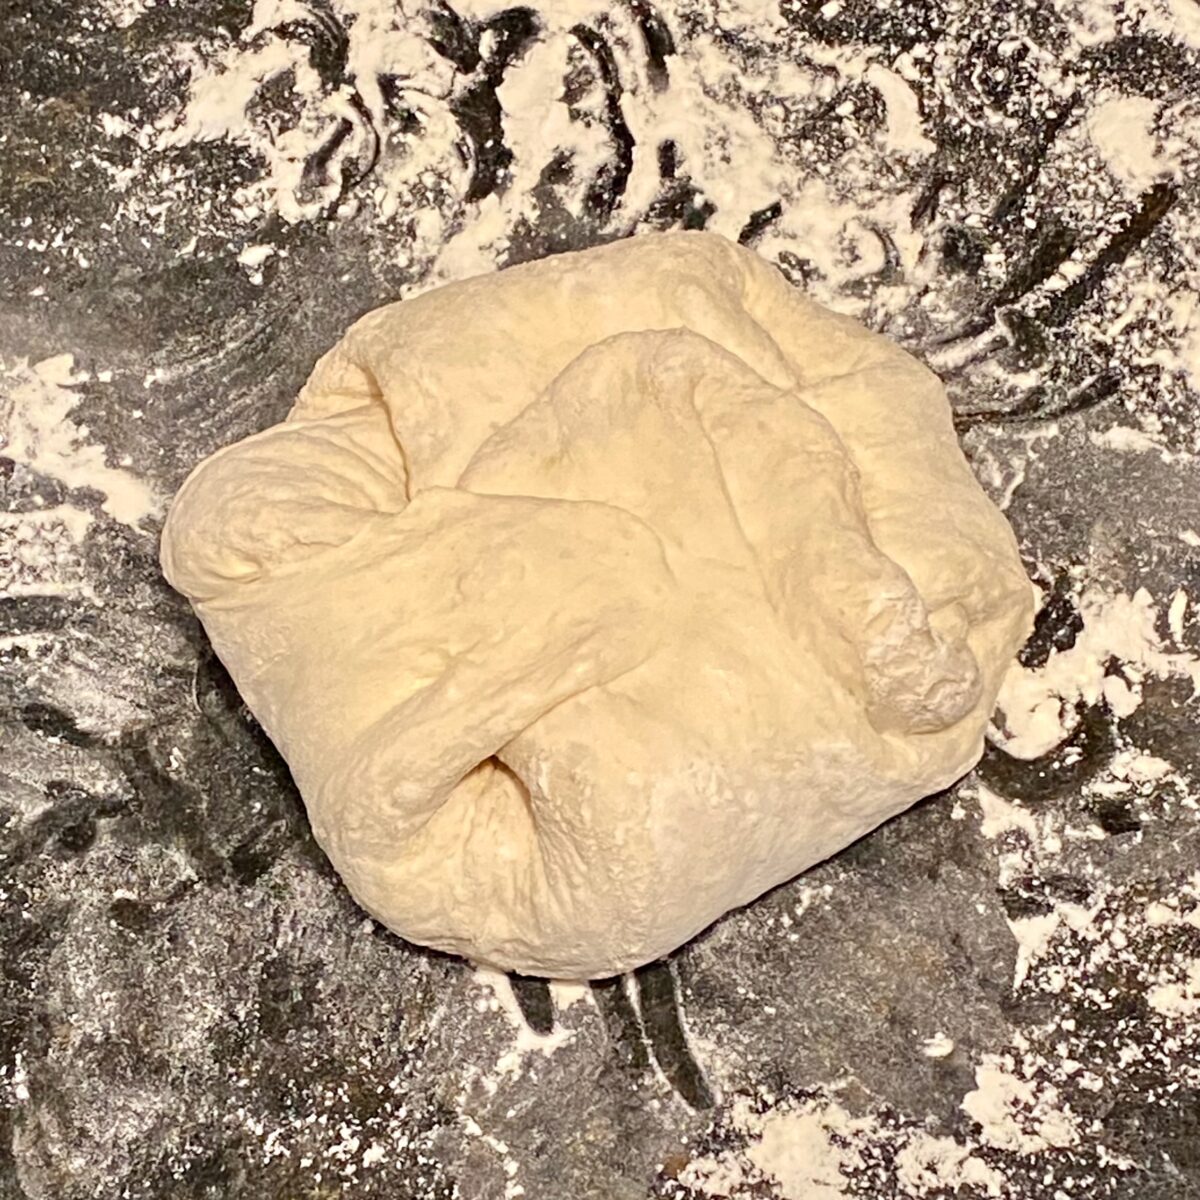
Form the dough into a smooth ball
Now turn the dough over so that the bottom side is now facing up and all the stretched and folded ends are now against the countertop.
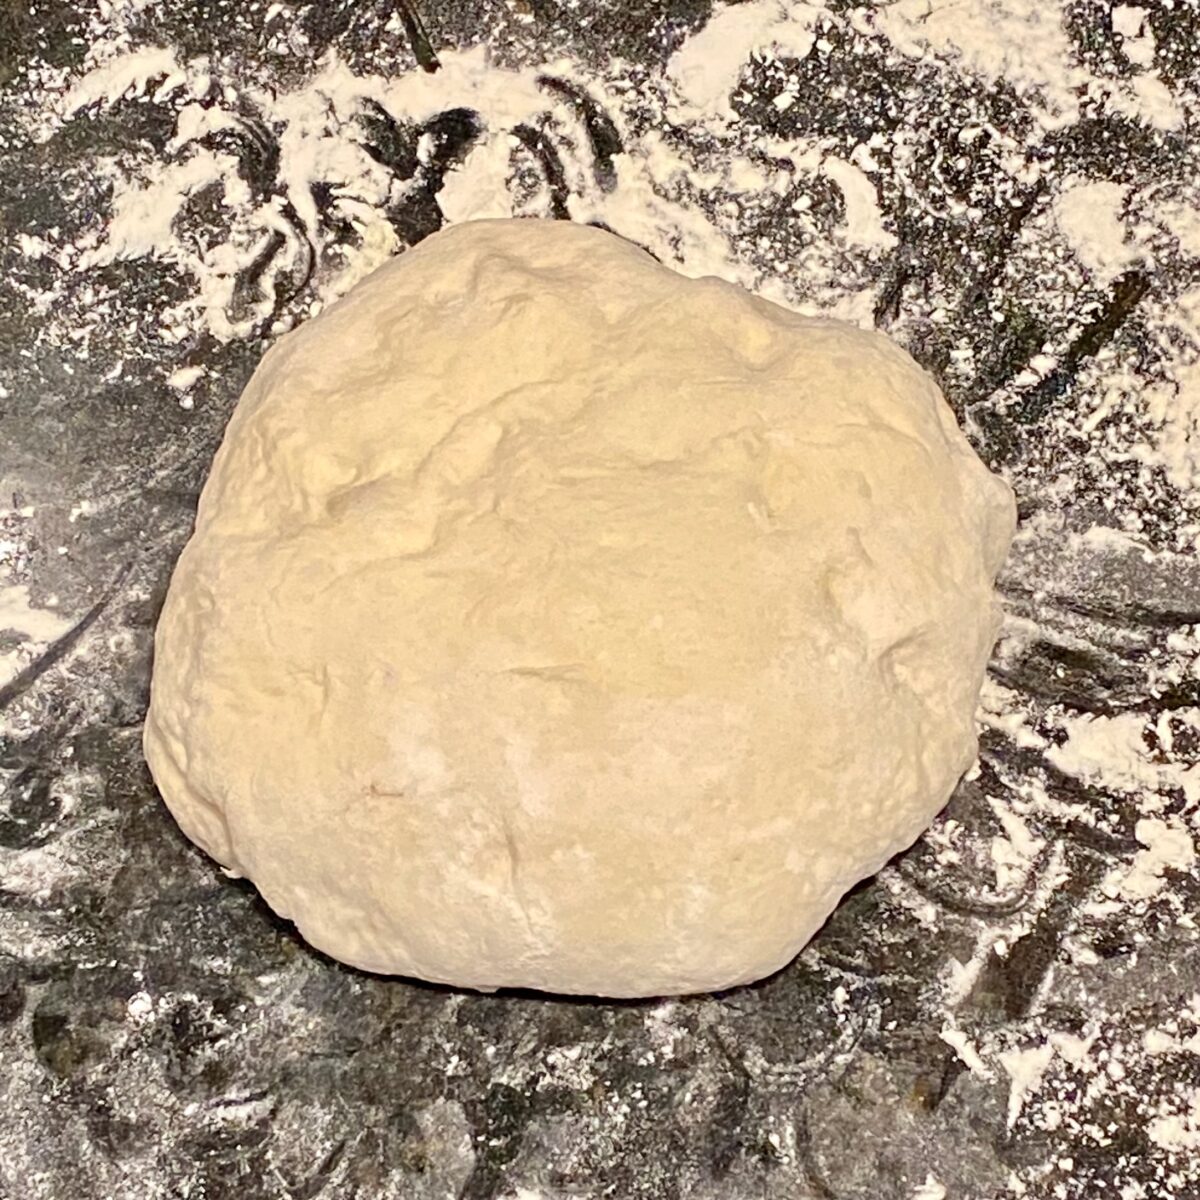
This will be the top side of your rustic bread loaf.
We still want to tighten up the dough a bit more, so cup your hands on each side of the dough and gently press in and down so that the dough stretches across the top.
While doing this, tuck the extra dough at your finger tips underneath the dough ball.
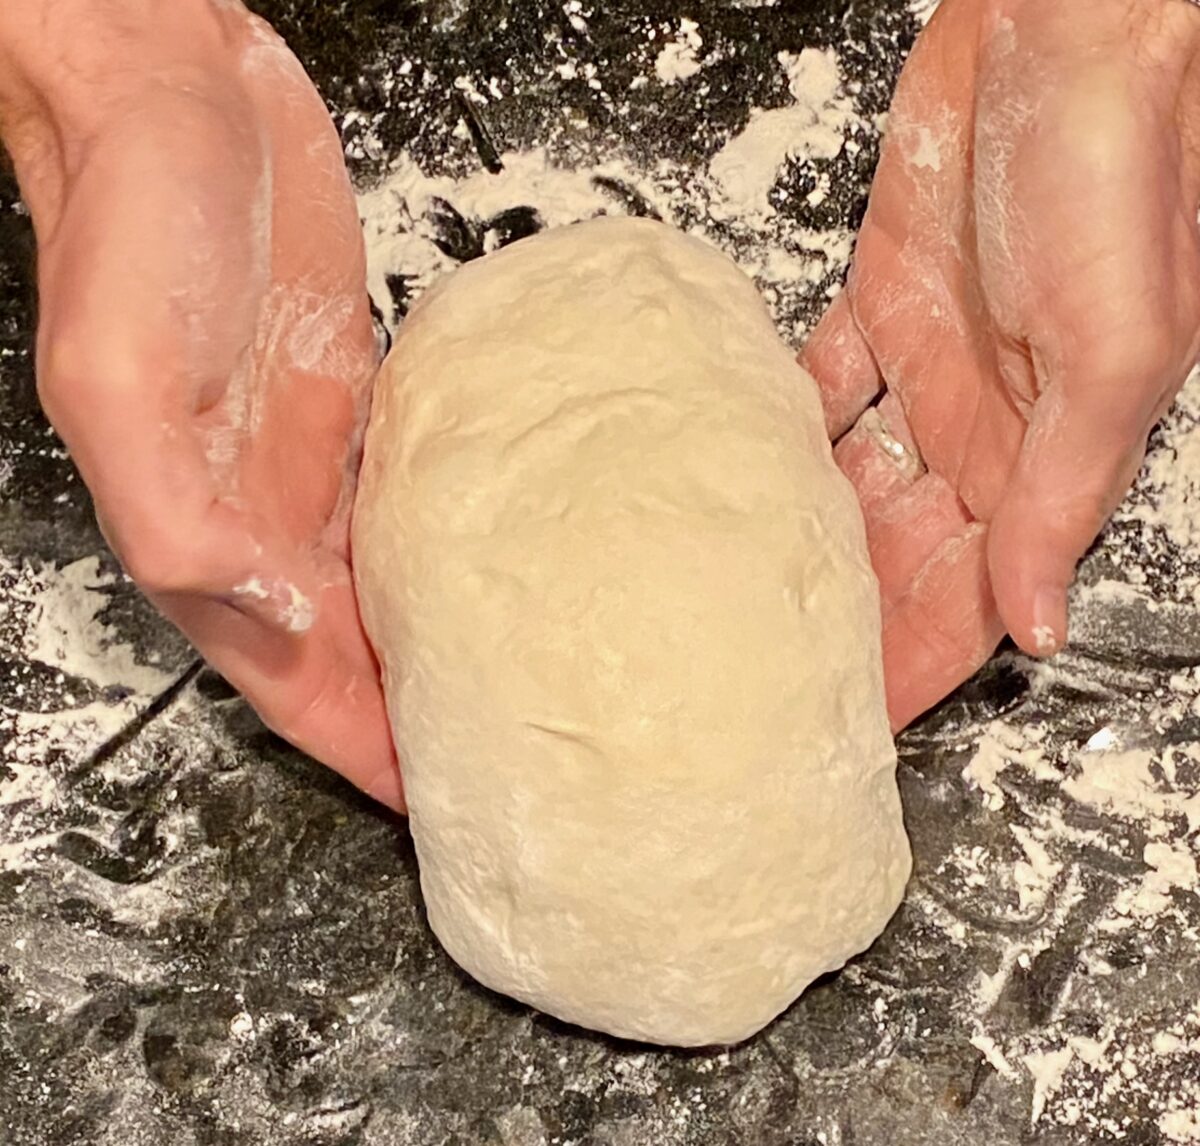
Continue to do this final shaping and tucking around the entire dough ball about 4-6 times until you get a nicely shaped ball.
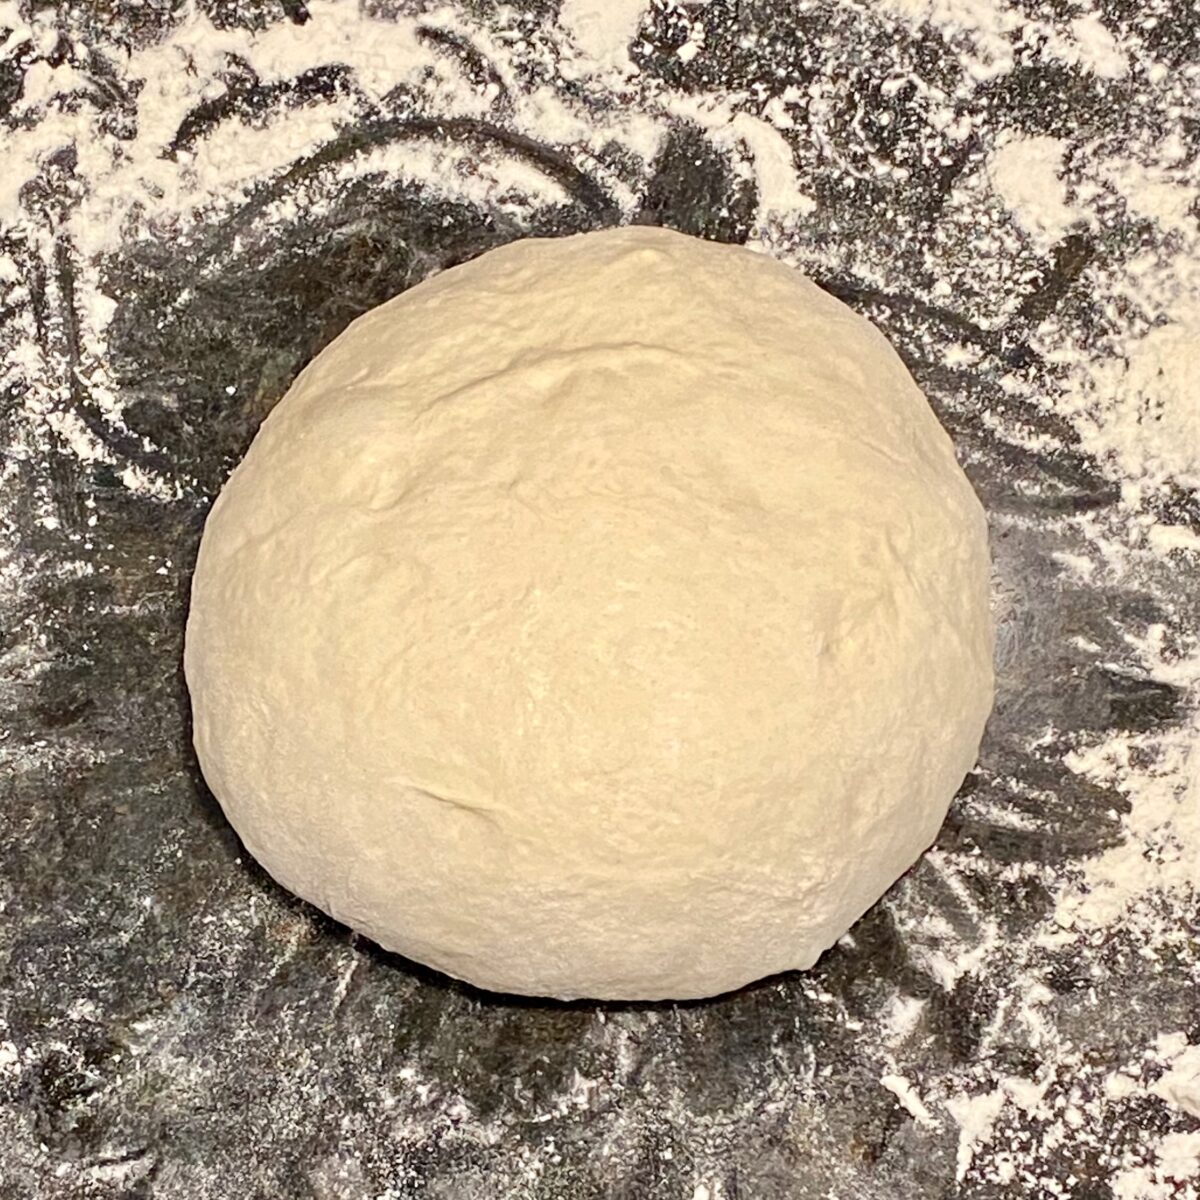
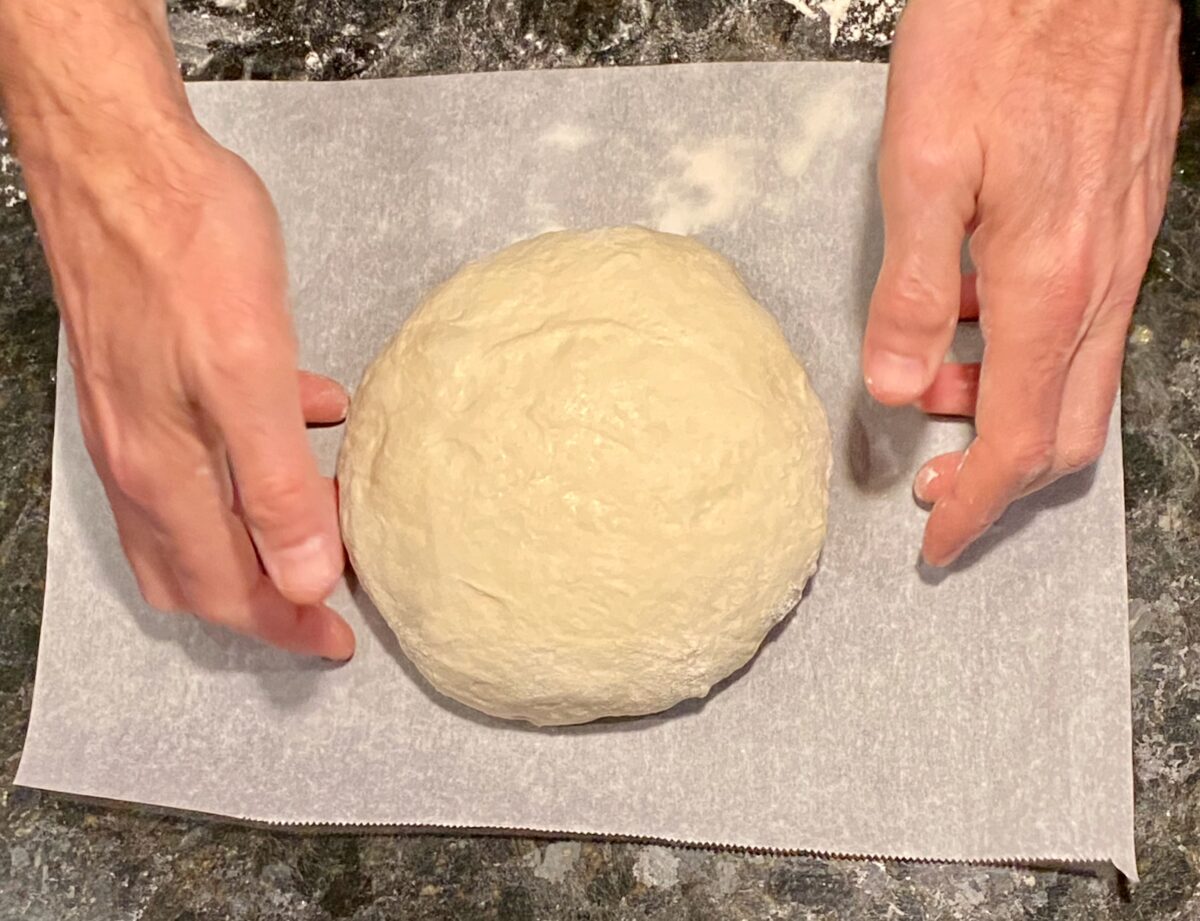
Now place this ball onto a 10" x 14" sheet of parchment paper.
The parchment paper will make it very easy to load and unload the bread from the hot pot.
Final 2 hour proof
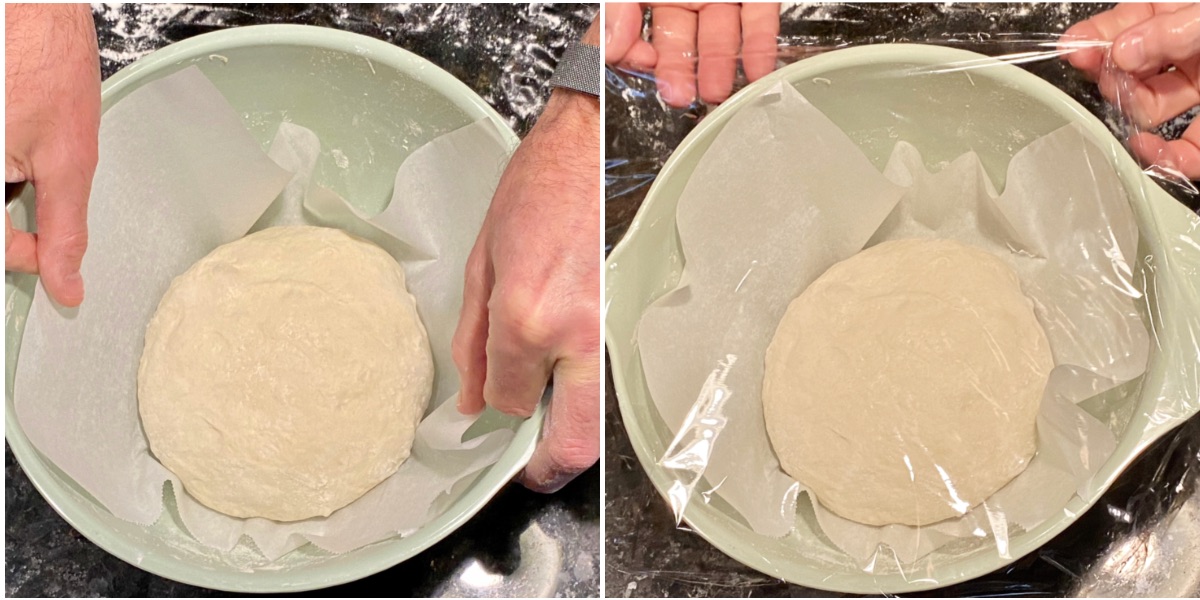
Using the longer ends of the parchment paper, lift the dough ball up and place it back into your proofing bowl.
Cover the bowl with plastic wrap and let it proof another 2 hours at room temperature.
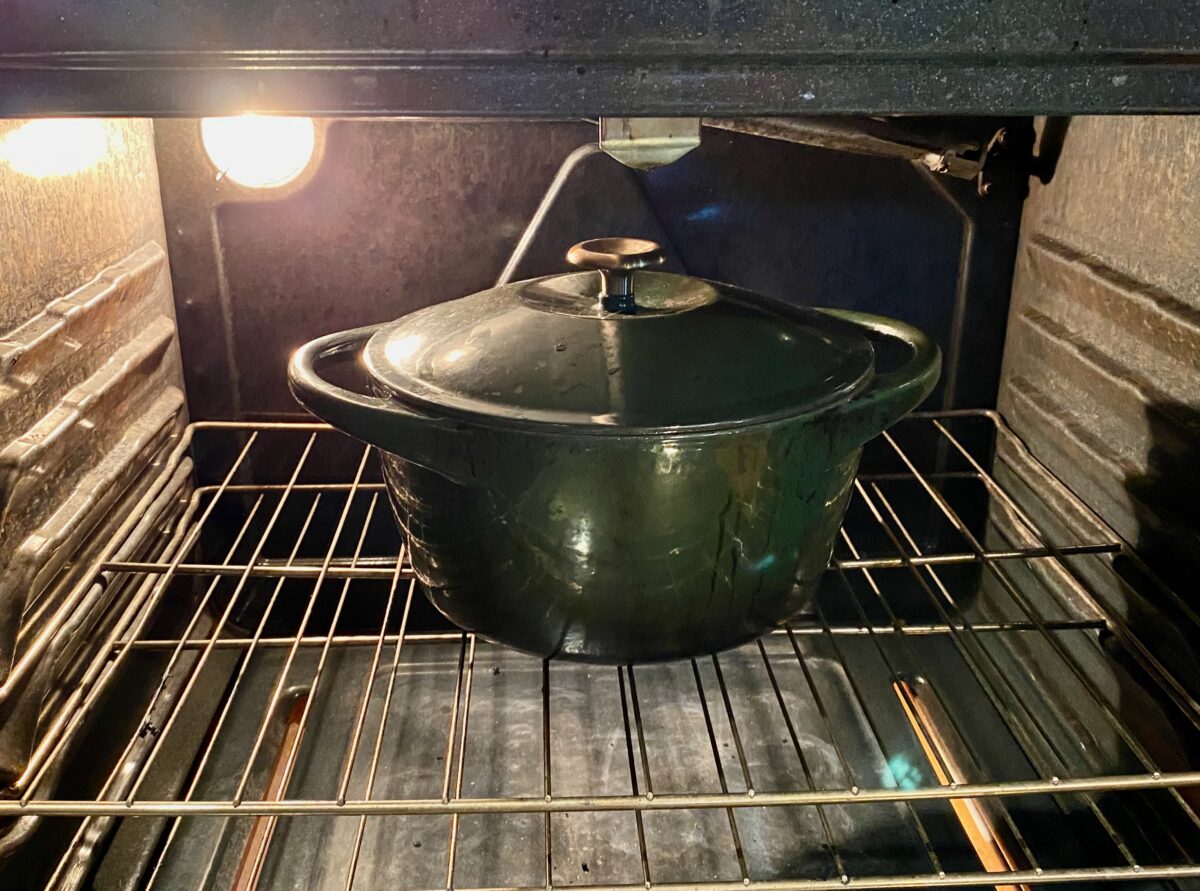
After 1.5 hours of proofing, place your empty 6-Quart Cast Iron Dutch Oven Pan into your oven. Leave the lid on. Then set your oven to 475 ºF and let it pre-heat for 30 minutes.
Bake the bread
Once the bread has proofed the final 2 hours AND your Dutch oven has pre-heated for 30 minutes, you're ready to bake some bread.
Are you excited?!
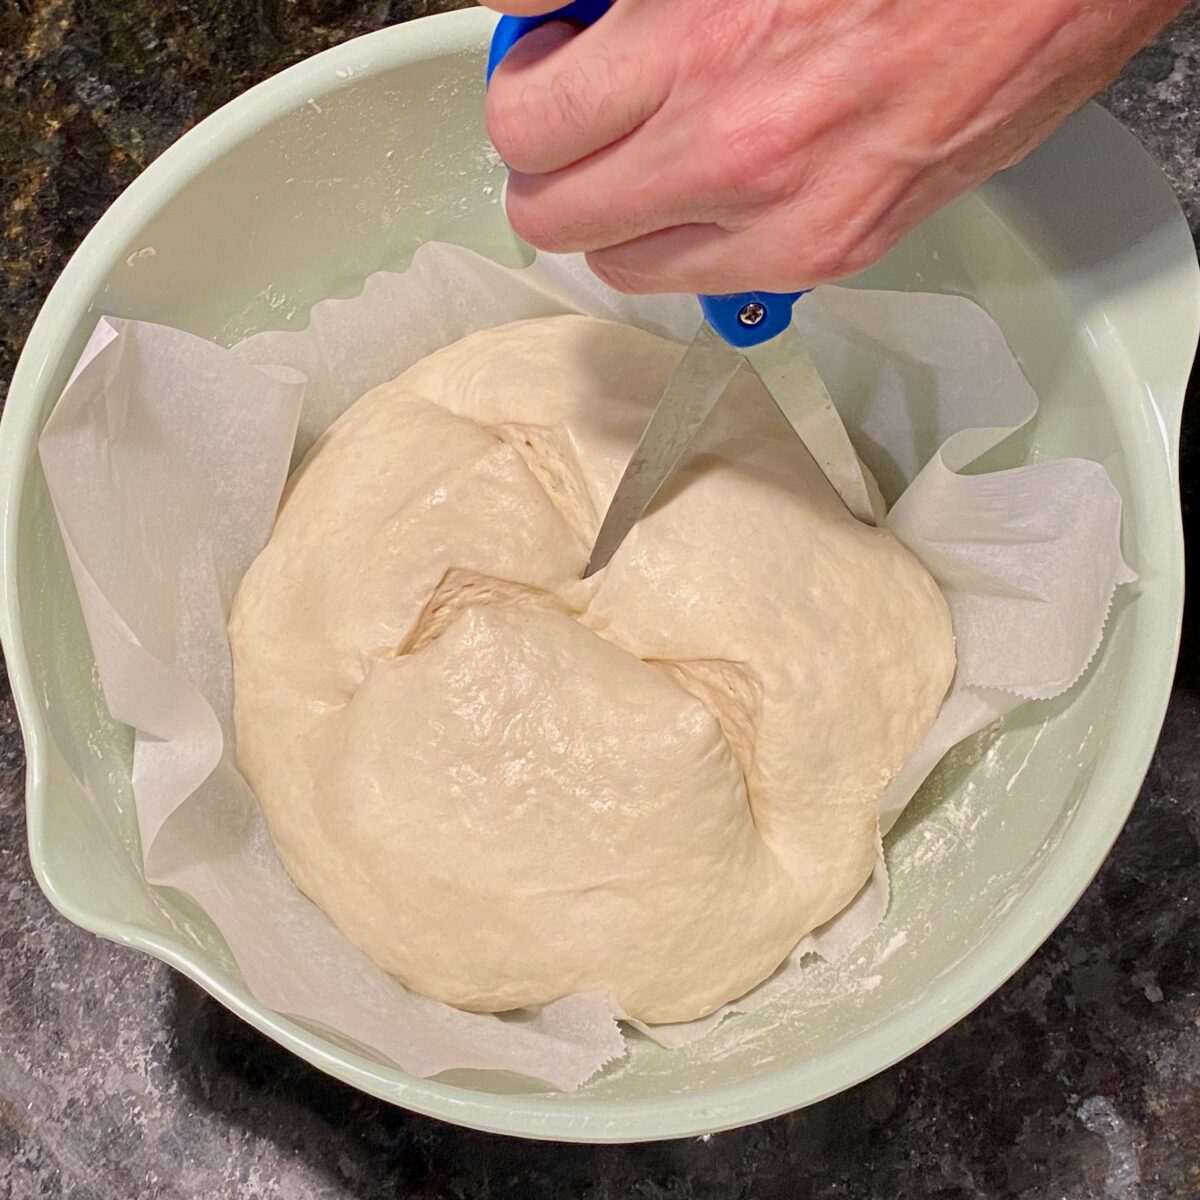
Begin by removing the plastic wrap from the proofed dough ball, then make 4 deep cuts along the top of the dough with a scissors. (about 1" deep)
It should resemble the shape of an 'X'.
These cuts provide a path for the steam to escape and will allow for a more uniform rise during the bake.
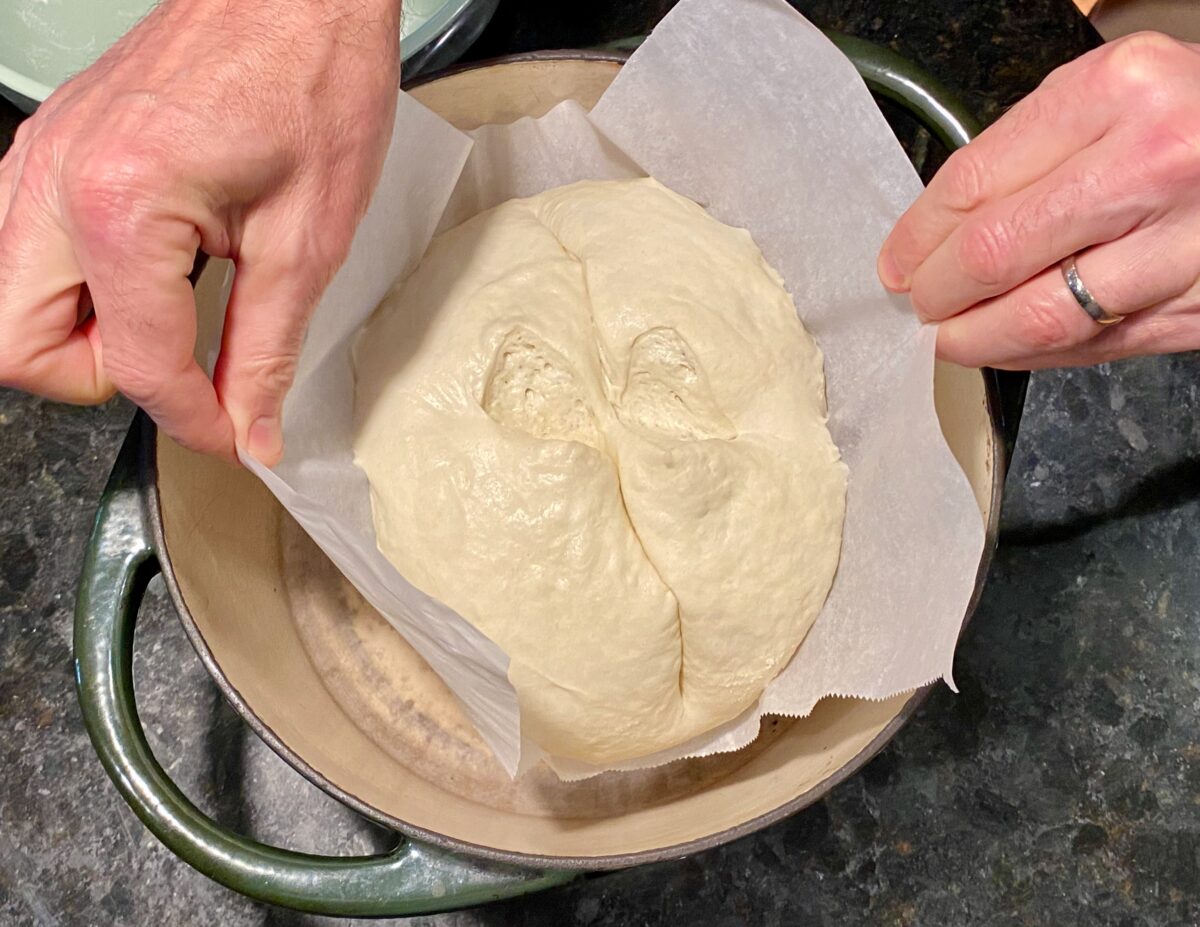
Next, carefully remove the VERY HOT pan from the oven and place it onto a heat resistant surface, like a burner on your stovetop.
Remove the lid with hot pads.
Using the longer ends of the parchment paper, lift the dough ball out of the proofing bowl and into the center of the hot Dutch oven.
Immediately cover the Dutch oven with the hot lid and place it back into the oven and allow it to bake covered for 25 minutes, still at 475 ºF.
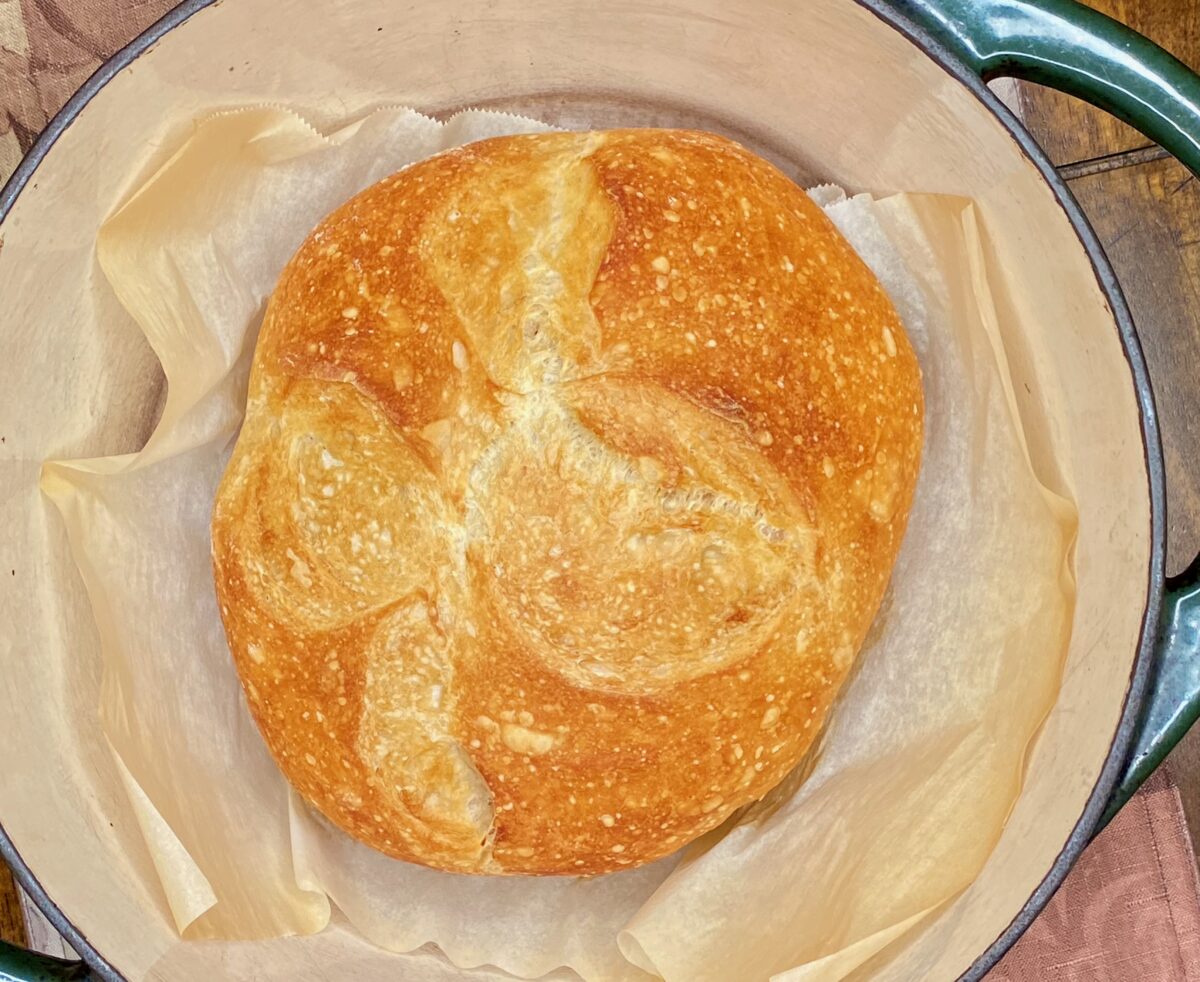
After 25 minutes, remove the lid and let it bake uncovered for an additional 10-15 minutes.
Image below is the bread after baking 25 minutes, COVERED.
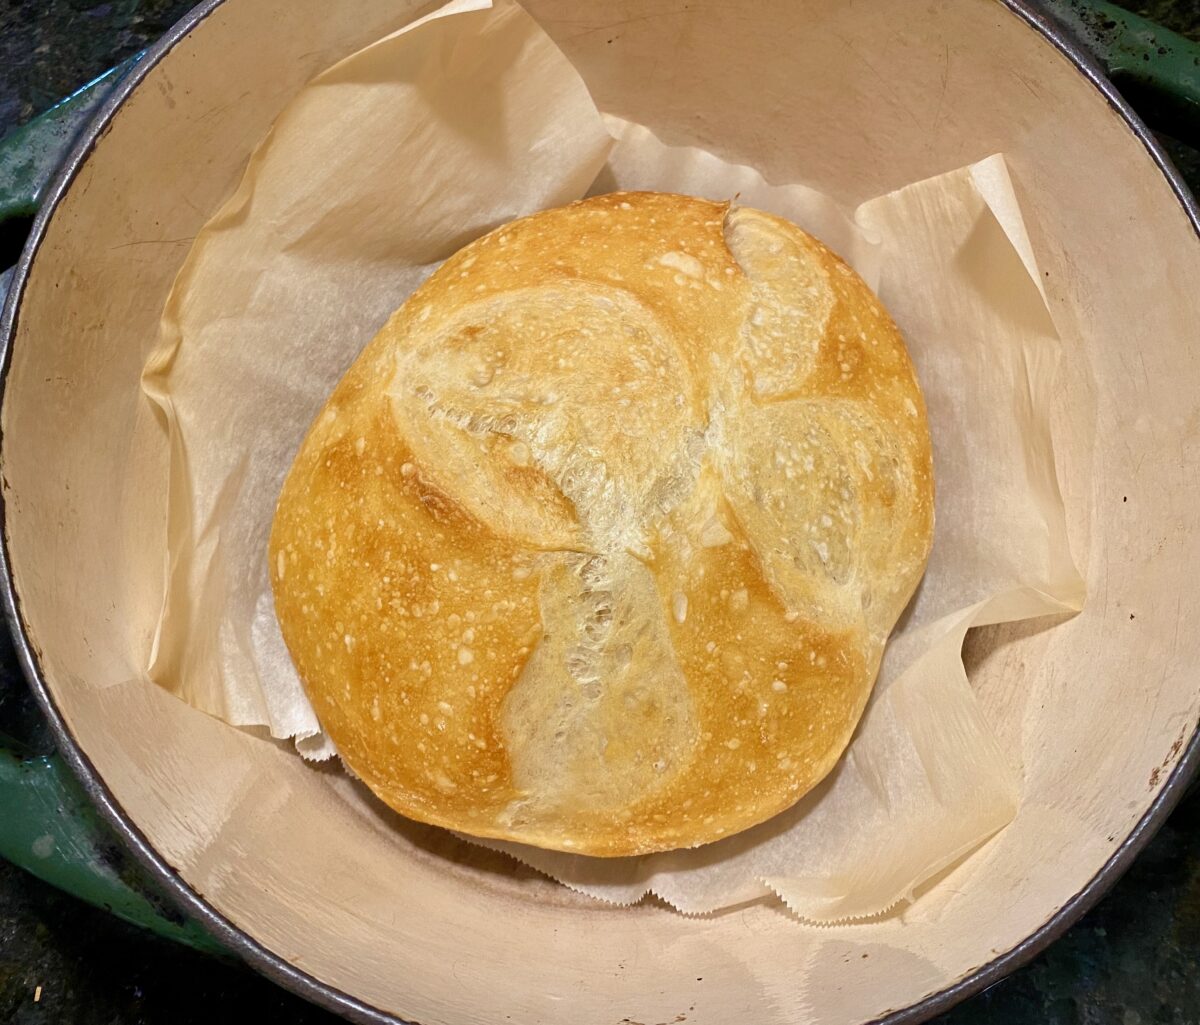
Image below is the bread after baking 10-15 minutes, UNCOVERED.
Remove and let it rest
Once the bread has browned to your liking, remove the hot pan from the oven and place it back onto a heat resistant surface.
Using a set of tongs or a couple of spatulas, carefully remove the bread from the hot pot and place it onto a cooling rack.
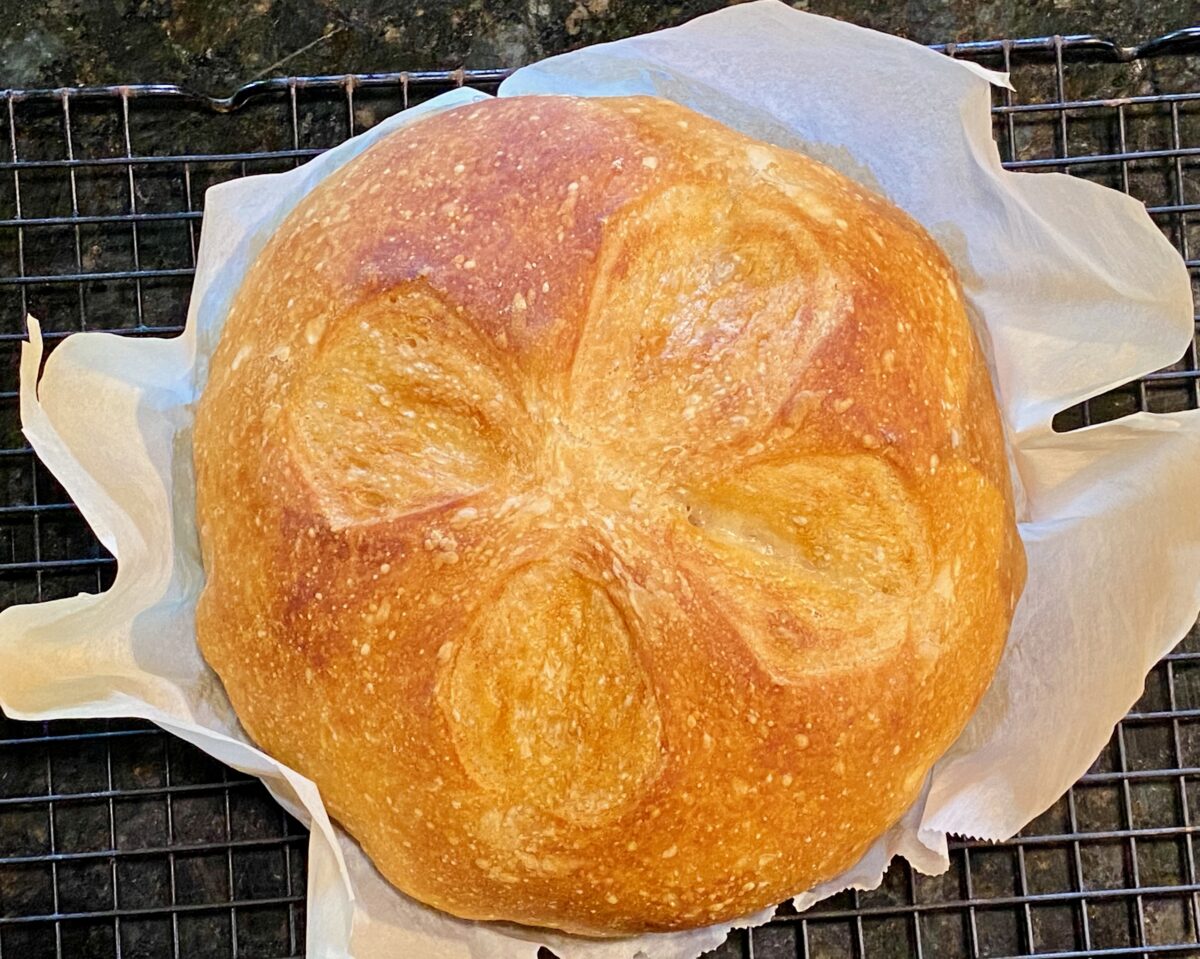
Allow this to cool for a minimum of 30 minutes before slicing.
As the bread cools, you'll hear it popping and crackling. It's kinda cool.
How do you know when bread is done
The best way to know when the bread is done is to insert an instant read thermometer into the center of the loaf.
The internal temperature should be between 195 ºF - 210 ºF.
Best way to re-heat rustic bread
This rustic bread is awesome soon after coming out of the oven. That crunchy crust and soft pillowy inside. YUM!
But after a few hours you lose that. Never fear, here are a couple of ways to get that crunch back:
1. Re-heat in the oven
Simply put a hunk of bread in a 350º F oven for 3 - 5 minutes until a little crunch is achieved on the crust. Then remove and enjoy.
When I do it this way, I pre-slice the bread being careful not to cut all the way through it so it still holds it's shape. Then guests can just pull off a slice and enjoy.
2. Re-heat in toaster
Just slice off what you need and put in a toaster. Simple as that.
How to store leftover rustic bread
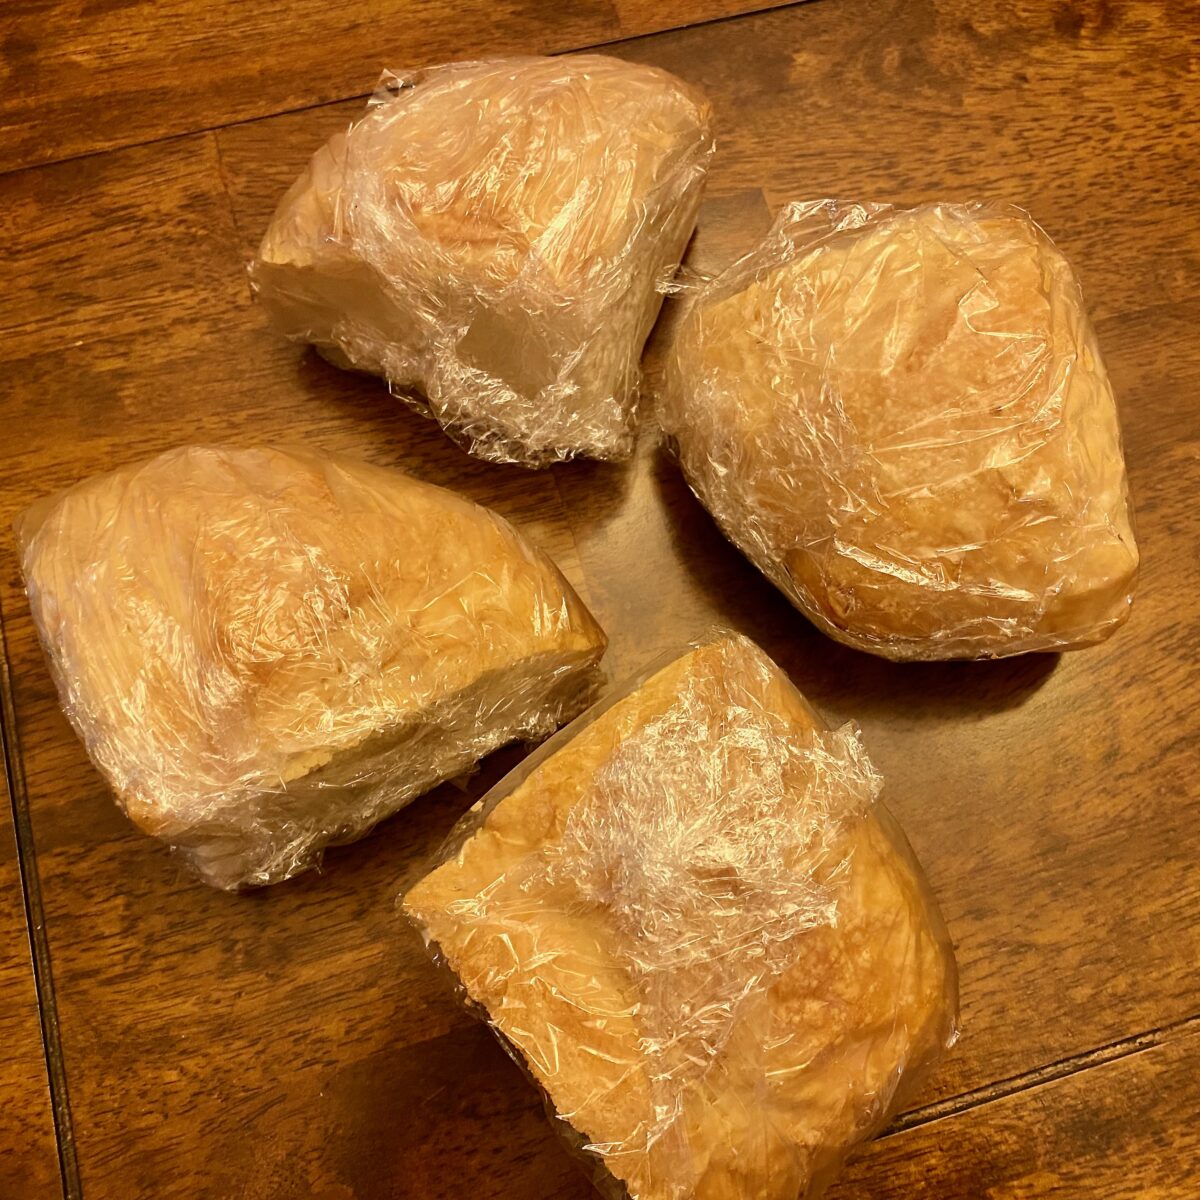
While these loaves are not huge, I like to cut each loaf into quarters.
Then I wrap each in plastic wrap. I keep one in my pantry for immediate use and the other three go into my freezer.
Make sure the bread has has thoroughly cooled before wrapping in plastic.
I'm so excited for you to try this bread. It pairs well with so many things! For instance:
- Italian Sausage-Pepper Ragu with Polenta
- Instant Pot Ham and Bean Soup
- Vintage Beef Stew
- Linguine in Clam Sauce
...just to name a few.
Happy baking!
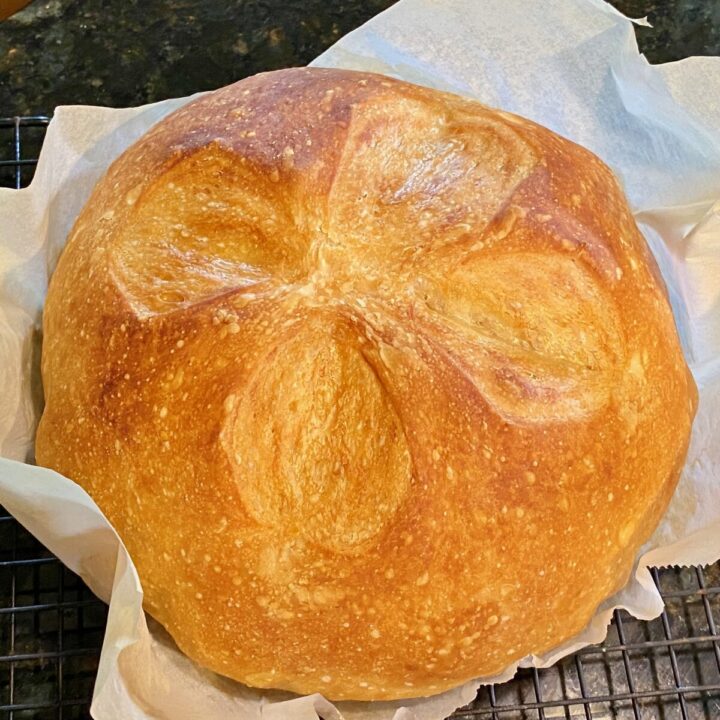
Rustic Bread (no knead)
This no knead rustic bread recipe is SO EASY! But don't let that fool you, the flavor and texture will rival any artisan breads you are buying at the grocery.
Ingredients
- 3 C bread flour (400g)
- 1 ⅓ C water ~60ºF (300g)
- 1 ¼ teaspoon salt, fine (7g)
- ¼ teaspoon instant yeast (.8g)
Instructions
- Images for all directions are in the post for reference if needed.
- In a large bowl, add the flour, salt and yeast. Mix the salt and yeast until is is thoroughly distributed in the flour.
- Add the water.
- Use a flexible non-stick spatula to mix the water and flour together. While mixing, scrape the sides and bottom of the bowl until no more dry flour remains. Use the spatula to press it into a shaggy dough ball. This should only take about 60 - 90 seconds.
- Cover the bowl with plastic wrap and let it proof at room temperature for 12 to 22 hours. Exact time will depend on your room temperature:
>80ºF, proof 12 to 14 hrs
72ºF-79ºF, proof 16 to 18 hrs - After the long proof, your dough will have risen quite a bit and will have bubbles all over the top. Sprinkle flour over the top of the dough and onto a clean, smooth work surface.
- Use a floured non-stick spatula to scrape up and down around the edges of the dough. The spatula should scrape 2-3 inches below the dough.
- Tip the bowl upside-down over the floured work surface so the dough can plop out.
- With floured hands, pull one edge of the dough out about 6-9 inches and fold it back over the top of the dough. Do this for the remaining 3 sides.
- Now the dough is in roughly a square shape. Perform the same folds at all 4 corners.
- Turn the folded dough ball over and using your cupped hands, gently press in on the sides to pull the edges of the dough underneath itself. This process stretches the top of the dough ball. Rotate the dough and continue this another 4 to 6 times until a nice round dough ball is achieved.
- Place the shaped dough ball onto a 10" x 14" piece of parchment paper.
- Using the long edges of the paper, pick up the dough and place it back into the proofing bowl. Cover and allow to proof an additional 2 hours at room temperature.
- After 1.5 hours of proofing, place your covered Dutch oven pan into the oven on the middle rack. Set the oven to 475 ºF and allow this to pre-heat for 30 minutes.
- After 2 hours of proofing, remove the plastic wrap from the proofing bowl and make four 1-inch deep cuts along the top of the dough. The cuts should make an 'X'.
- After cutting the dough, immediately remove the hot Dutch oven pan from the oven and remove the lid. Take extra care to place both items on a heat-resistant surface.
- Using the long edges of the parchment, remove the dough and gently place it in the center of the hot pot. Put the lid back on the pot and place it back into the oven to bake for 25 minutes.
- After 25 minutes, remove the lid and let the bread continue to bake another 10-15 minutes until desired color is achieved.
- Remove the pot from the oven and carefully remove the hot bread from the pan onto a cooling rack to rest for a minimum of 30 minutes.
Recommended Products
As an Amazon Associate and member of other affiliate programs, I earn from qualifying purchases.
Nutrition Information:
Yield: 10 Serving Size: 1Amount Per Serving: Calories: 149Total Fat: 1gSaturated Fat: 0gTrans Fat: 0gUnsaturated Fat: 0gCholesterol: 0mgSodium: 293mgCarbohydrates: 30gFiber: 1gSugar: 0gProtein: 5g
Nutrition data provided here is only an estimate: if you are tracking this information for medical purposes, please consult a trusted external source. Thanks!


Leave a Reply