
Take your grilling skills to the next level with this Tomahawk Steak recipe. Don't let this massive piece of meat intimidate you: it's actually very easy to grill. My step-by-step grilling instructions ensure a perfectly cooked steak, EVERY TIME!

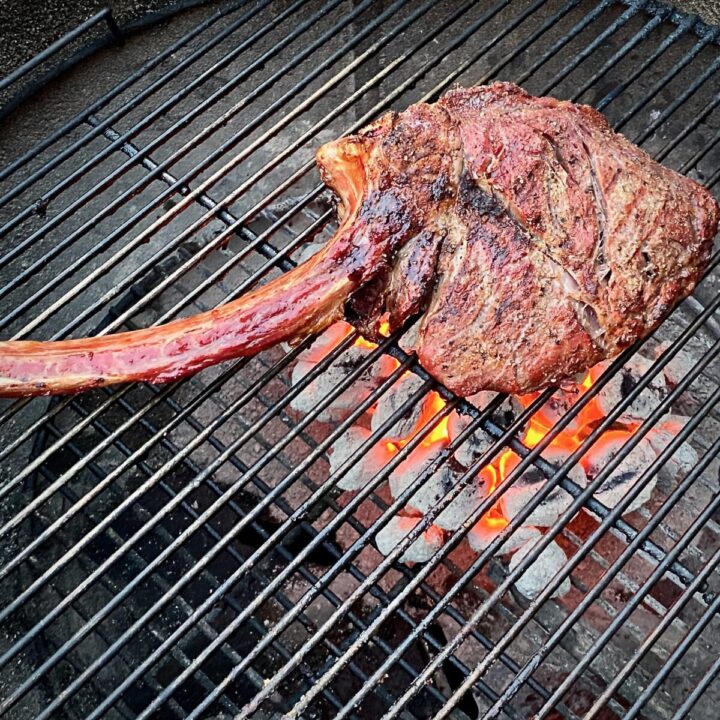
The tomahawk steak might be the most impressive cut of beef you can buy.
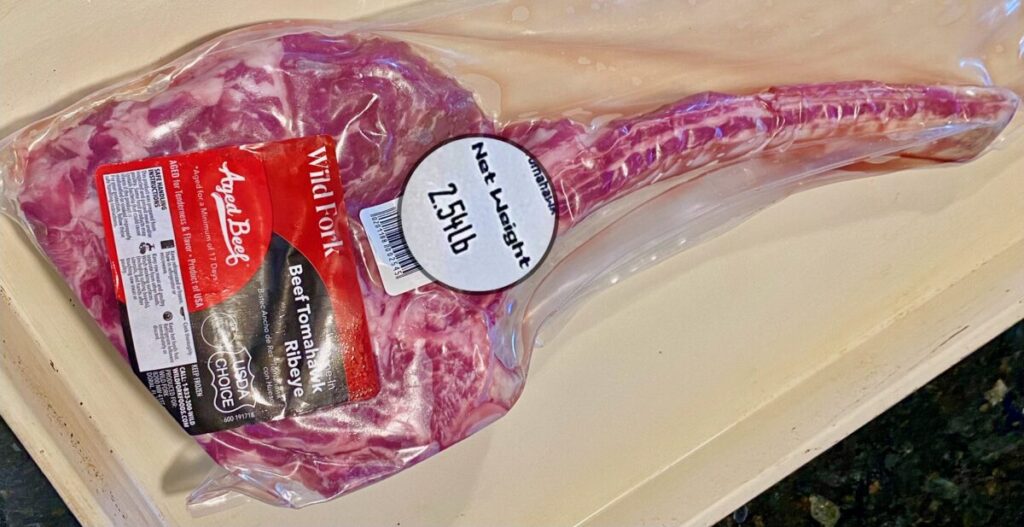
It's essentially a huge, thick ribeye steak attached to an obnoxiously long bone. The steak is so ridiculously big that it looks like something the Flintstones might have for dinner.
Grilling a huge, expensive piece of meat can be scary, so the last thing you want to do is mess it up.
But don't worry,
that's why I'm here.
Whether you are a grill-master or a novice, I'll walk you through every step to ensure that everything goes smoothly.
We'll cover the following:
- Seasoning the steak for optimal flavor and juiciness
- Proper grill set-up
- Charcoal placement
- How to maintain grill temperature
- When and how to sear the steak, etc.
Prefer to do this indoors? I have a section below on how to do this in your oven. It turns out no less awesome.
The reverse sear process
For this recipe, we will grill the steaks using what is called The Reverse Sear Process.
It's absolutely the best way to cook any thick steak, such as filet mignon or huge ribeyes.
The reverse sear cooking process uses two basic cooking methods: indirect and direct cooking.
First, you cook over indirect heat
We begin by cooking the steak indirectly with a medium heat level.
It cooks this way until it's ALMOST done.
Then the steak is removed to rest while you get the grill ready for the searing phase.
Next, sear over direct high heat
While the steak is resting, get your grill temp cranked up as high as you can.
When the coals are scorching hot, you place the steak on the grill directly over the coals, which forms an amazing sear or crust.
Why you want to reverse sear
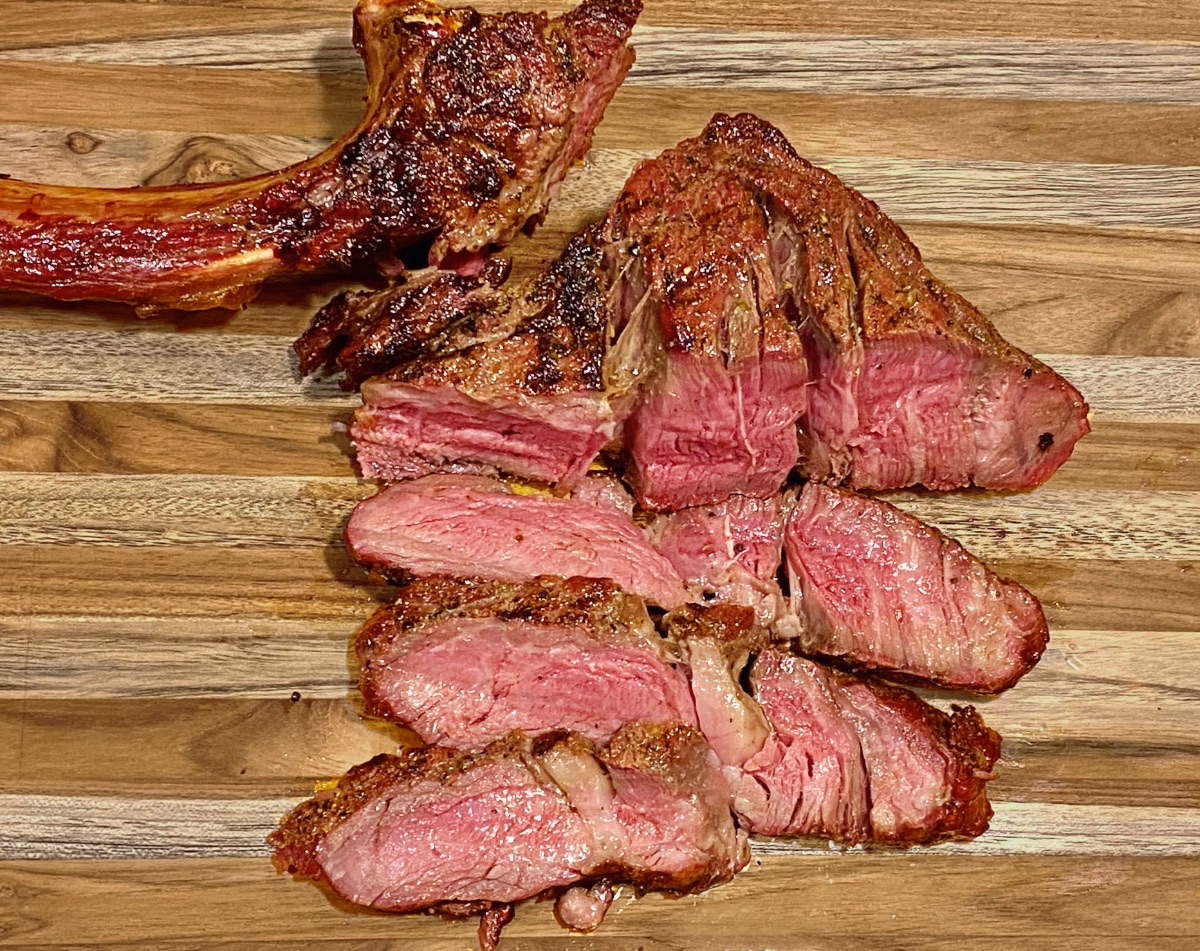
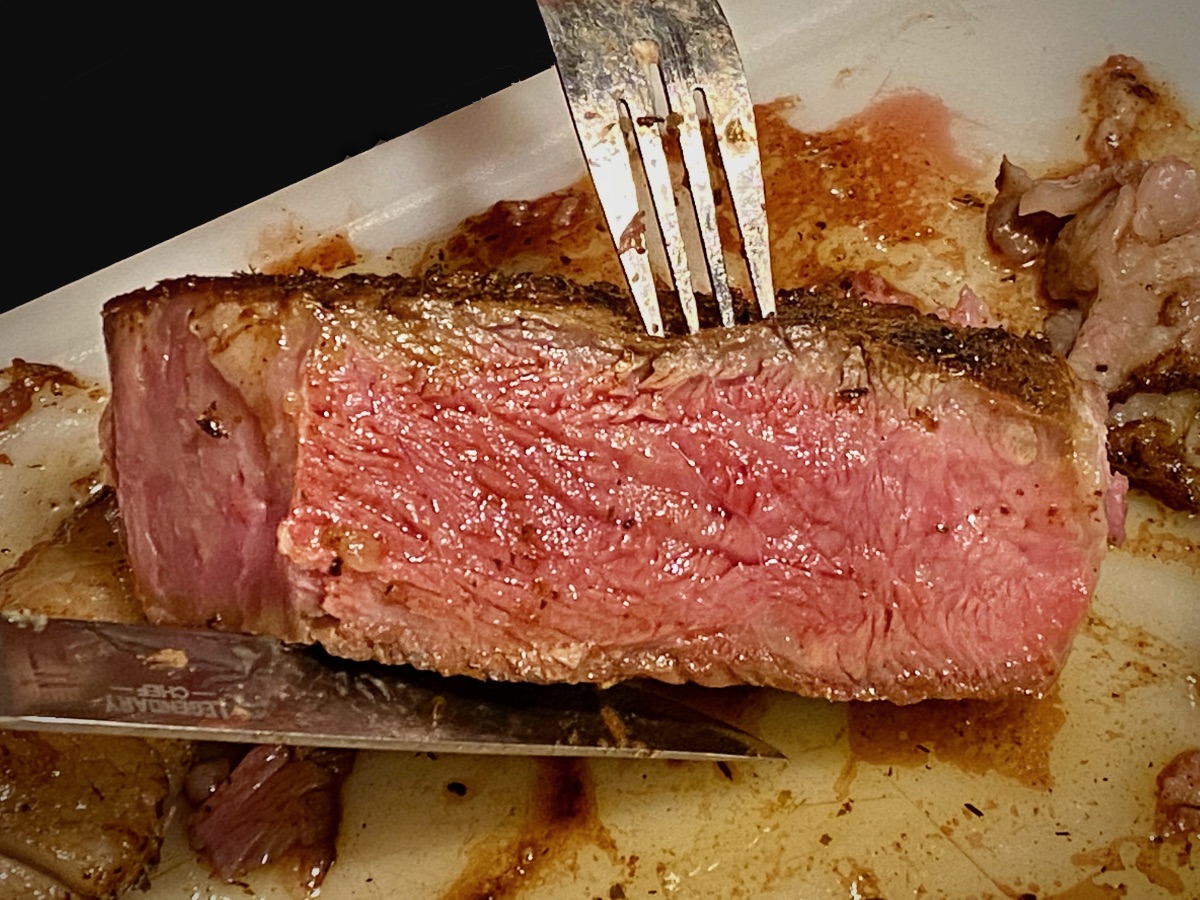
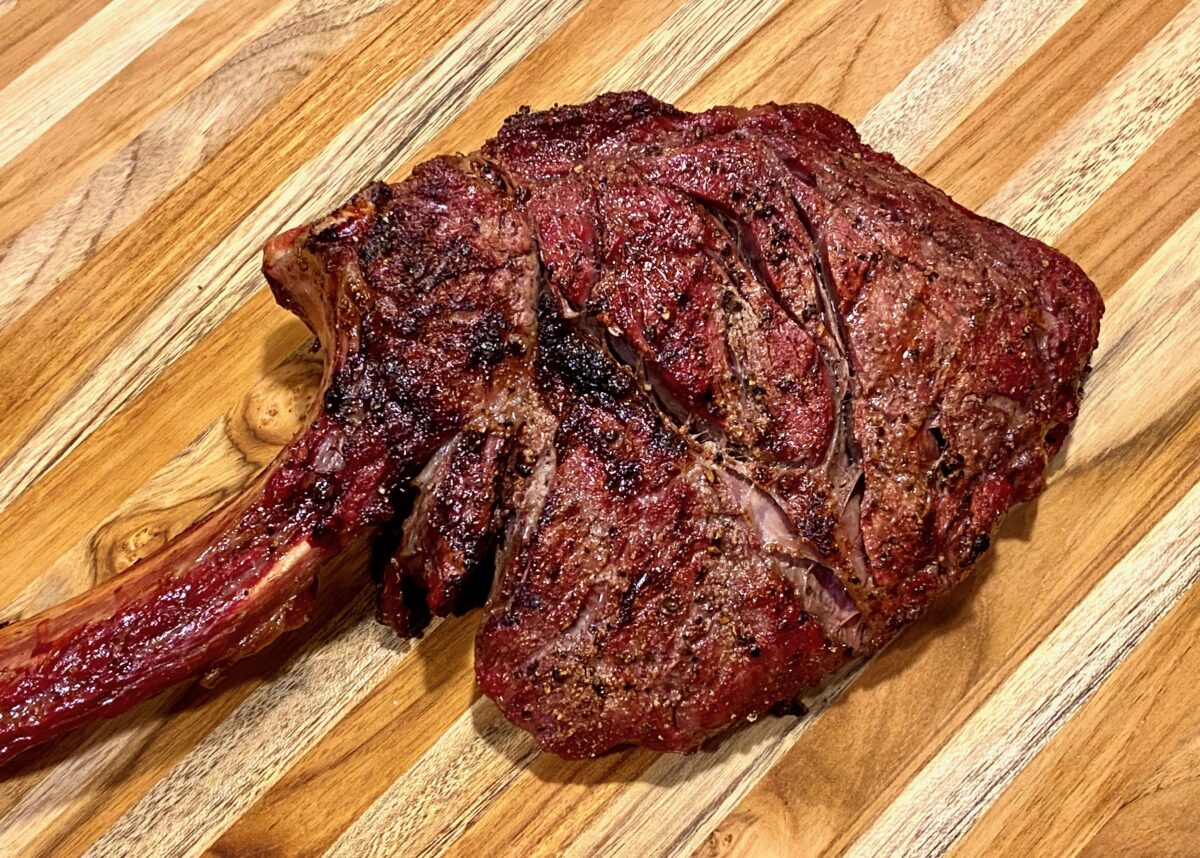
The main benefit from reverse searing is that it provides uniform doneness throughout the steak.
I am talking a perfect pink center from top to bottom and end to end. Like this:
And using the grill to reverse sear is the best way to go because it adds a great char flavor that only improves an already flavorful steak.
So, stick around as I walk you through all the steps to making this the best steak you'll ever eat.
How to grill a tomahawk steak
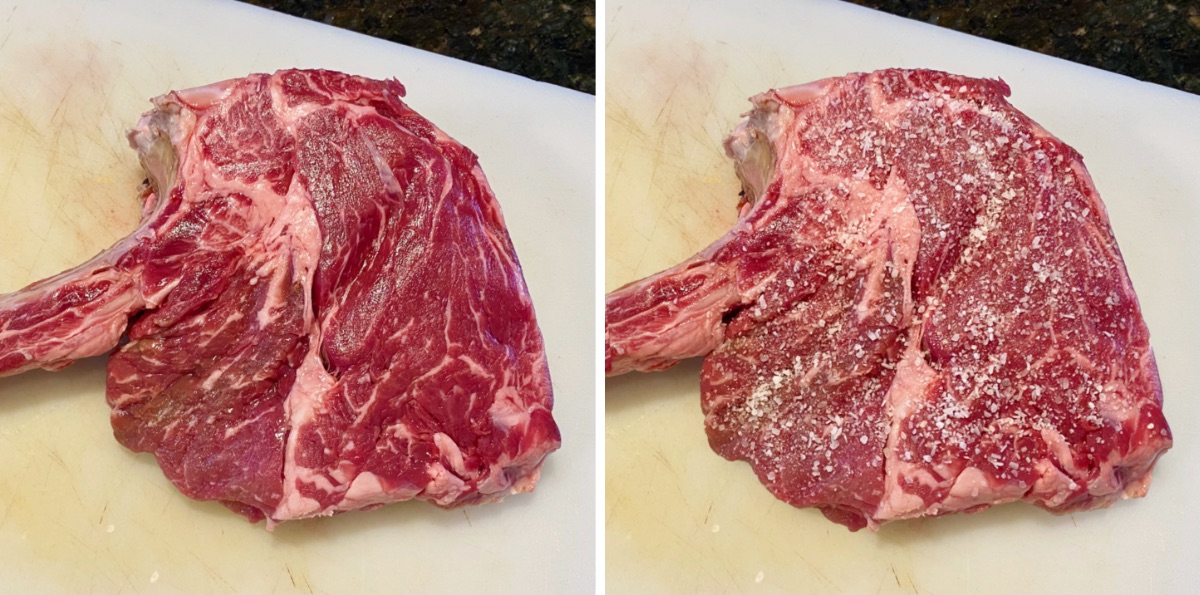
First, salt the steak...early!
You need to salt the steak a minimum of 4 hours before grilling, but it can also be done up to 24 hours in advance.
This is called dry brining.
Dry brining allows the salt to penetrate deep into the meat, which not only flavors the meat, but also allows it to retain moisture during the cook. This makes for a more flavorful and juicy steak.
Use 1 teaspoon of kosher salt per pound of meat (less the bone weight).
My tomahawk steak weighed 2.5 pounds (approximately 2 pounds without the bone), so I sprinkled 2 teaspoons of salt all over this steak.
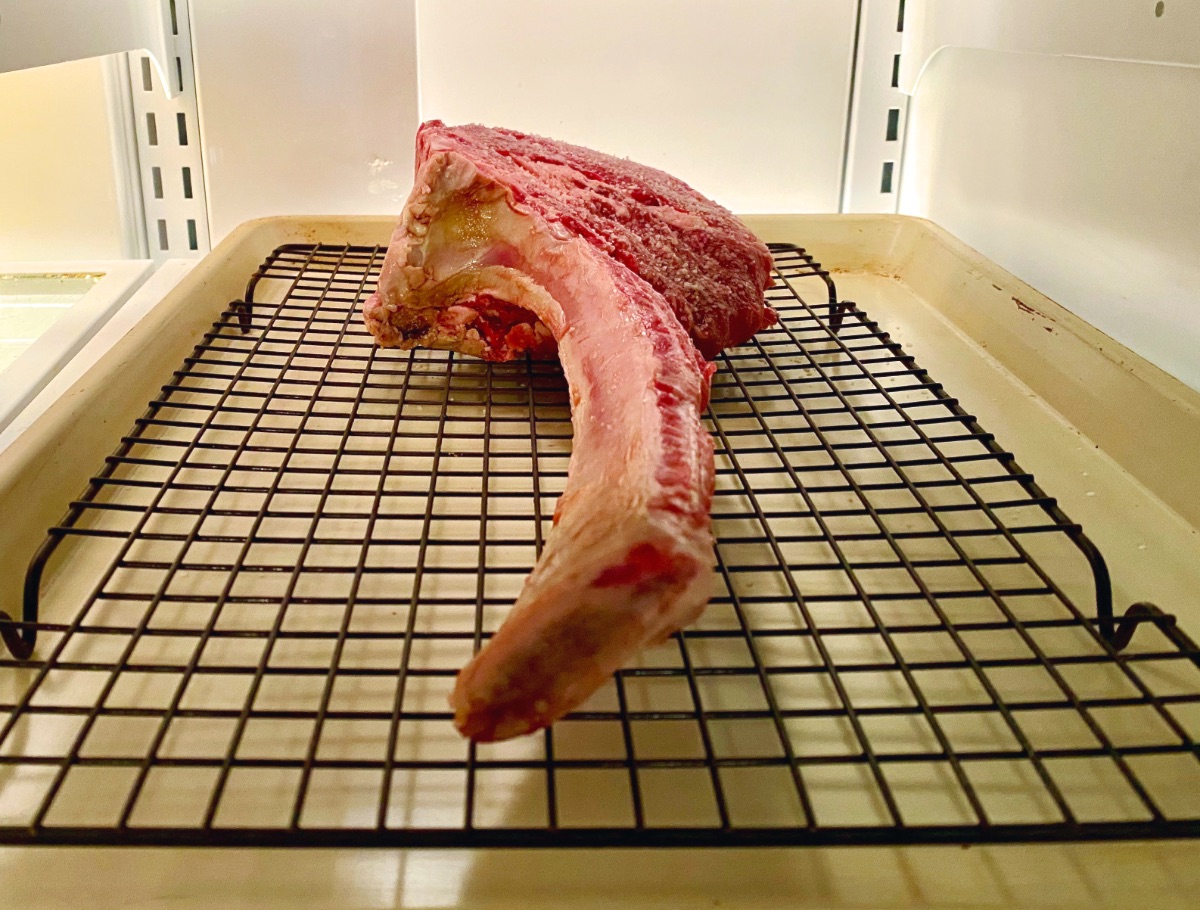
Once salted, set it onto a cooling rack placed into a rimmed baking sheet.
Allow this to rest in your refrigerator uncovered a minimum of 4 hours.
If you don't have time to pre-salt, you can always salt the steak before grilling, when you add your other seasonings.
Season the steak
One hour before grilling, it's time to apply additional seasonings. This extra time allows the spices to soften and bloom.
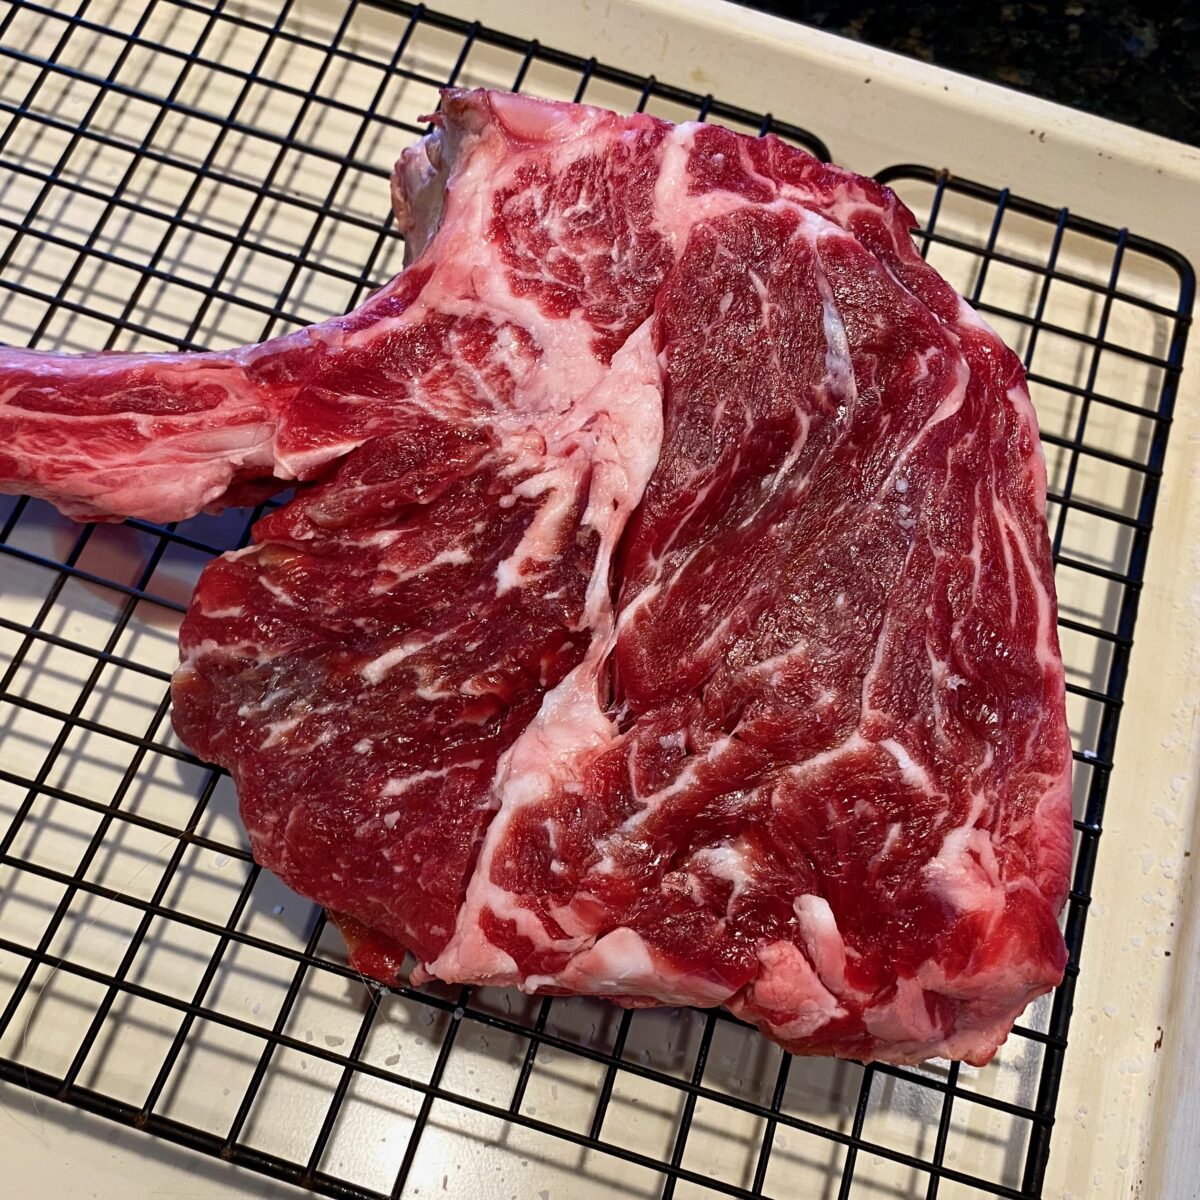
After removing the steak from the fridge, you should notice that all the salt has fully absorbed into the meat.
Before adding any spices, splash a few dashes of Worcestershire Sauce around the whole steak.
This acts as a binder for the seasoning, and has a nice flavor that complements the steak.
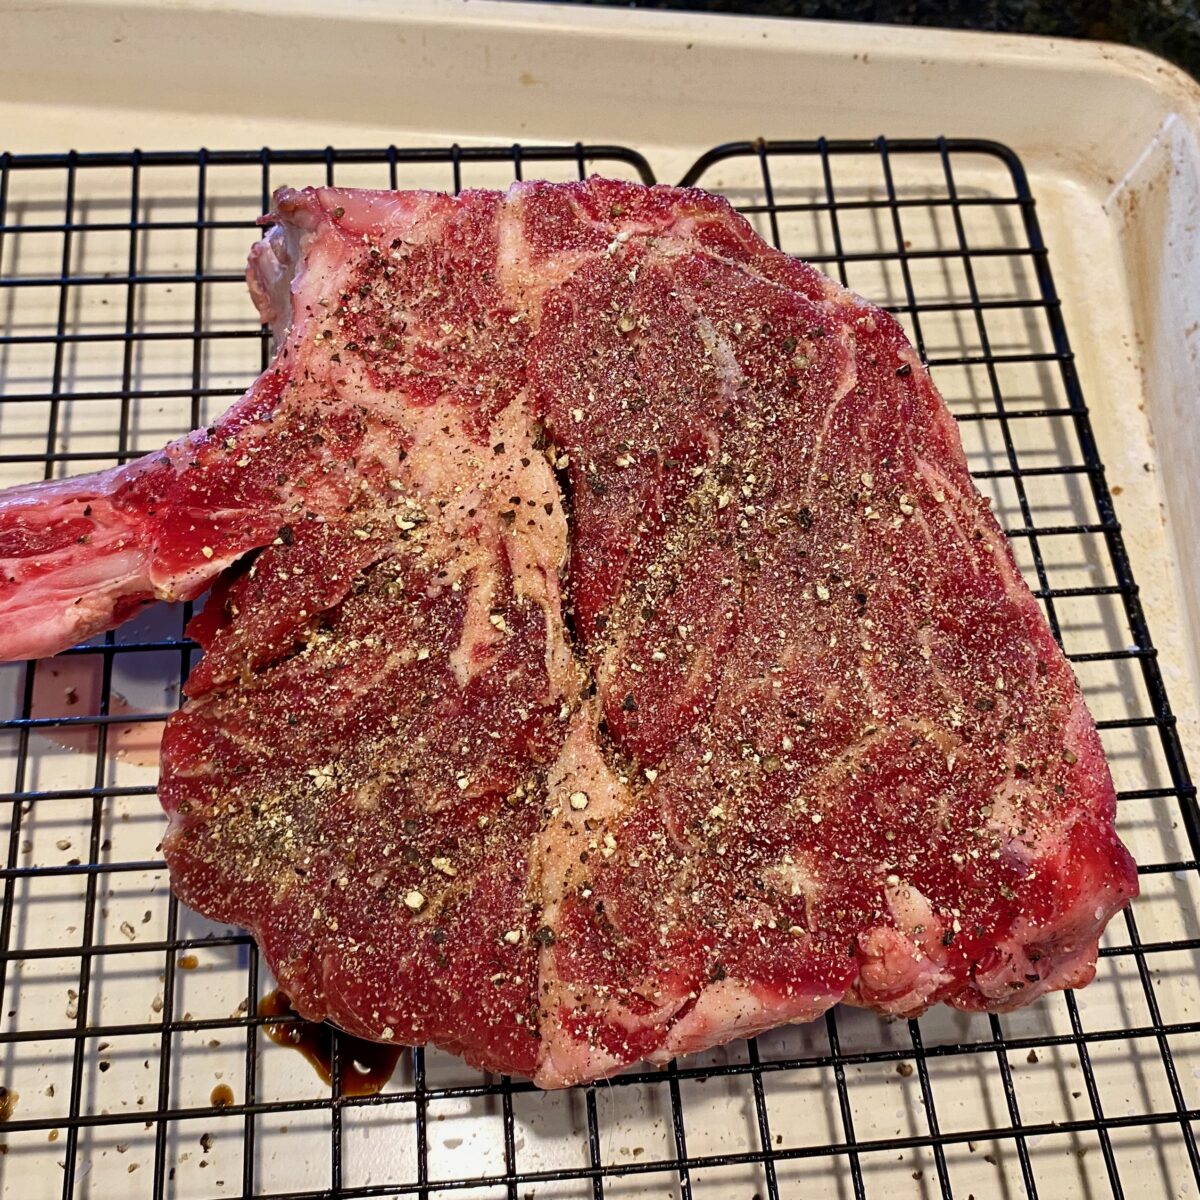
Then apply the seasoning to the sides and edges.
Montreal seasoning is a popular choice for steaks, but I prefer to keep it simple with a combination of cracked black pepper and a little garlic powder. My ratios are below:
| 4 parts | Kosher Salt (if not dry brining) |
| 3 parts | Fresh Cracked Pepper |
| 1 part | Granulated Garlic Powder |
Let the seasoned steak rest at room temperature one hour before grilling. This gives you time to get the grill ready.
Pre-heat the grill
Always start with a clean grill by removing the ashes and cleaning the grates.
Right after seasoning the steak, it's time to pre-heat your grill. This will take about an hour.
Start by lighting the coals
Remove the lid and cooking grate and place your chimney starter in the center of the coal grate.
Adjust your bottom vents to 100% open.
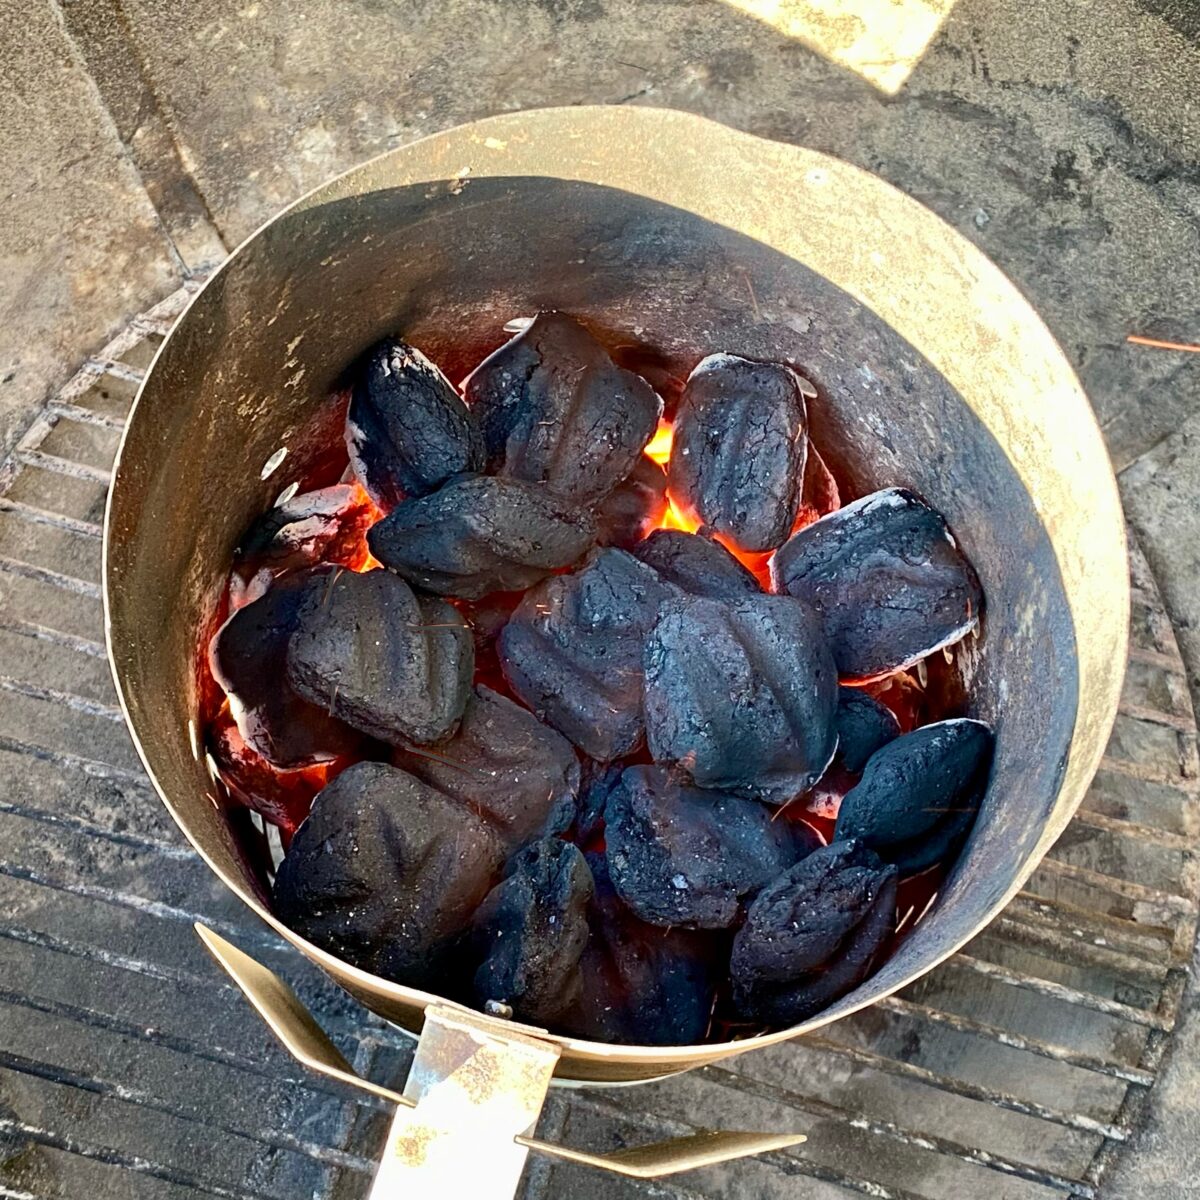
Add about 50 coals to the chimney and light the coals. Once the top coals begin turning gray on the edges, they are ready to be dumped into the grill.
This should take about 15 minutes.
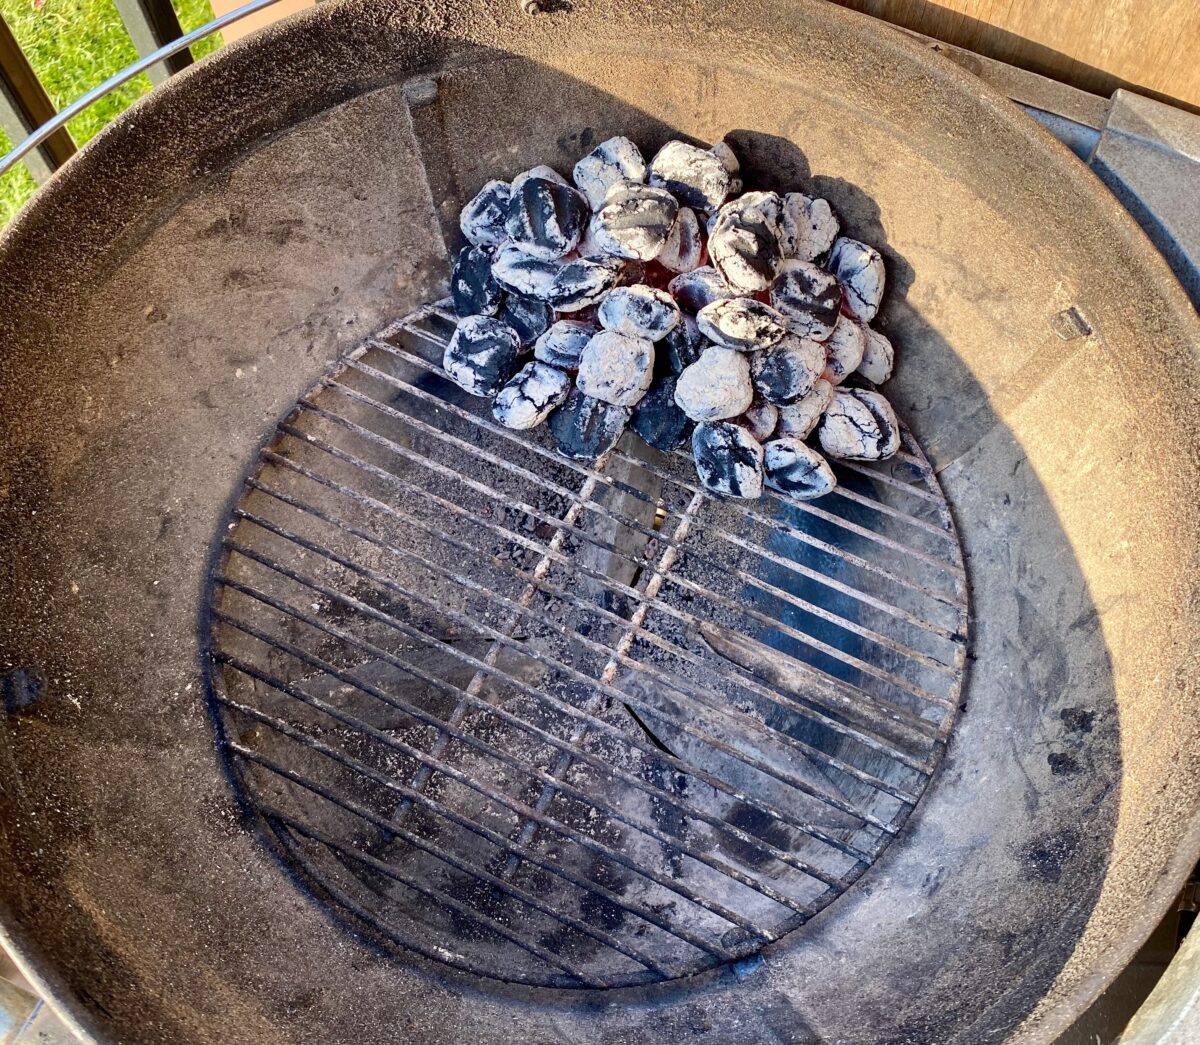
Next, dump the hot coals to one side
Position the hot coals to one side of the coal grate. Use a cheap set of tongs to get them stacked tightly to one side.
Placing the hot coals to one side allows us to grill the steak on the other side using indirect heat.
Allow grill to pre-heat
Once the coals are placed, replace your cooking grate and cover the grill.
- Adjust your bottom vents to 25% open (or 75% closed).
- Adjust your top (lid) vent to 100% open.
Allow the grill to pre-heat with these vent settings for 15 minutes.
It's very likely that these lower vents will need adjusting during the cook.
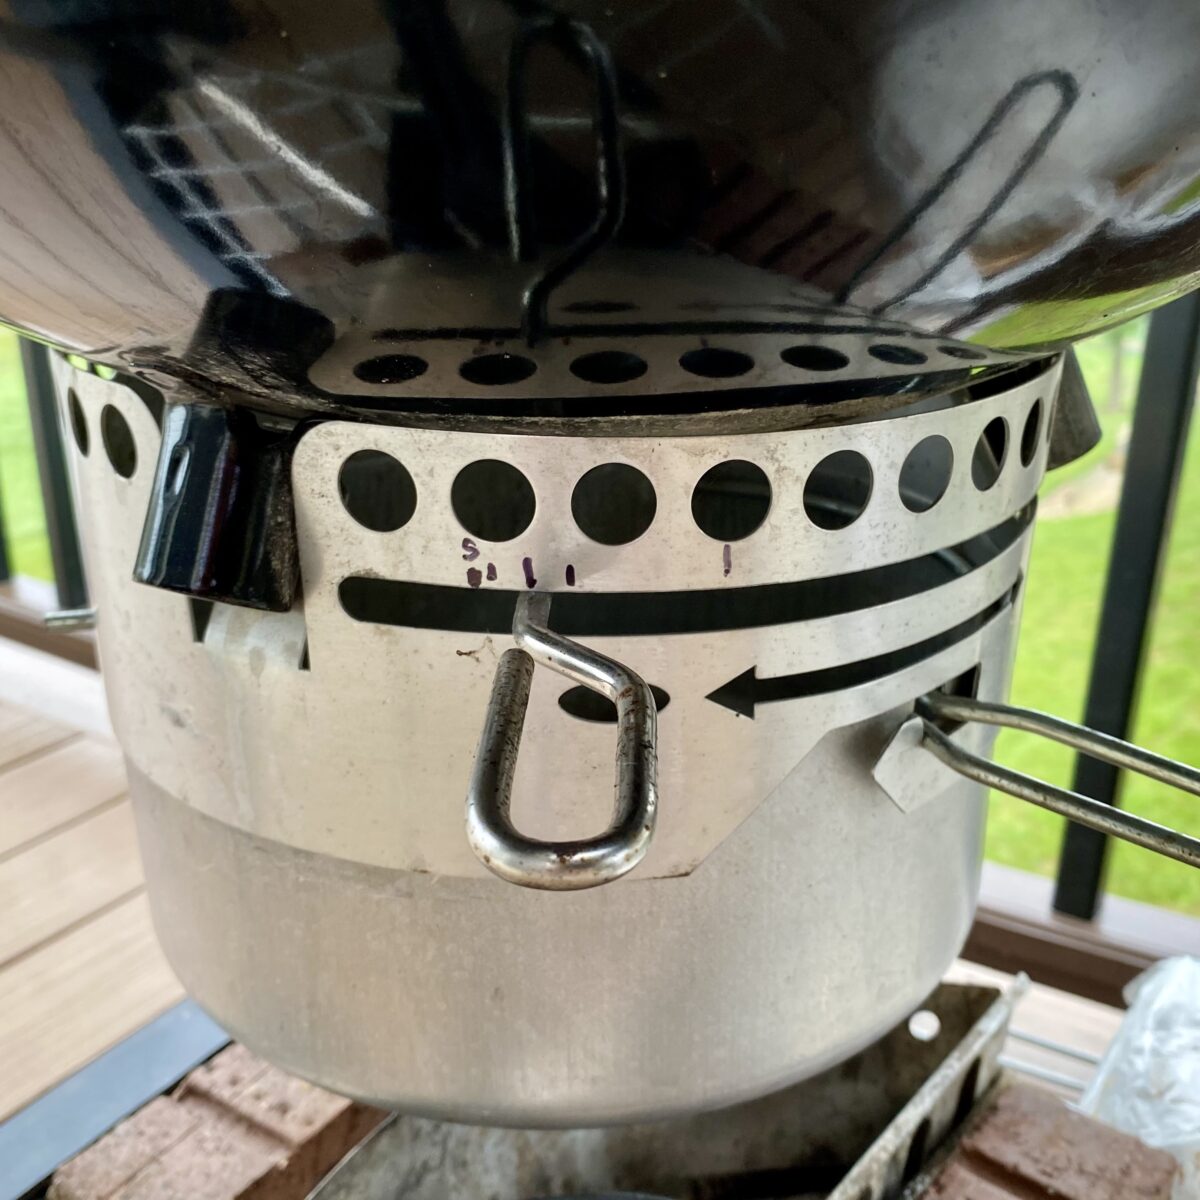
Knowing how open your vents are during a cook can be difficult, especially with the lid on. So here's a little trick that I've figured out:
Mark your various vent positions
When the grill is empty and cool, slide your vent to the 100%, 75%, 50%, 25% and 'S' open positions.
The 'S' position means that it's only open a sliver.
This sliver open position is sometimes necessary to maintain a low and slow temperature, which is critical when you're smoking on a charcoal grill.
At each location, simply mark it with a sharpie.
Monitor the grill temperature
While the grill is pre-heating, pay attention to the grill temperature.
If your grill doesn't have a thermometer in the lid, you can use a digital grilling thermometer and position the temp probe on the cooking grate opposite where the coals are positioned.
The temp will rise quickly at first, but we want it to settle in around 300º F.
But don't get obsessed with hitting this exact 300º temperature...
...any consistent temp established between 225º F - 375º F is perfectly acceptable.
What if my grill temp is too hot (or cold)?
If you notice your grill temperature bumping up against the extremes of this temperature range (225º-375º), you will need to make vent adjustments to fix this.
Maintaining a grill temperature is about getting the correct airflow through your grill which is done through the vents.
For this cook, we will always have the lid vent at 100% open and we'll only be adjusting the lower vents.
If the grill temp is running too hot
To lower the grill temperature, you need reduce the air intake. This means closing the lower vents a bit more.
How much you close your vents is determined by how far off you are from your target temperature:
- If it is only slightly over (5º - 10º) your target temp, these adjustments should be extremely small.
- If you way overshoot your temp (15º - 30º), you'll need to close the vents a bit more. (but never close the vents entirely!)
Vent adjustments are not immediate. Always allow 5 minutes after any vent adjustment to see how the temperature changed.
If the grill temp is running too cool
It's the reverse of this process: you'll be OPENING the vents a bit more instead of closing them.
Time to start grilling!
At this point your grill has pre-heated a minimum of 15 minutes with the lid on.
You have also established a grill temperature somewhere between 225º F - 375º F.
That means it's time to get your beautiful piece of meat on the grill!
As discussed earlier, there are two parts to this reverse sear process:
- The indirect cook, and then
- The direct cook to sear the steak.
Let's start the indirect cook
The indirect cook phase will take 45-90 minutes depending on your steak thickness and grill temperature.
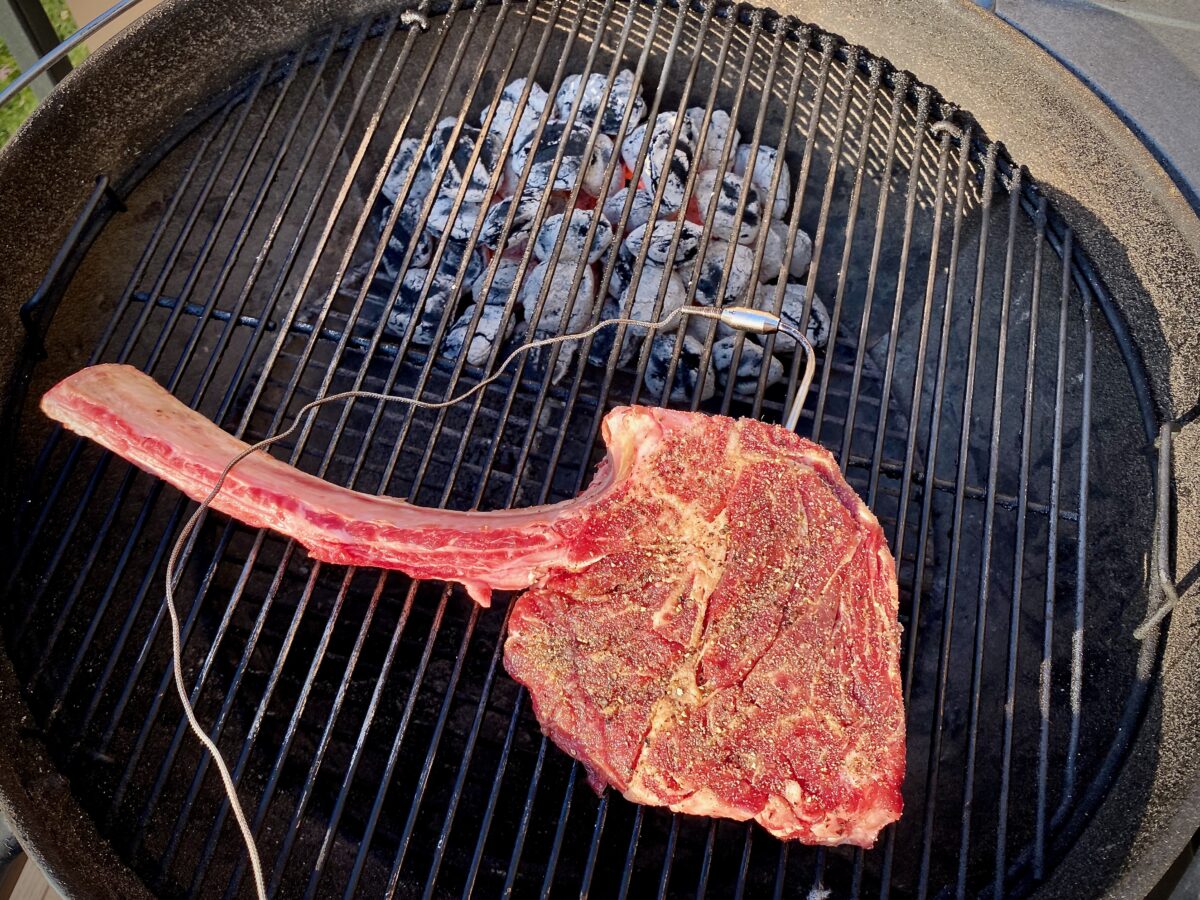
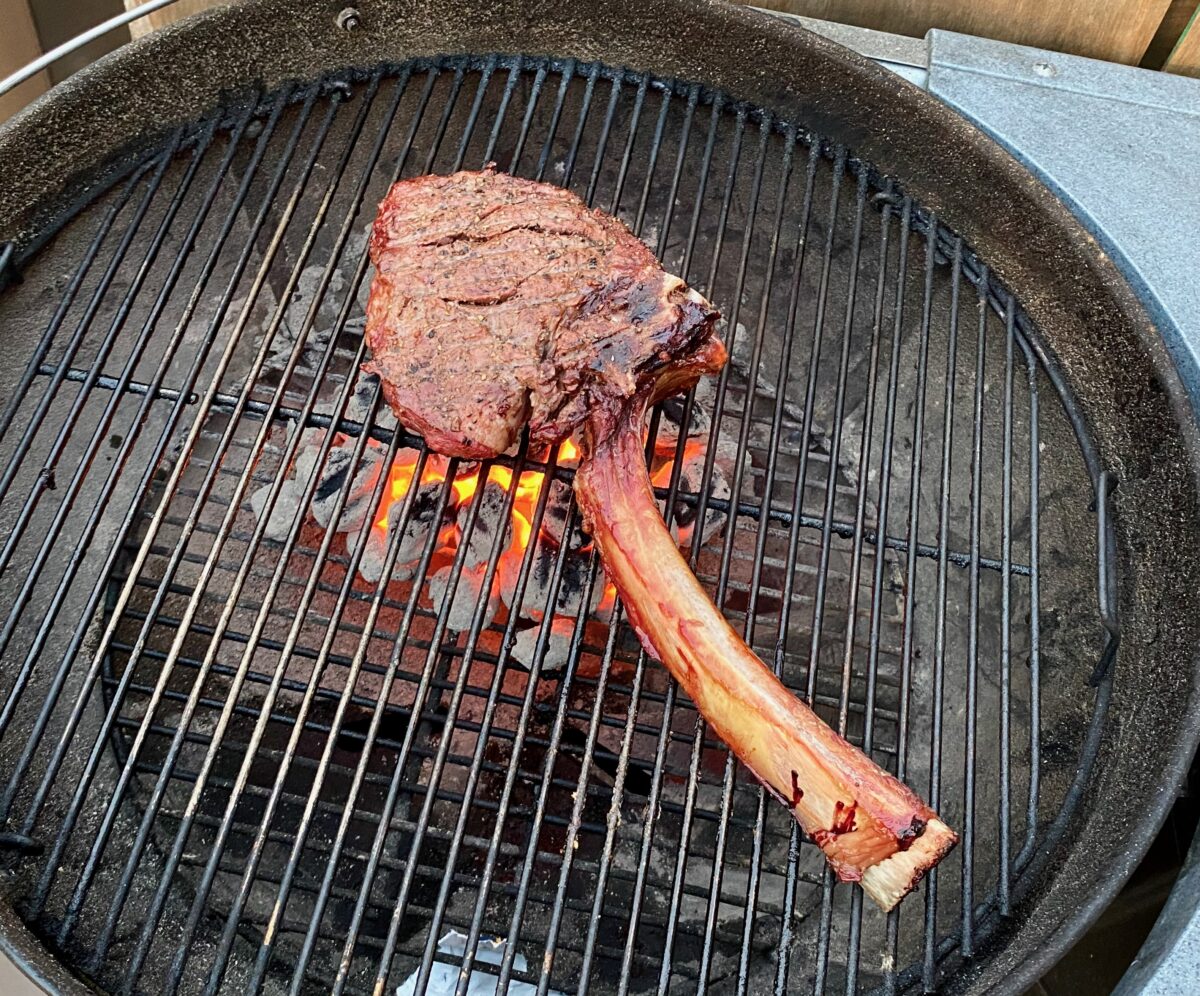
Place the meat on the grill
First, we need to insert a meat thermometer into the thickest part of the steak.
THIS IS CRITICAL. You need to know the internal temperature of your steak to ensure it gets cooked properly.
Then, remove the lid and place the steak on the cooking grate, away from the hot coals, so that the bone side is facing the coals.
The grill temp is hottest towards the coals and gradually decreases as you move away from them. The bone side can handle this higher heat.
Immediately put the cover back on the grill.
Keep the lid on during the entire indirect cooking phase.
When is the indirect phase done?
You want to cook your steak indirectly until it's 10º F from your desired doneness level.
| Doneness | Final Temperature (after resting) |
|---|---|
| Rare | 125º F |
| Medium Rare | 135º F |
| Medium | 145º F |
| Medium Well | 150º F |
| Well Done | 160º F |
For example: I prefer my steak medium rare, therefore I am indirect cooking the steak to an internal temperature of 125º F.
Once your temperature has been reached, remove the steak to a platter and tent it with tin foil.
Allow this to rest before starting the SEARING PHASE.


The searing phase
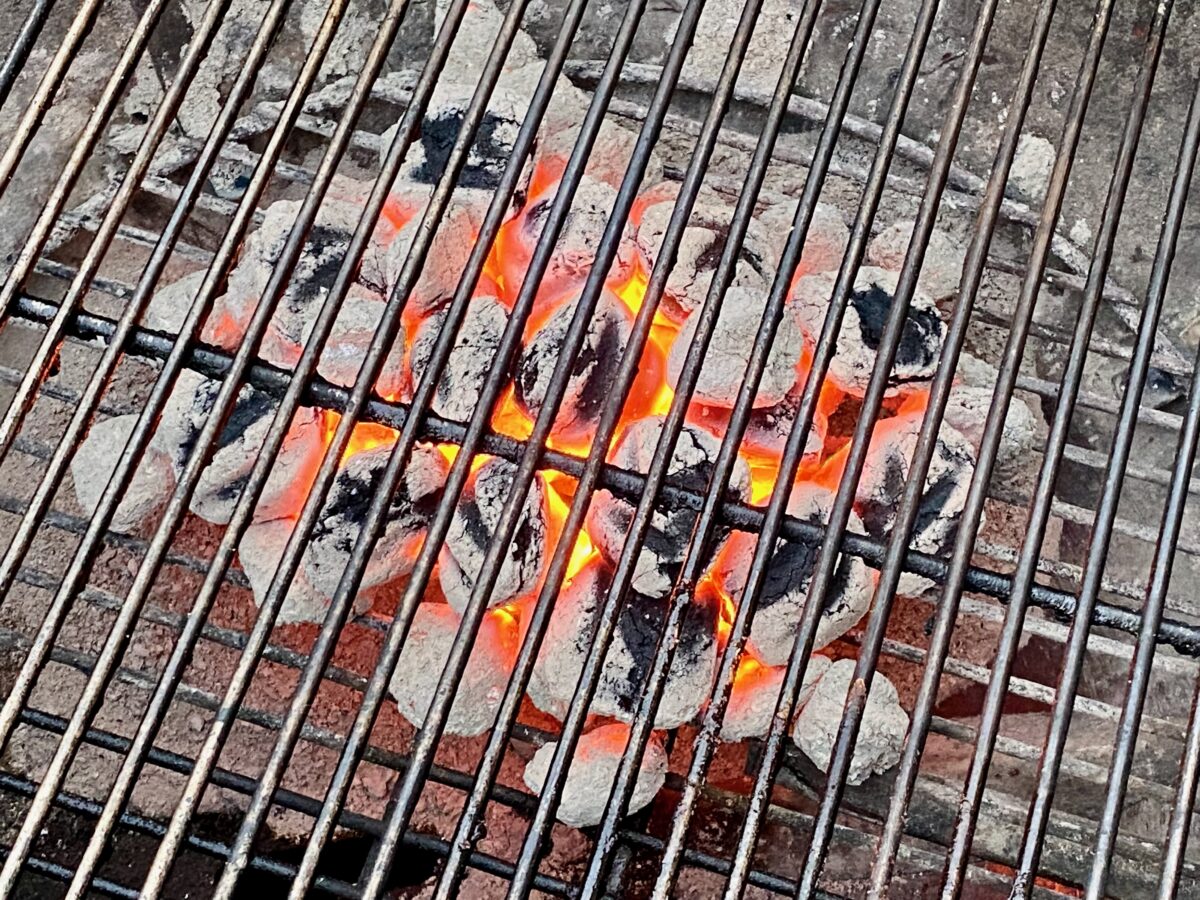
While the steak is resting from the indirect cooking phase, we need to get the coals scorching hot for the searing phase.
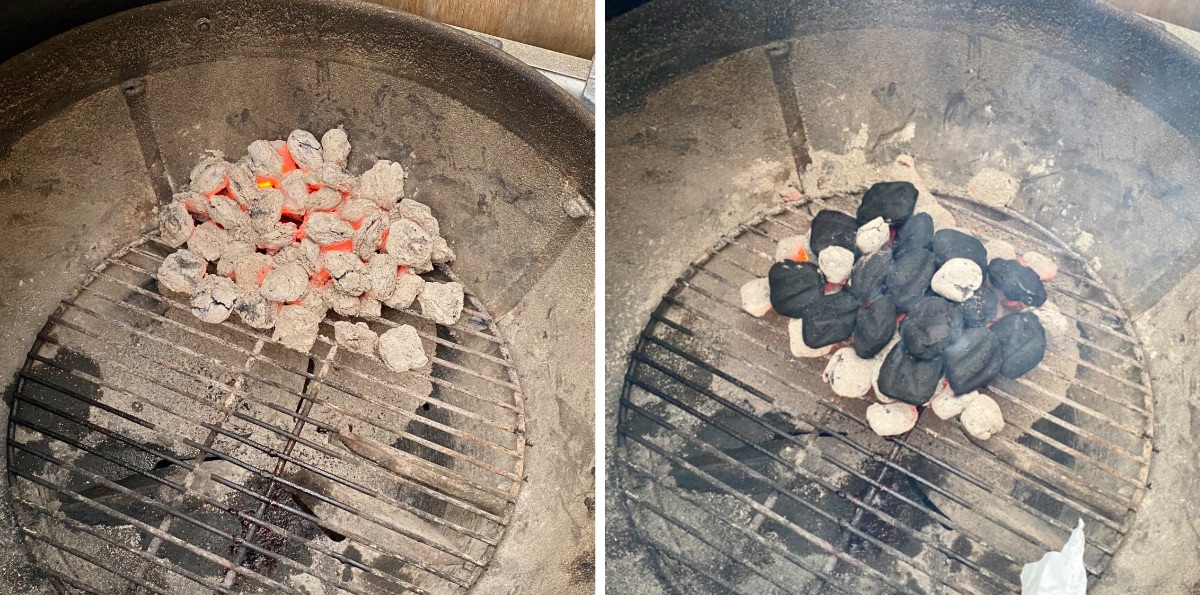
Begin by re-assembling your coals
Remove the cooking grate and use cheap tongs to push the current hot coals closer to the center of the coal grate.
Then mix in 10-20 unlit coals. Make sure the pile is wider than your steak and measures 2-3 coals high.
Put the cooking grate back on BUT keep the lid off the grill.
Then adjust the bottom vents to 100% open.
We want as much oxygen as possible to get at these coals.
Keep the lid off and let these coals get red hot. This will take about 15 minutes.
Once they are ashed over and red hot, it's time to sear that steak.
Sear the steak
Now, place your steak over the red hot coals.
Allow the steak to sear a minimum of 1 minute, undisturbed.
After one minute, take a peek to verify the sear level.
If it's to your liking, flip it over and sear the other side...if not, let it go another 30-60 seconds before flipping it.
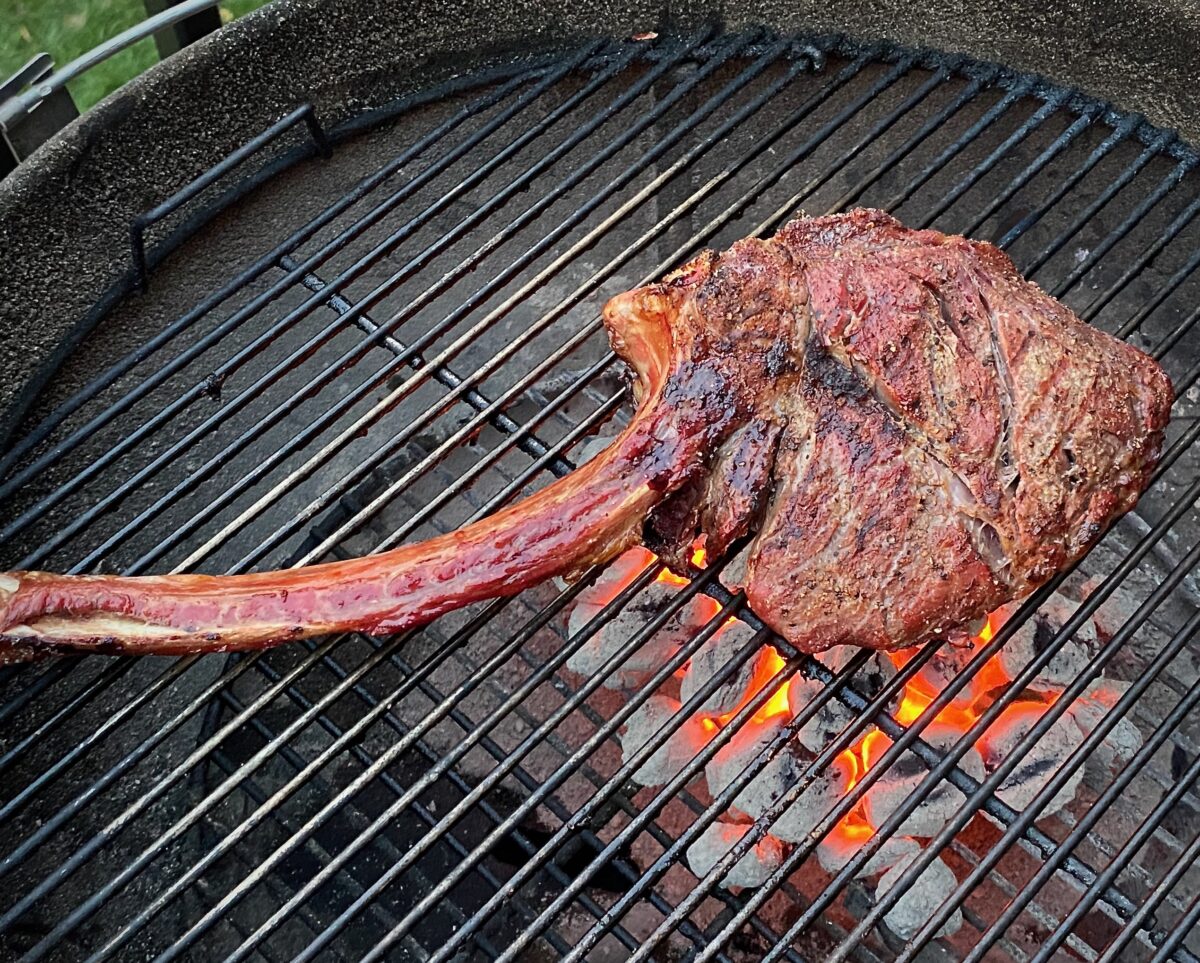
Again, give the second side another minute before looking to check the sear level.
Once seared to your liking, remove the steak to a cutting board.
Let it rest?
Yes, but it only needs to rest about 5 minutes.
There is minimal rest time needed since it already rested ~15 minutes while getting the coals red hot for the sear phase.
Serve your steak with some amazing side dishes
A 2.5-lb tomahawk steak is more than enough for two people, especially if you serve it with a few side dishes. I recommend the following:
- Cream of Mushroom Soup (if you're doing a Valentine's Day or other special occasion spread, you can make this a first course! How fancy is THAT?!)
- Mashed Potatoes with Horseradish
- Easy Microwave Asparagus
- Grilled Pepper, Mushrooms & Onions
- Microwave Brussels Sprouts
- Easy Dinner Rolls
How to reverse sear a tomahawk steak in the oven
Reverse searing in the oven is very easy and will still turn out an amazing steak.
Once again, there will be an indirect cook and a direct cook over high heat.
Indirect cooking in the oven
The indirect cooking process is exactly the same as what I outline in my Reverse Seared Ribeye post. Please follow those directions.
Searing in the oven
Allow the steak to rest after the indirect cooking phase.
Since the tomahawk steak bone is too long to fit in a cast iron pan to sear it, we need to do something else. You have two options:
Sear it under your oven's broiler
While your steak is resting from the indirect cooking phase, turn your oven's broiler to high.
Allow it to pre-heat 5 minutes.
While the steak is still on a wire rack that has been set into a baking sheet, put it on the highest rack in your oven so it's only inches from the broiler element.
KEEP YOUR EYE ON THE STEAK!
Once you get a nice sear on the top side, turn the steak over to sear the other side.
Or you can sear in cast iron griddle pan
If you have a cast iron griddle pan, you can use that to sear your steak. Technically, this part would be on the stove-top and not in the oven.
If you're using a griddle pan, you can simply follow the exact same process I have in my Reverse Seared Ribeye post. The only difference is that you're using the griddle pan instead of a skillet.
Other grilling/smoking recipes
If you are looking for more grilling and smoking inspirations, here are a few of our favorite recipes:
- Greek Marinated Lamb Chops
- Smoked Ribs, Brisket and Pork Butt (pulled pork)
- Grilled Tri-Tip with Chimichurri Sauce
- Grilled Italian Sausage Sandwiches
That's it! I hope you enjoy your amazing steak dinner.
—Phil
Grilled Tomahawk Steak
Take your grilling skills to the next level with this Tomahawk Steak recipe. Don't let this massive piece of meat intimidate you: it's actually very easy to grill.
Ingredients
- 2.5 lb tomahawk steak
- 2 teaspoon Worcestershire Sauce
- 2 teaspoon kosher salt
- 1 ½ teaspoon black pepper
- ½ teaspoon garlic powder
Instructions
- (4-24 hours before grilling) Salt the steak on all sides and edges. Use 1 teaspoon kosher salt per pound of steak, less the bone weight. (See recipe note #1)
- Put the salted steak on a cooling rack set inside a rimmed baking sheet. Then place it into the refrigerator uncovered to dry brine for 4-24 hours before grilling
- One hour before grilling, splash Worcestershire sauce (or olive oil) on the steak and apply the black pepper and garlic powder on the sides and edges of the steak. Allow the seasoned steak to rest at room temperature for one hour.
- Set up your grill for indirect cooking by placing hot coals to one side of your coal grate. (See exact grill set up and pre-heat instructions inside the post)
- Allow your grill to pre-heat to 300 ºF for a minimum of 15 minutes with the lid on. Any consistent temp you establish between 225 ºF - 375 ºF is acceptable.
- Insert a meat thermometer into the thickest part of the steak and then place the steak on the grill, opposite where the hot coals are. Orient the steak so that the side with the bone faces toward the hot coals.
- Lid the grill and allow the steak to cook with indirect heat until your meat temperature is 10 ºF below your desired doneness level (reference the temperature chart in the post above).
- Once your temp is achieved, remove the steak to rest covered with tinfoil.
- With tongs, move your hot coals to the center of the coal grate and add 10-20 additional unlit coals to the pile. The pile should be just wider than your steak and 2-3 coals high.
- Open your lower vents to 100% and keep the lid off. After 10-15 minutes, the coals should be ashed over and red hot.
- Place your rested steak directly over the red-hot coals and let it cook, uncovered and undisturbed, for one minute.
- After a minute, take a peek to see if the sear is to your liking. If so, flip the steak over and repeat on the other side. If not, allow it to sear another 30-60 seconds before flipping.
- When both sides are seared, remove to cutting board and allow to rest 5 minutes before slicing and serving.
Notes
Recipe Notes:
- If you don't have time to pre-salt, you can always salt the steak right before grilling.
Nutrition Information:
Yield: 3 Serving Size: 1Amount Per Serving: Calories: 1059Total Fat: 70gSaturated Fat: 27gTrans Fat: 0gUnsaturated Fat: 32gCholesterol: 367mgSodium: 1073mgCarbohydrates: 2gFiber: 0gSugar: 0gProtein: 99g
Nutrition data provided here is only an estimate: if you are tracking this information for medical purposes, please consult a trusted external source. Thanks!
Tom says
Love your recipe. I will say that I've had great success in oven and over fire with an inverted cast iron skillet. For me, it gives a better crust, plus the audio cue of the sizzle stopping helps with timing the flip. Okay...I'm so smart it only took four or five in-oven cooks before I realized that I could do the inverted cast iron over coals - better yet, skillet placed directly atop! I can tell you from experience, your method gives you a 10/10 steak, but the inverted cast iron skillet takes it to an 11.
And, for what it's worth, roasted marrow bones with just salt and pepper and rosemary mashed potatoes make a pretty fine meal!
Thanks for helping all us home chefs!!