This cold fermented pizza dough recipe produces that airy, flavorful, Neapolitan-style crust you dream about when you think of the ideal pizza. Prepare to be amazed when your HOME OVEN turns out better pizzas than your favorite pizzeria!

This cold fermented pizza dough recipe has taken me over two years to perfect. In all that time, I experimented with various ingredients, quantities and preparation steps.
If you're willing to make your own pizza, you have to try my no knead rustic bread recipe. So easy and so flavorful. You'll never buy crunchy bread again!
You would think having pizza every week would make a family happy, right? WRONG!
While they loved the pizza, I drove my family crazy with my follow-up interrogations:
"Is this pizza better, same, or worse than last week?"
"How's the flavor of the crust?"
"Is the crust airy enough?"
"Does it have a good crunch but still soft enough on the inside?"
NOBODY EXPECTS THE SPANISH PIZZA INQUISITION!
(a little Monty Python humor)
But this is what it takes when you're in pursuit of perfection.
There is one thing though, that I didn't change during all this experimentation...I always cold-fermented the pizza dough.
I learned early on that this the only way to get great flavor and airy texture into a pizza crust.
You know the crust I'm talking about: airy and light. Thin and crunchy on the outside, but soft and chewy on the inside.

While cold fermentation is a critical step, there are tons of other things you need to get right to make a great pizza crust.
- Using the right amount of water (VERY important)
- Starting with the correct water temperature
- Using the right quantities of yeast, salt, sugar, and olive oil
- Knowing when to add each ingredient
- Knowing how long to knead the dough
- Knowing when to form the pizza dough balls
- Understanding the proper steps to cold fermenting
- Baking at the right temperature
- And much more...
Don't worry though. I cover all of this and leave no stone unturned!
Armed with my recipe, simple instructions and even a video, you will soon be enjoying the best homemade pizza you've ever had.
So sit back, read on, and enjoy the fruits of my labor (of love).
If you prefer that thick pan pizza crust, you're in luck. My homemade pan pizza dough is what you are looking for!
Jump to:
- Why cold ferment pizza dough?
- I bet this is complicated, right?
- Ingredients for cold fermented pizza dough
- A few notes about the recipe
- How to make cold fermented pizza dough
- Tips for topping your pizza
- How to bake the pizza
- How to freeze pizza dough
- Best practices
- How to scale the recipe for 1, 2 or 4 pizzas
- Why you need to make homemade pizza
- Other popular recipes
- Cold Fermented Pizza Dough Recipe
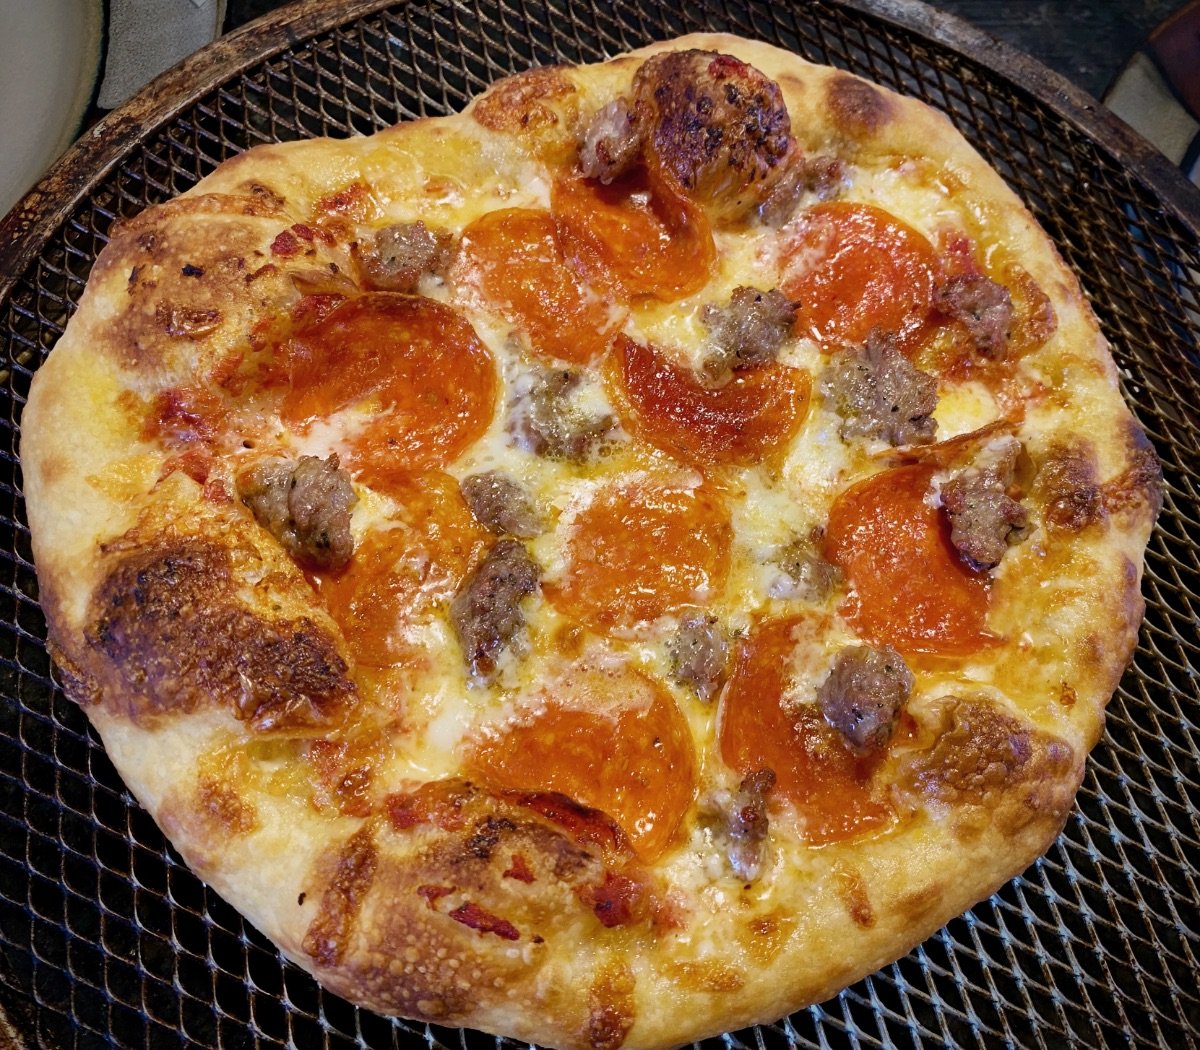
Why cold ferment pizza dough?
As you know, there are tons of pizza dough recipes that don't cold ferment the dough. They have you baking the pizza within a few hours of making the dough.
That's all fine and good, if you want flavorless pizza.
Sorry to be harsh, but it's true.
When you cold ferment your pizza dough, two amazing things happen.
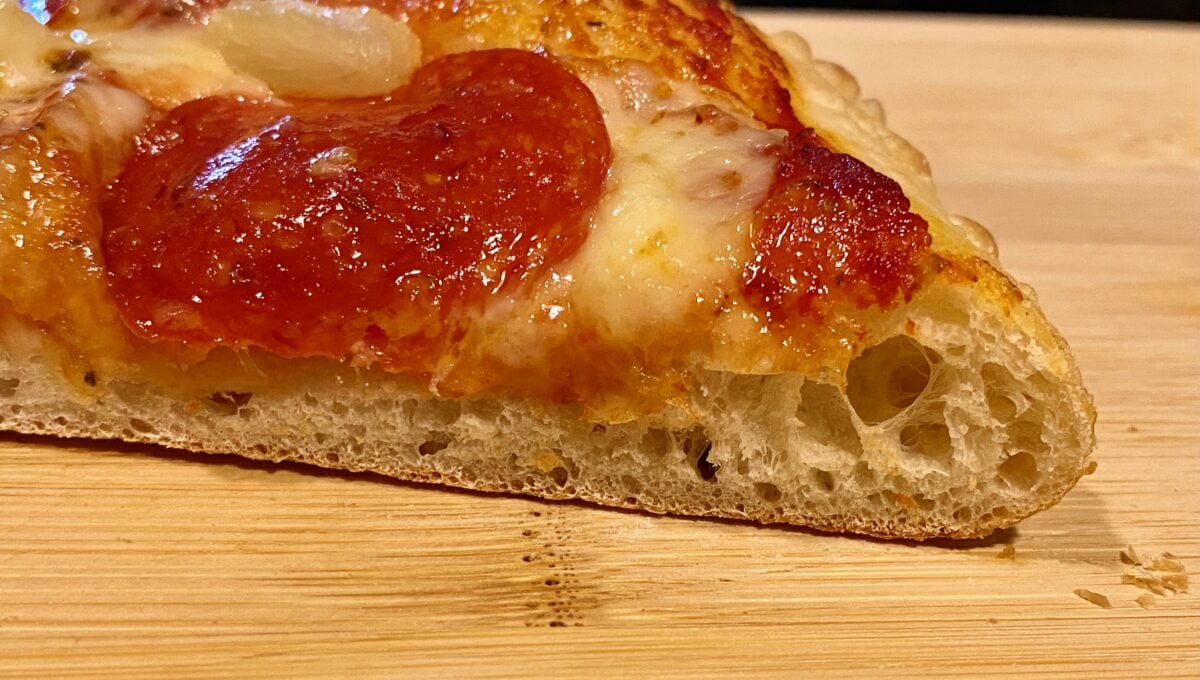
First, it vastly improves the flavor
Cold fermenting the pizza dough is the only way to get great flavor into your pizza crust. This can't be done by resting your dough only a few hours at room temperature.
Refrigerating the pizza dough slows down the yeast activity. Yeast behaves differently at colder temperatures.
The slower fermentation produces more of the desirable flavor compounds and fewer of the sour ones.

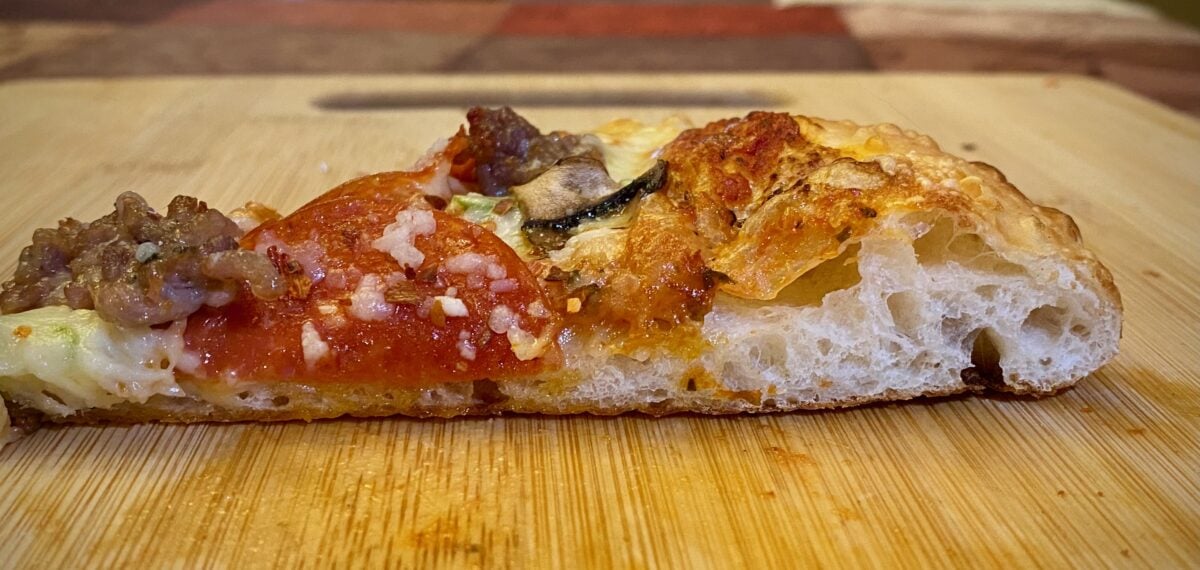
Second, it creates a light and airy crust
Cold fermentation creates a better gluten structure. This results in more bubbles throughout the dough.
This means larger and thinner bubbles can develop in the crust, which creates that airy texture we all crave.
The resulting crust has a thin crunch on on the outside, but soft chew on the inside.

Want more information on the science and benefits of cold fermenting pizza dough? Read this Serious Eats article.
I bet this is complicated, right?
Nope…there is nothing difficult about this recipe.
Actually, it's quite simple...now that you have all the correct ingredients, quantities, and steps clearly outlined.
However, it does require some planning! This recipe requires you to refrigerate the dough for 3 days.
I cover every detail
Throughout the post, I try to include as much detail as possible. At no point should you be wondering “how’d he do that?” or “what do I do next?”.
There are tons of process shots and an accompanying video. I recommend watching the video. It walks you through every step from start to finish.
Ingredients for cold fermented pizza dough
The quantities listed below will yield three 10-inch pizzas. If you want more or less, check out my section 'How to scale this recipe for 1, 2 or 4 pizzas'.
| Ingredient | Amount | Weight | Bakers % |
|---|---|---|---|
| Bread Flour1 | 3 ½ C | 480 g | 100% |
| Water | 1 ¼ C | 298 g | 62% |
| Instant Dry Yeast | ⅓ tsp | 1g | .21% |
| Sugar | 2 ½ tsp | 10 g | 2.1% |
| Salt | 2 ½ tsp | 14 g | 2.9% |
| Extra Virgin Olive Oil | 2 tsp | 9 g | 1.9% |
I strongly recommend using a food scale to weigh your ingredients. Measuring cups and spoons leave leave a lot of room for error.
About the yeast
The big difference in cold fermented pizza dough is how little yeast is used.
Most recipes you see call out for 10 times this amount. This is because they need a fast rise so the pizza can be made the same day.
For cold fermented pizza dough, we require a slow rise. Both the cold temperature and using a small amount of yeast accomplish this.
Yeast Tip: Start with brand new yeast. Nothing is worse than going through all of this only to find out that the yeast you purchased months ago has gone bad.

Now, let’s talk flour
Many will say “I thought 00 (double zero) flour is the best flour for pizza dough?”
This is true...if you have a wood fired pizza oven that can reach 900ºF and will cook your pizza in 90 seconds.
But most of us are baking our pizzas in a home oven, which can only reach temperatures of up to 550ºF.
Bread flour is your best choice when baking pizza at these temps.

A few notes about the recipe
- This recipe uses a stand mixer with a dough hook attachment.
If you don't have one, I recommend buying this one. You'll be making this dough so often, you'll get your money's worth. If not, you can always mix everything in a bowl then knead by hand.
- Be precise with the flour and water measurements. These two ingredients are critical to achieving the proper hydration level. More on the importance of this later in the post.
- DO NOT ADD FLOUR to your hands or workspaces, unless instructed to do so. Additional dustings of flour reduces the hydration level of the dough.
Enough talking
Let’s make some pizza!
How to make cold fermented pizza dough
I hope you find these instructions very simple to follow. If you have any questions, concerns or suggestions, please leave a comment.
Start by adding all the ingredients together (except the oil)
In your stand mixer bowl, add the ingredients in the following order:
- Water (~105 ºF)
- Salt
- Sugar
- Flour
- Instant Dry Yeast
Olive Oil- NOT YET
Simply add each ingredient on top of the previous one.
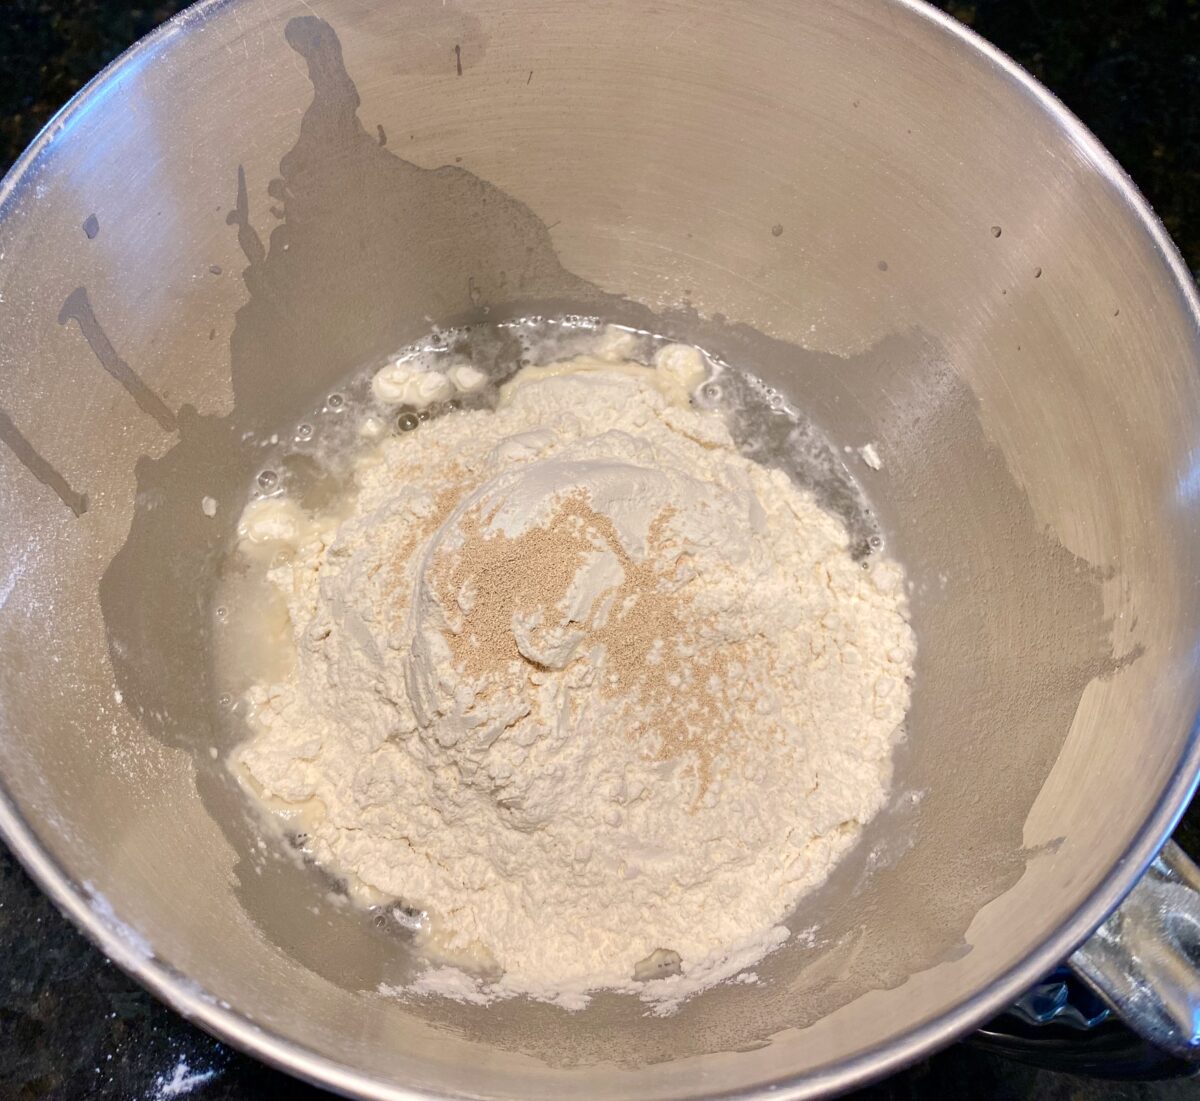
Feel free to whisk the water, salt and sugar until dissolved before adding the flour and yeast to ensure a more even distribution of these ingredients.
Next, turn on the stand mixer
Lower the dough hook and set your mixer to level 1 (or stir level).
Allow this to mix for a total of 2 minutes.
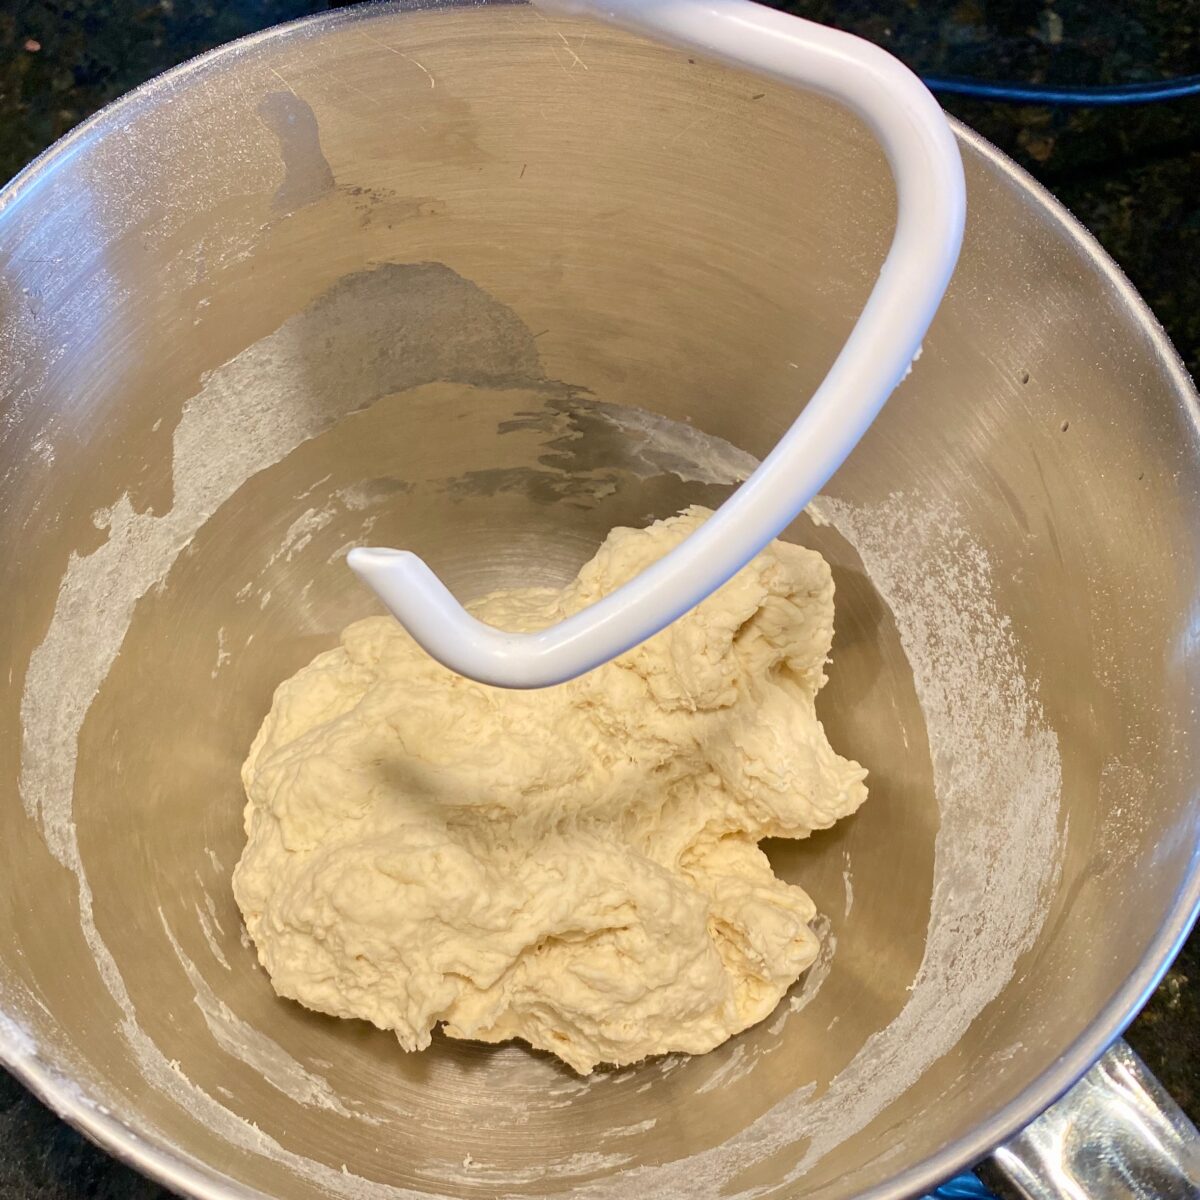
Now add the olive oil
While the mixer is still running, slowly add the olive oil.
Once all the oil has been added, allow the mixer to run another 2 minutes (again, on level 1).
After adding the oil you may notice that the dough ball seems to just spin around. Be patient: it will start to mix into the dough.
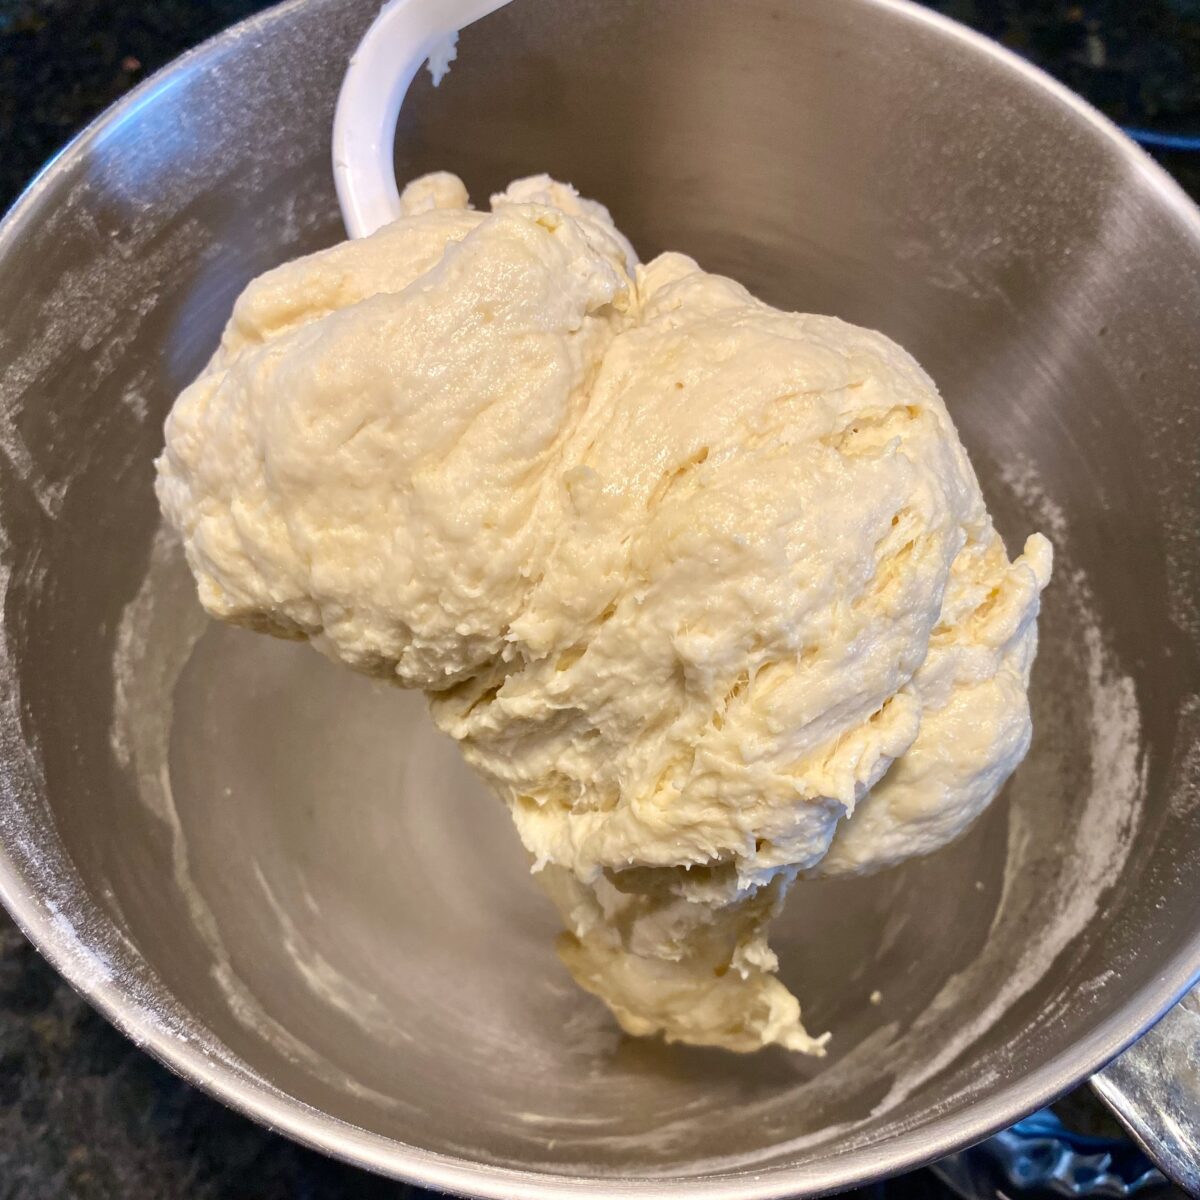
Why add the oil later? Adding the oil later allowed the flour to fully absorb the water during the first 2 minutes of mixing. This results in an improved dough consistency and uniformity.
Increase the mixing speed
At this point all the ingredients have been added and the mixer has run for a total of 4 minutes on level 1. Now it's time to increase the mixing speed.
Turn the mixer to level 2 and let this run for 8 minutes.
Adjust the dough periodically during these 8 minutes
To ensure the dough gets thoroughly kneaded, I like to reposition the dough a few times (3 to 4 times) during this 8-minute kneading cycle.
Simply stop the mixer and remove the dough from the hook. Then, reposition it in the bottom of the bowl and turn the mixer back to level 2. (watch the video to see it in action)
After 8 minutes, the dough should look something like the image below:
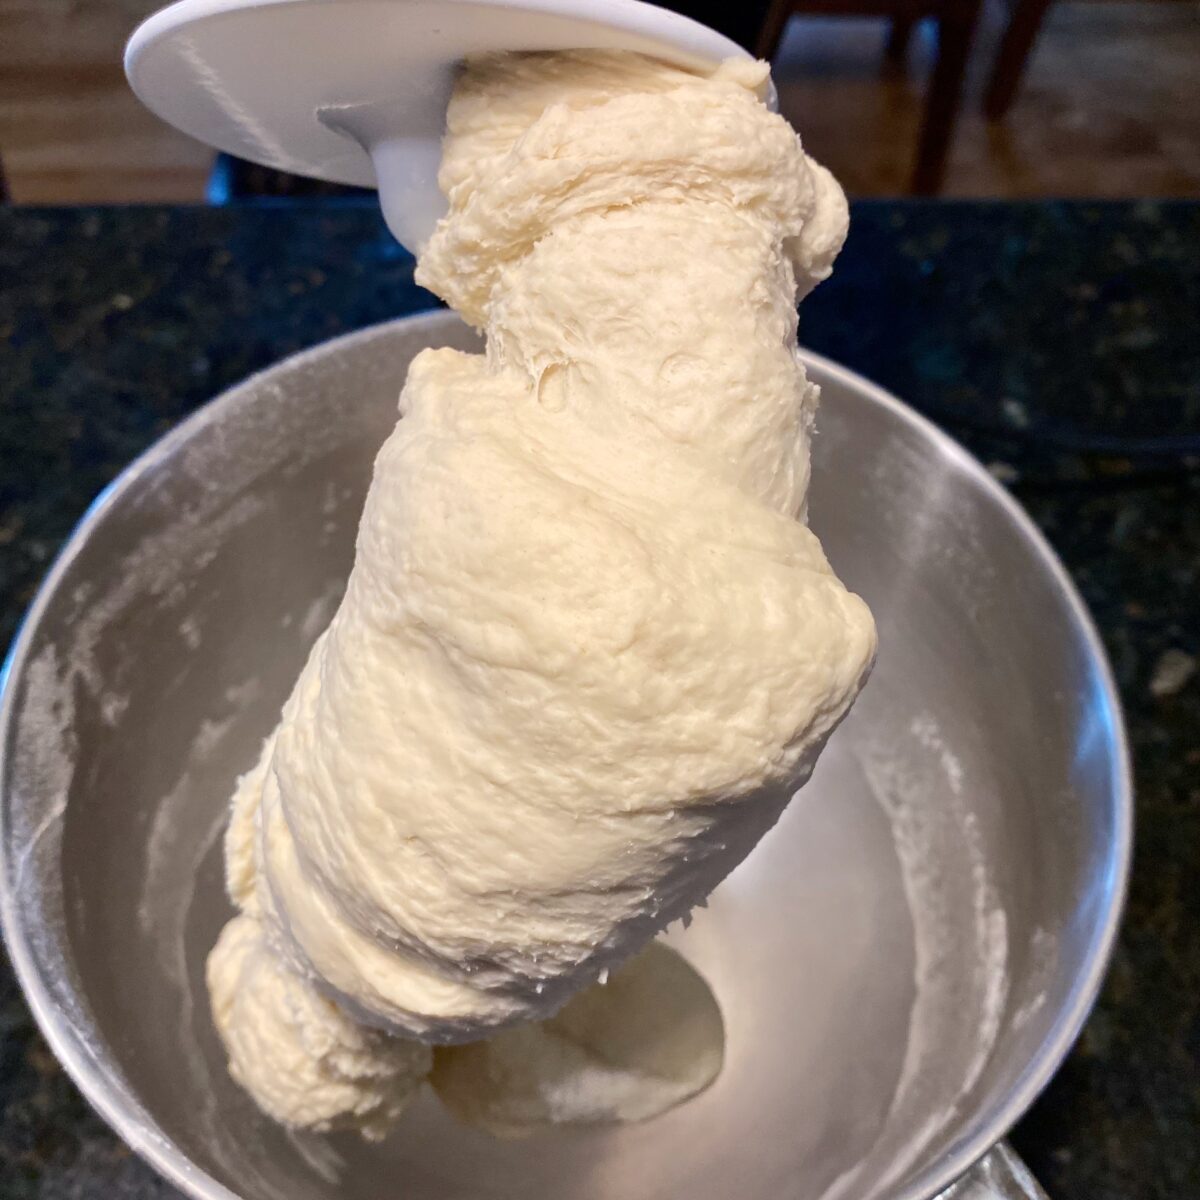
The dough should not be sticking to the sides or bottom of the mixing bowl! If it is, add another tablespoon of flour and continue mixing. Repeat as necessary.
Remove the dough
Using your hands, remove the dough from the bowl and hook and place it onto a clean smooth work surface. DO NOT ADD FLOUR.
Let the dough rest 5 minutes (uncovered) so the gluten can relax and become more pliable. Right now, the gluten is tight after the aggressive kneading we just put it through.
You will notice that the dough is a bit wet and tacky, but it shouldn't be sticking to your hands.
A wet dough makes the best pizza crust
A well-hydrated dough is another critical element to achieving a light, airy pizza crust.
The water softens the gluten strands in the dough, which allows for larger air pockets to form inside your crust.
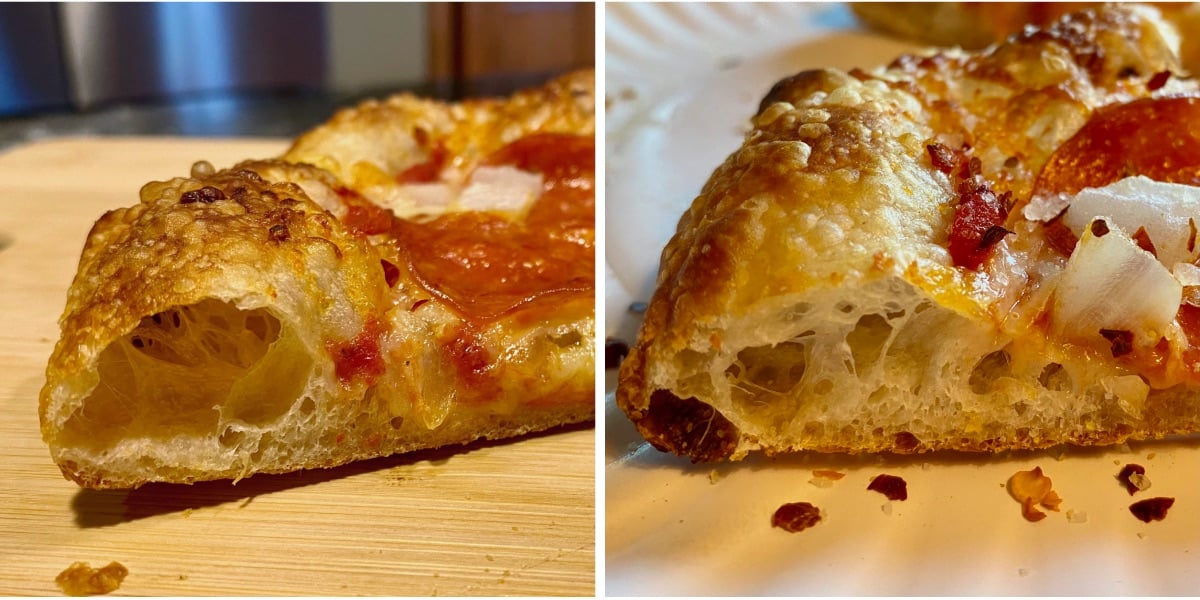
Water is also a major factor to achieving the soft, chewy inside part of the crust.
As a pizza bakes, the water in the dough evaporates. If you have low hydration, your pizza crust will come out hard. A well hydrated dough prevents this from happening.
How do you calculate the hydration level? Easy! It's the percentage of water used in relation to the flour. For example, this recipe's hydration level is 58% (280g water / 480g flour x 100)
Ok, now back to making our pizza dough...
Portion the dough into thirds
After the dough has rested 5 minutes, it's time to portion the dough into roughly 3 equal pieces. Each piece will become a future pizza. (Or use your food scale to get exact size pieces)
You can use a bench scraper, knife or just tear the pieces from the main dough ball using your hands. If you want them all the exactly the same size, use a food scale.
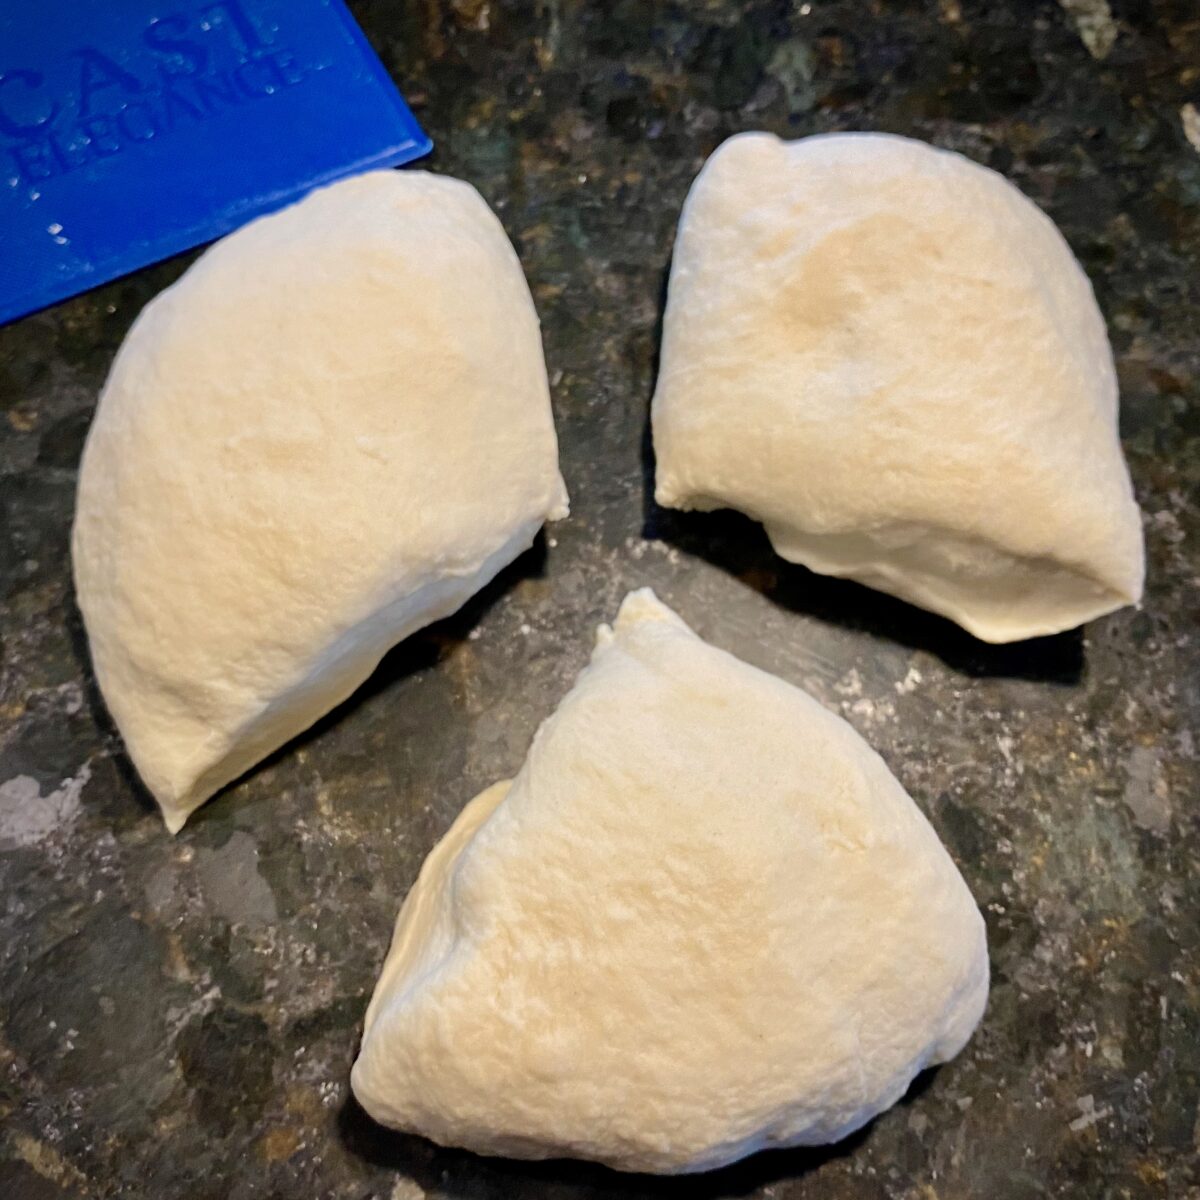
Form the pieces into dough balls
A dough ball should have a smooth top that is formed from dough that has been stretched across the top. The seams or edges from this stretched dough should be pinched and sealed on the bottom side.
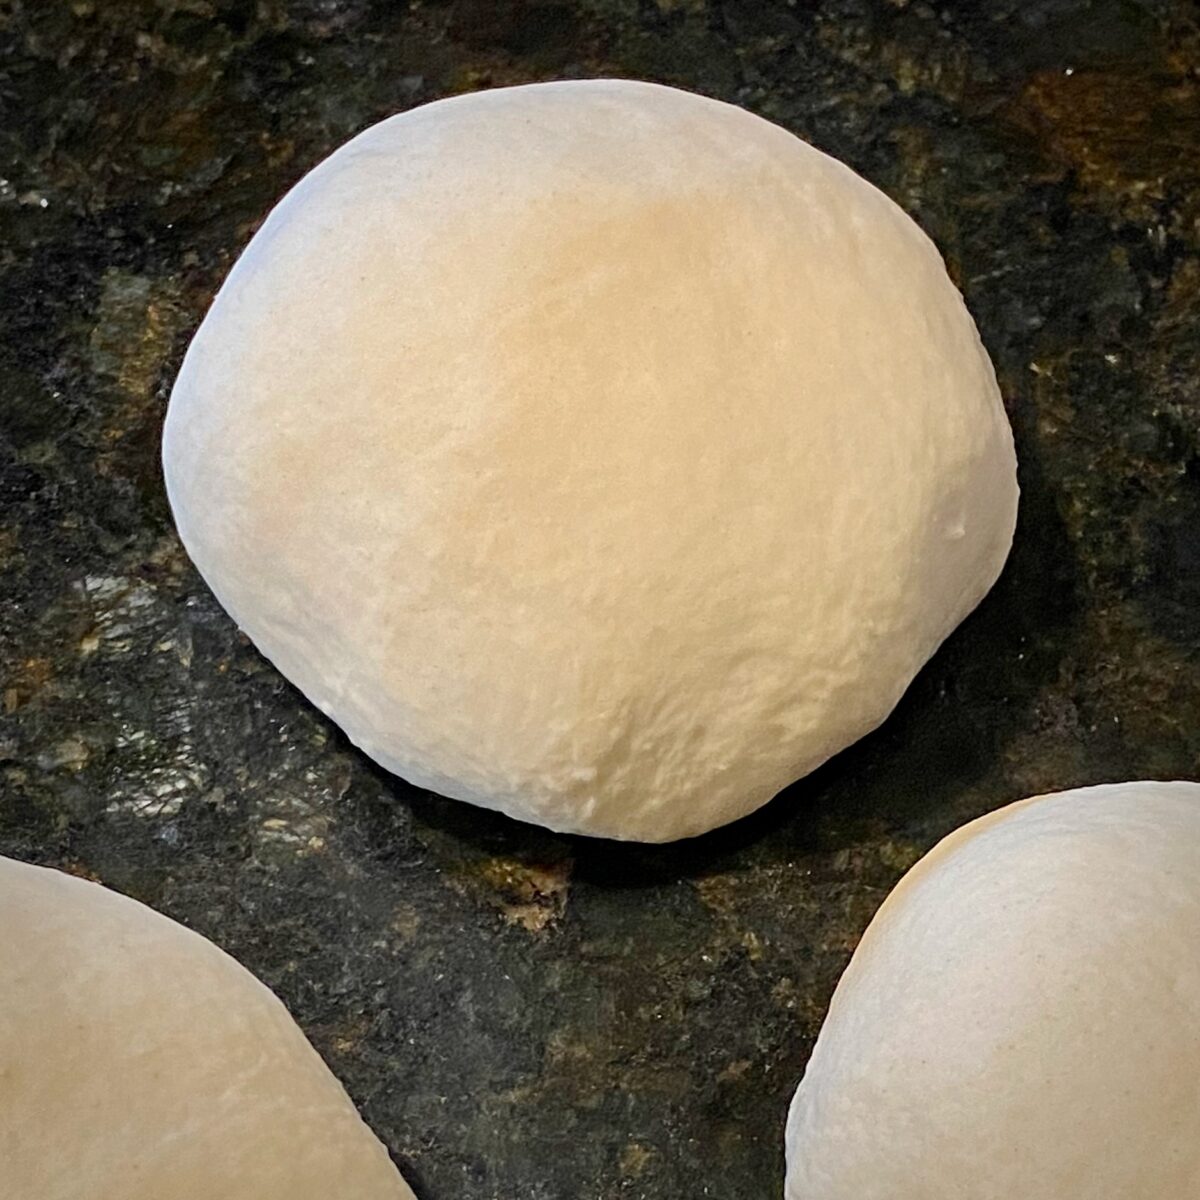
To do this, start by positioning one of the dough pieces in front of you.
Take the edge closest to you and fold it away from yourself: basically, you are folding it in half. Then, press the two edges together.

Now, lift it up and turn it 90º with the seam facing up.
Then, fold it the same way you did before. Take the edge closest to you and fold it away from yourself. Press the two edges together again.

Follow this same process two more times for a total of four folds, each time turning the dough 90º, seam side up, and folding away from you.
After the 4th time, don't rotate the dough 90º. Instead, turn the dough so the seam is facing down against the counter.
Now, place your thumb and forefinger from both hands on each side of the dough ball.
Use these fingers to press down and, at the same time, begin to lift up the dough ball. This will allow you to finish pinching the dough underneath itself.
Turn the dough ball over and finish pinching the seams together.

Last step is to simply place the dough ball on the counter, seam side down, and roll it around on the counter a few seconds with your hand to smooth out the seam on the bottom. (watch the video to see this in action)
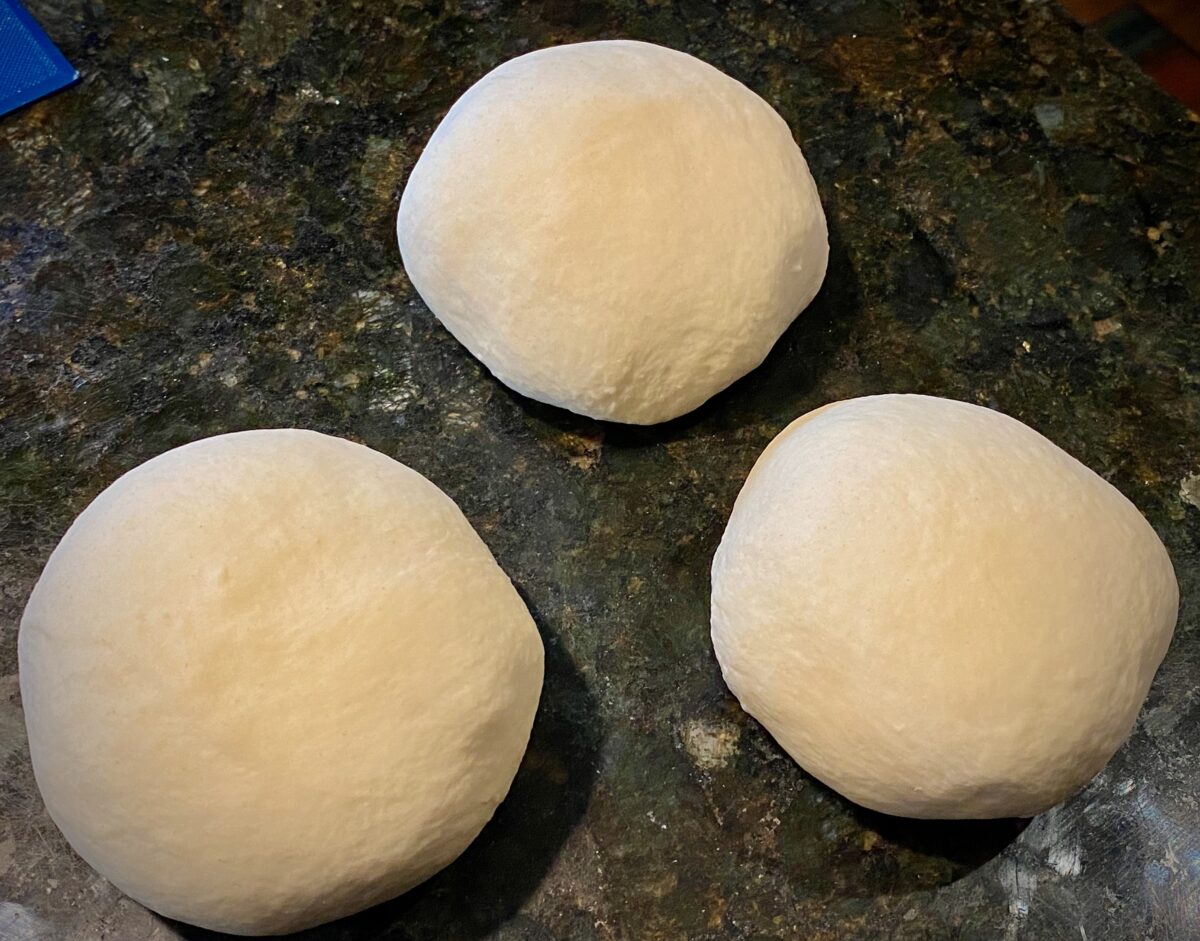
Time for cold fermentation
Now is the time to freeze any dough balls that you don't want to bake. Check out the section below on "How to freeze pizza dough".
First phase - place in refrigerator uncovered
The dough balls need to go into the fridge - UNCOVERED - for 2 hours to start the cool down process.
Uncovered dough will cool down quickly and at a consistent, uniform rate. If we covered right away, the heat from the dough would be trapped. This would accelerate the fermentation process and could result in overproofed dough and condensation issues.
To begin, place each dough ball, seam side down, into a lightly greased, medium-sized bowl.
It's best to use a non-stick cooking spray to grease your bowl, then brush it around the bottom and sides to get even coverage.
After placing the dough balls into the greased bowls, zap the tops of the dough with the same non-stick spray. Again, brush it around for even coverage.
Oiling the tops prevents the dough from drying out and forming a skin during this uncovered phase.
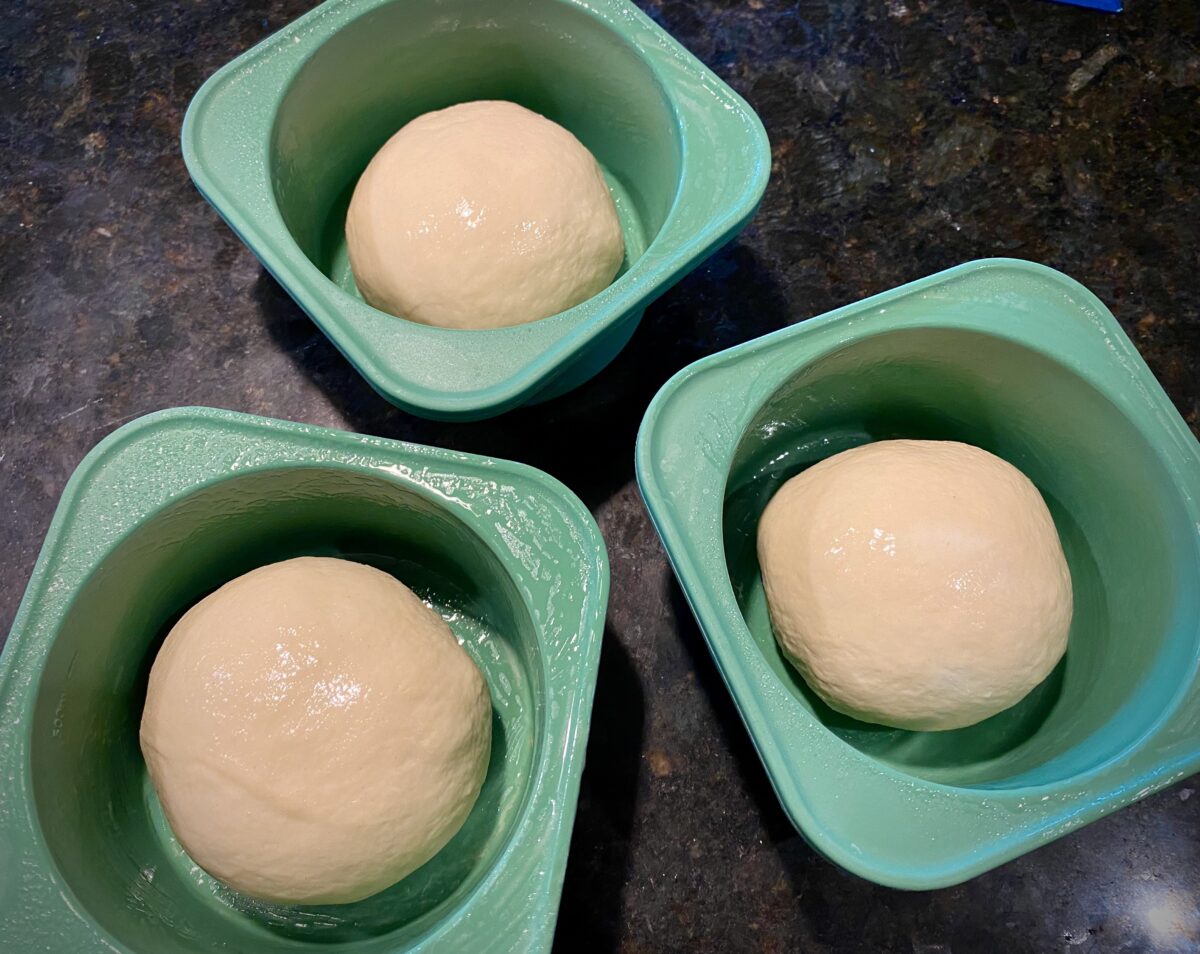
Once oiled, place the dough ball bowls into the fridge for 2 hours.
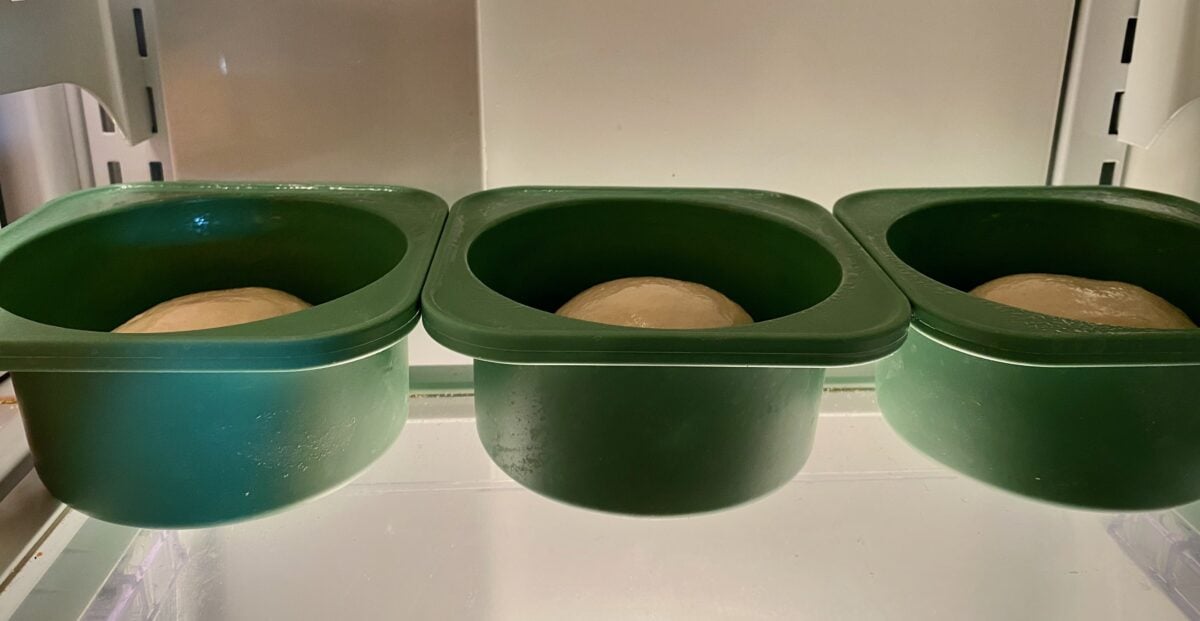
Second phase - Cover the dough and REFRIGERATE FOR 3 DAYS
After the uncovered dough has been in the fridge for 2 hours, simply cover the bowls and place back into the refrigerator to cold ferment for 3 days.
You can snap on the lid or cover tightly with plastic wrap.
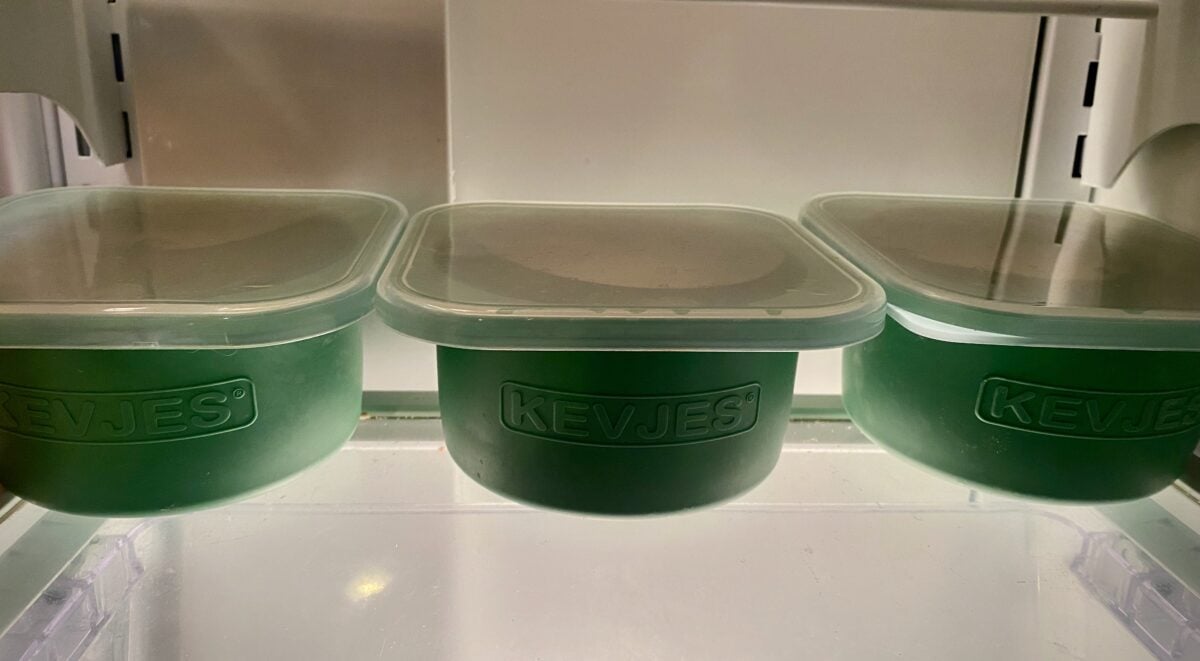
3 days of cold fermentation produces the most flavorful crust.
Pizza Day!
After anxiously waiting through the cold fermentation time, the day has finally come where you get to enjoy the fruits of your labor.
Remove dough 2 hours before baking
Allow the dough to rest at room temperature for 2 hours before baking. Keep them covered and in their bowls during this rest time.
This allows for a final rise and will make the dough easier to stretch.
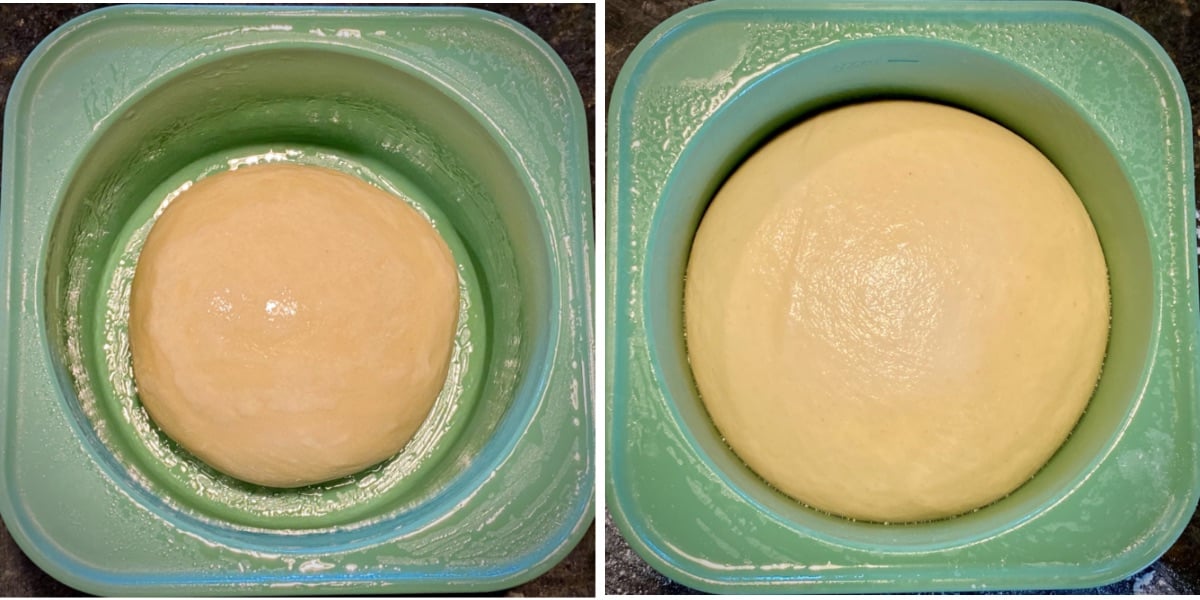
Below is a picture showing how the dough started (before cold fermentation) and finished (after the 2 hour rest at room temperature).
Understand that there is a top and a bottom
When you're shaping a pizza crust from a cold fermented dough ball, a top crust and bottom crust has been established.
- The top side of the dough in your bowl will be the top of your pizza crust.
- The dough that is against the bottom of the bowl will be the bottom of your pizza crust.
Maintain this top and bottom orientation throughout the stretching process and, most importantly, when you're topping your pizza.
Remove the dough from the bowls
When you're removing a dough ball, it's important to keep its shape and not lose any of the gases that have built up over the last 3 days. The process below has proven to be the best way to do this.
After 2 hours of resting at room temperature, we need to remove the dough from the bowls so we can begin to shape them into pizzas.
We begin by applying a light dusting of flour over a clean, smooth workspace. Most likely, this will be your countertop.
Did you notice that this is the first time additional flour has been introduced to the dough?
Remove the cover and sprinkle some flour on top of the dough ball. Spread it around so it is well covered.
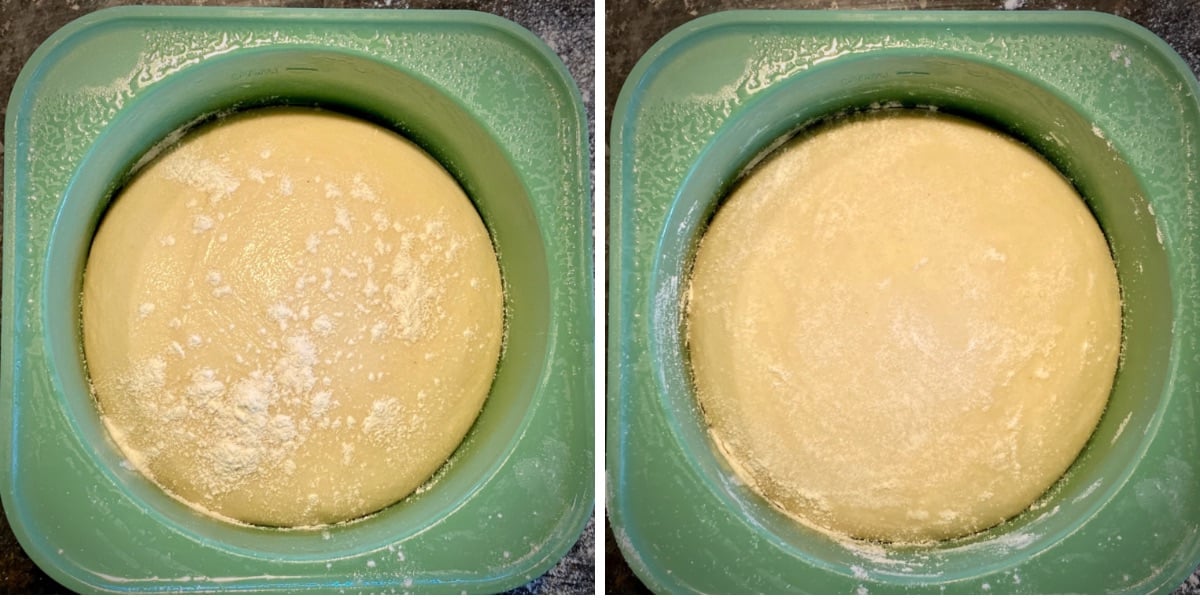
Now turn the bowl over and hover it about 2 inches above your floured workspace.
After about 10-15 seconds, the dough should plop out. Thank you non-stick cooking spray!
Sprinkle more flour on the bottom side (that is now facing up). Then spread it around with your fingers until it is well covered.
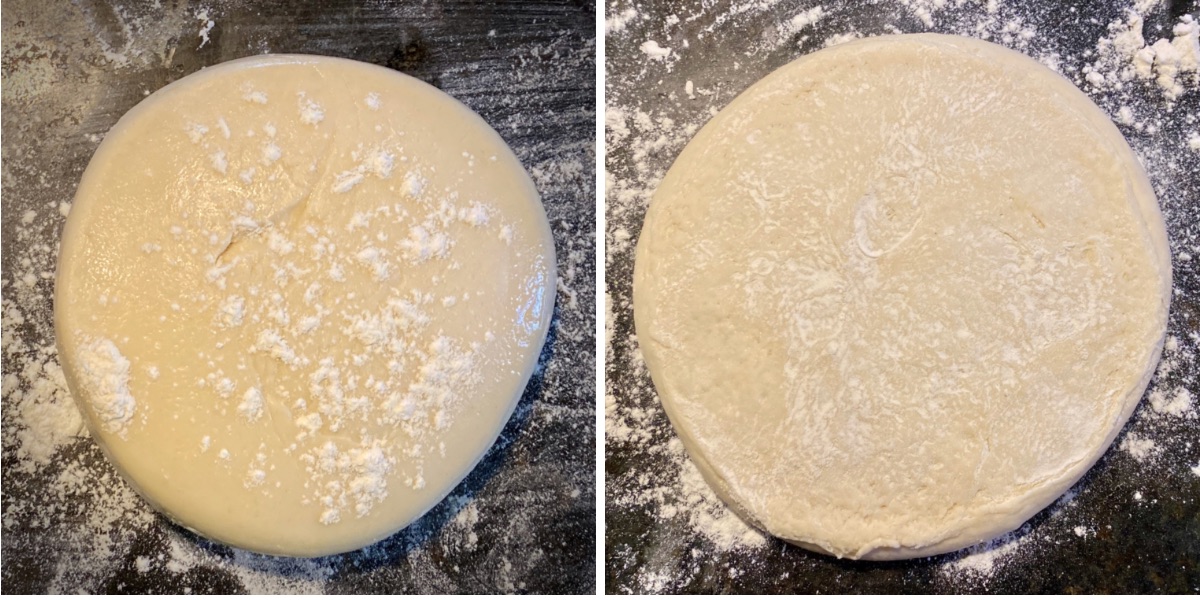
Inspect both sides: make sure they are well covered in flour, then shake off any excess.
Place the dough ball back onto your floured workspace, bottom side down.
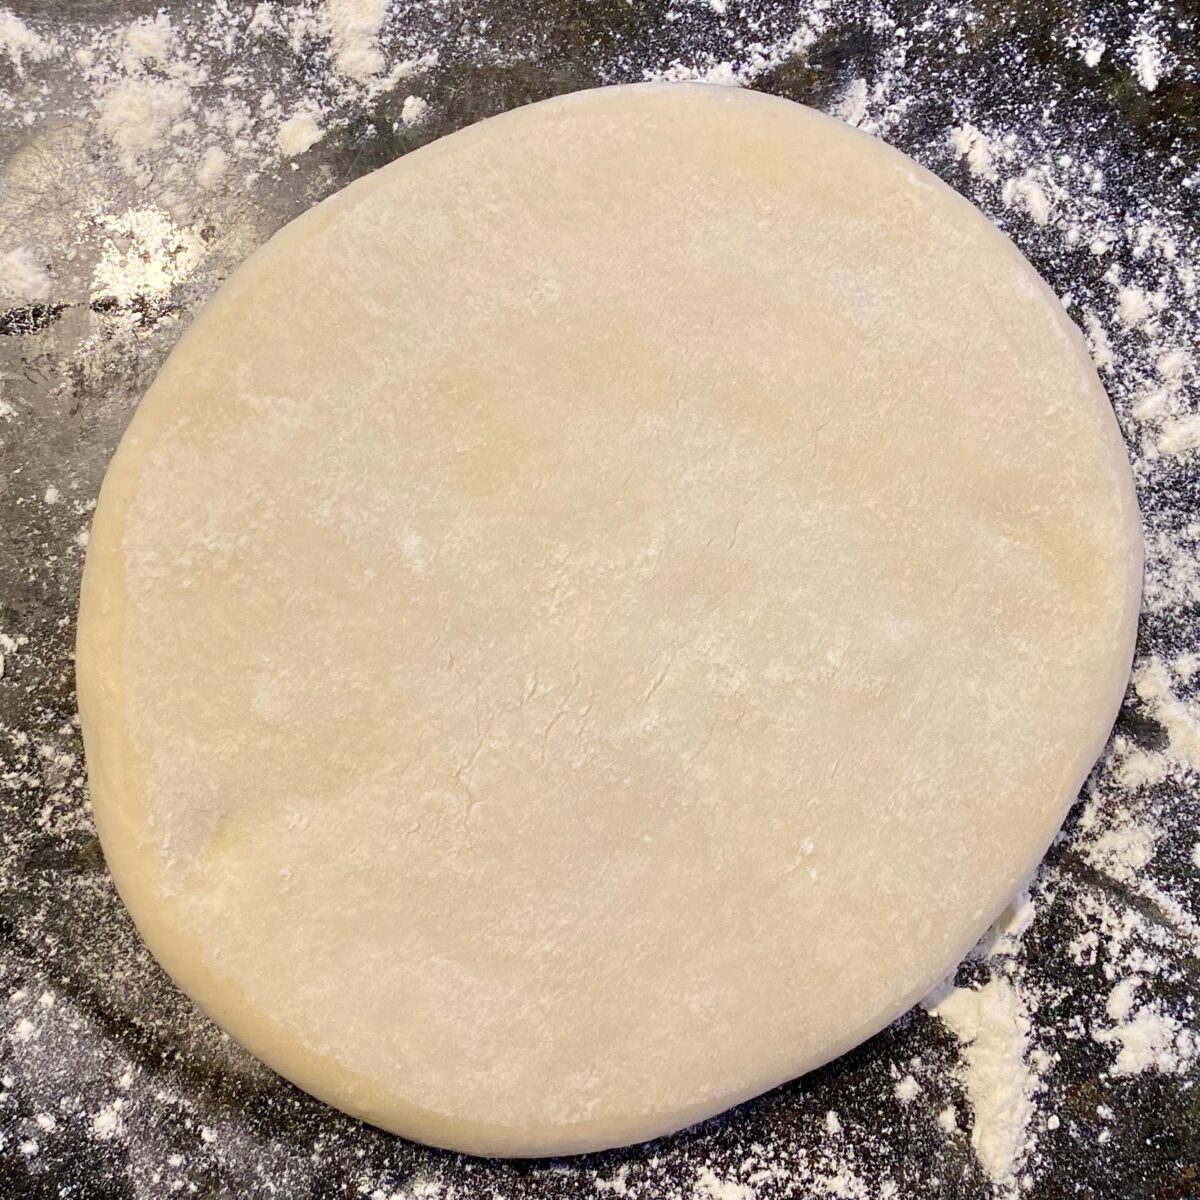
Stretch the dough to your desired size.
Notice that I said to STRETCH the pizza dough. Do not use a rolling pin. Stretching the dough allows us to retain more of those flavorful gas pockets we worked so hard to develop.
Using your finger tips, start pressing down gently in the middle of the dough ball, working your way outwards.
Do not press right up to the edge. You want to leave about a ¾ inch lip so that can develop into a puffy crust.
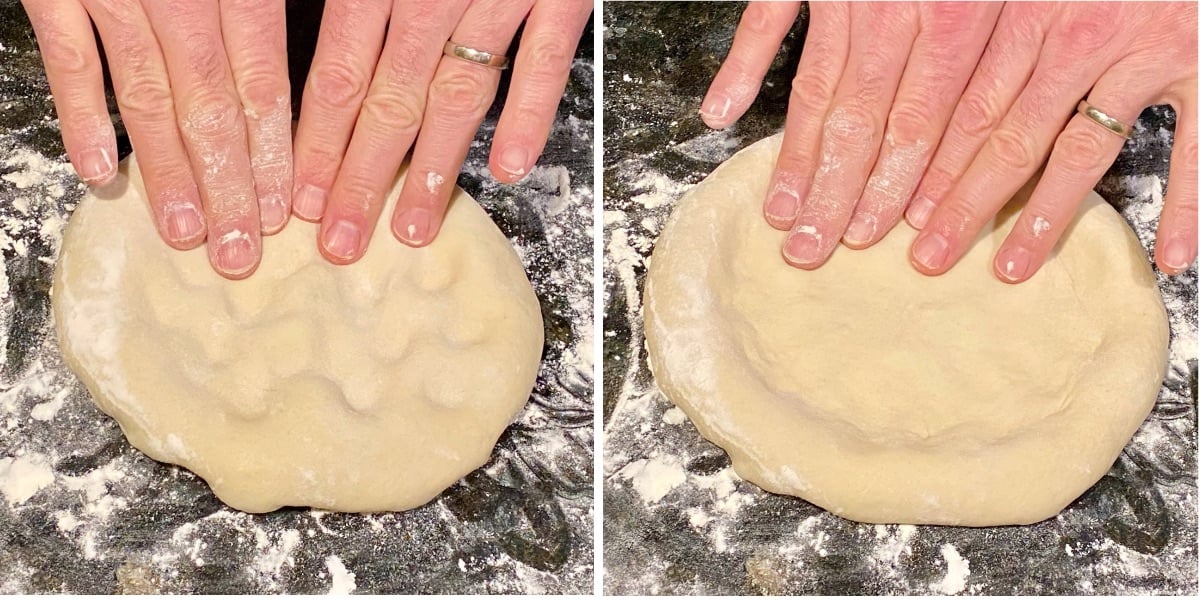
Each time, slightly spread your fingers out a bit to stretch the dough. Rotate the dough a ¼ turn periodically.
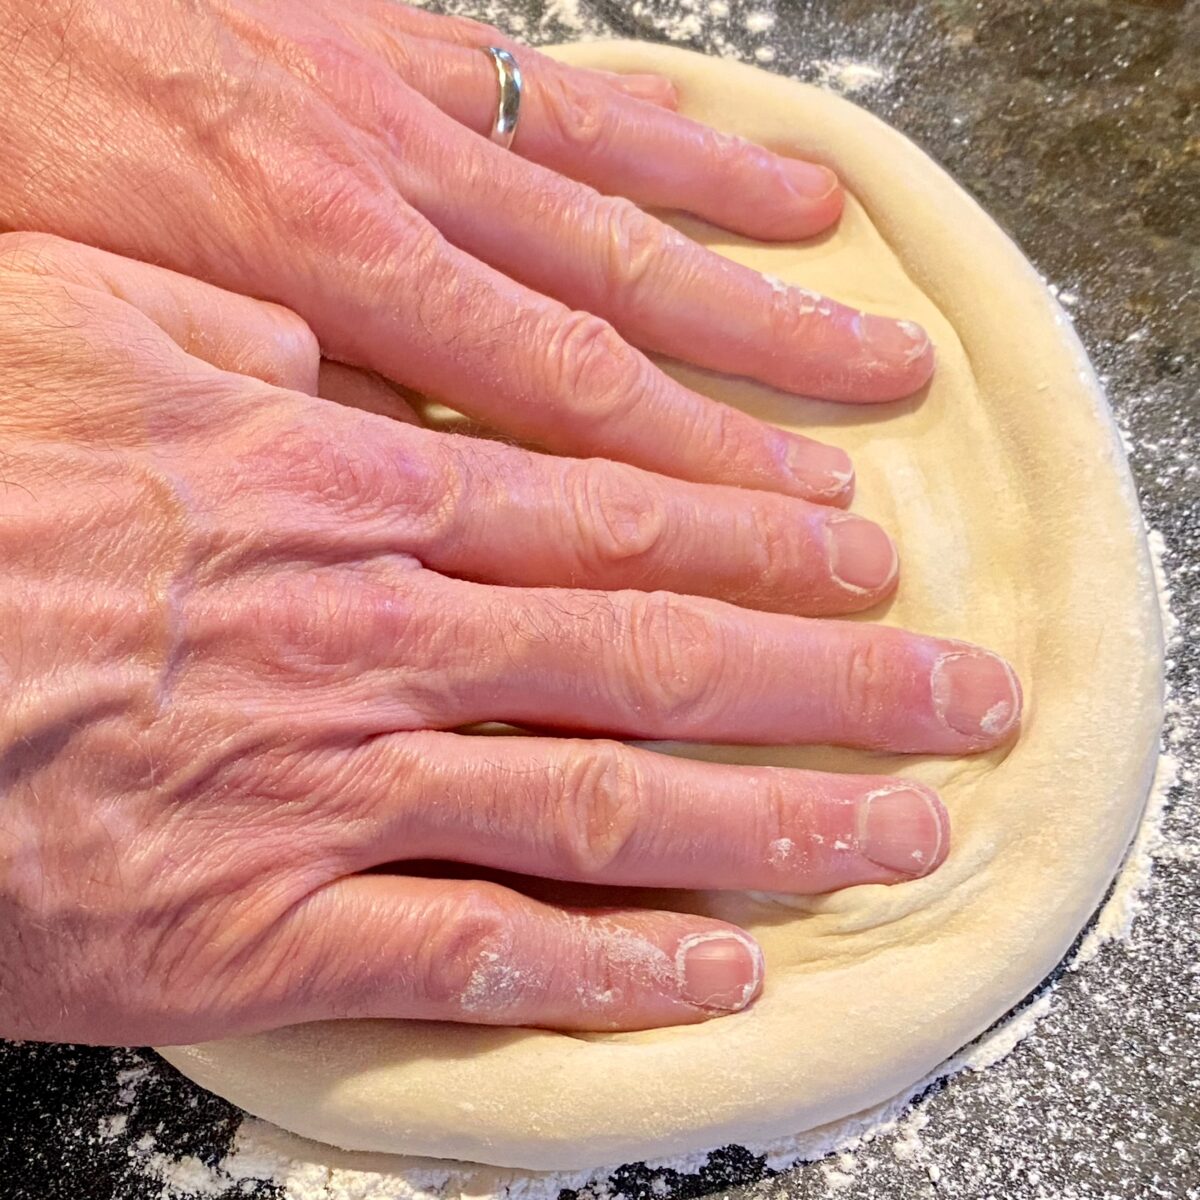
Continue this outward pressing movement, always working from inside out and rotating the dough to keep the crust a uniform thickness and circular shape.
Once the dough reaches about 6-7 inches in diameter, I like to finish stretching the dough using the top side of my knuckles.
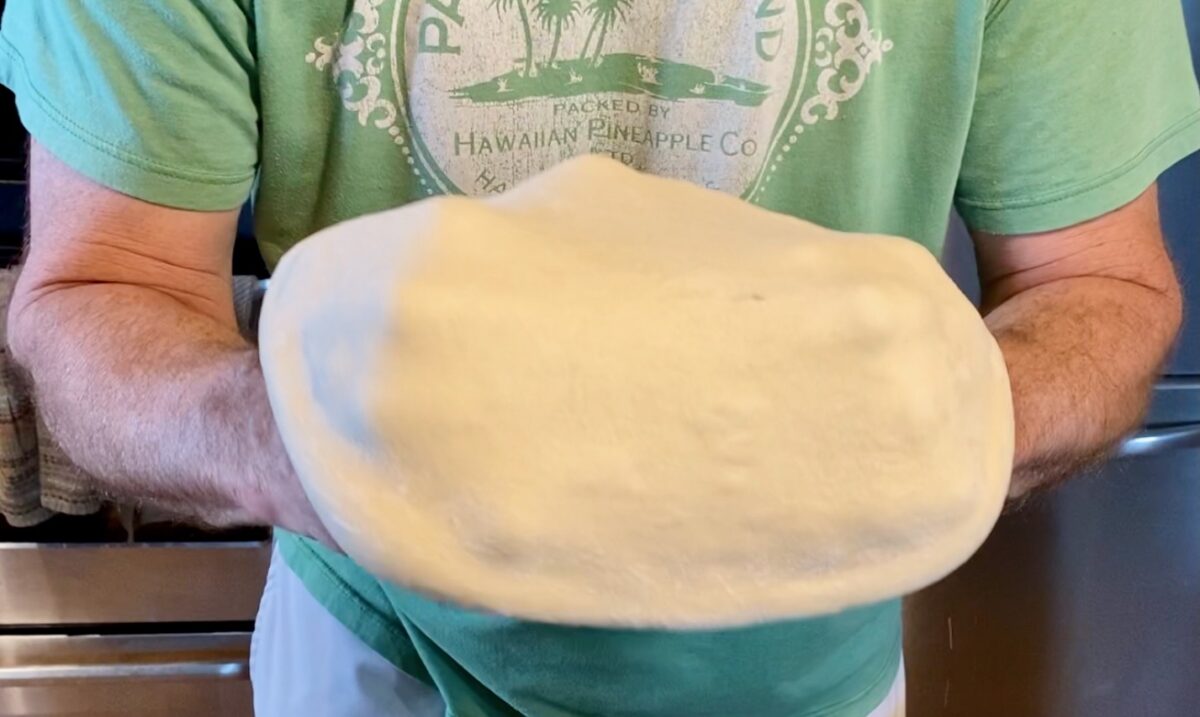
After each stretch, I gently rotate the dough a little bit and continue to stretch it this way until I reach my desired size.
There are lots of ways to stretch pizza dough. Check out this video to find the one that works best for you.
When done, you should notice some nice air pockets forming in the crust.
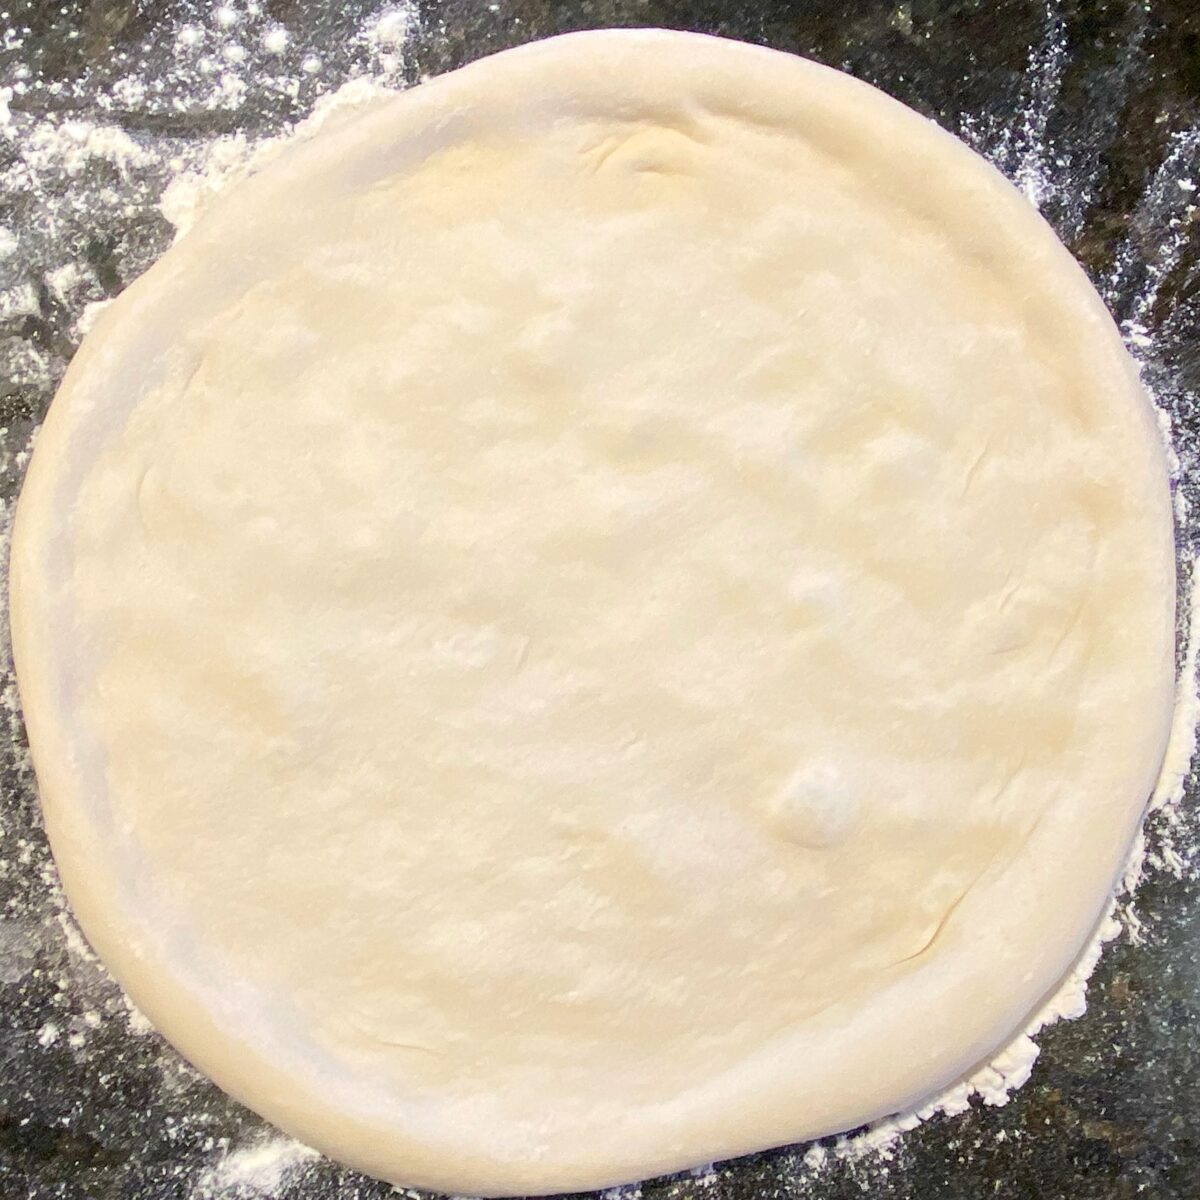
What are you baking your pizza on?
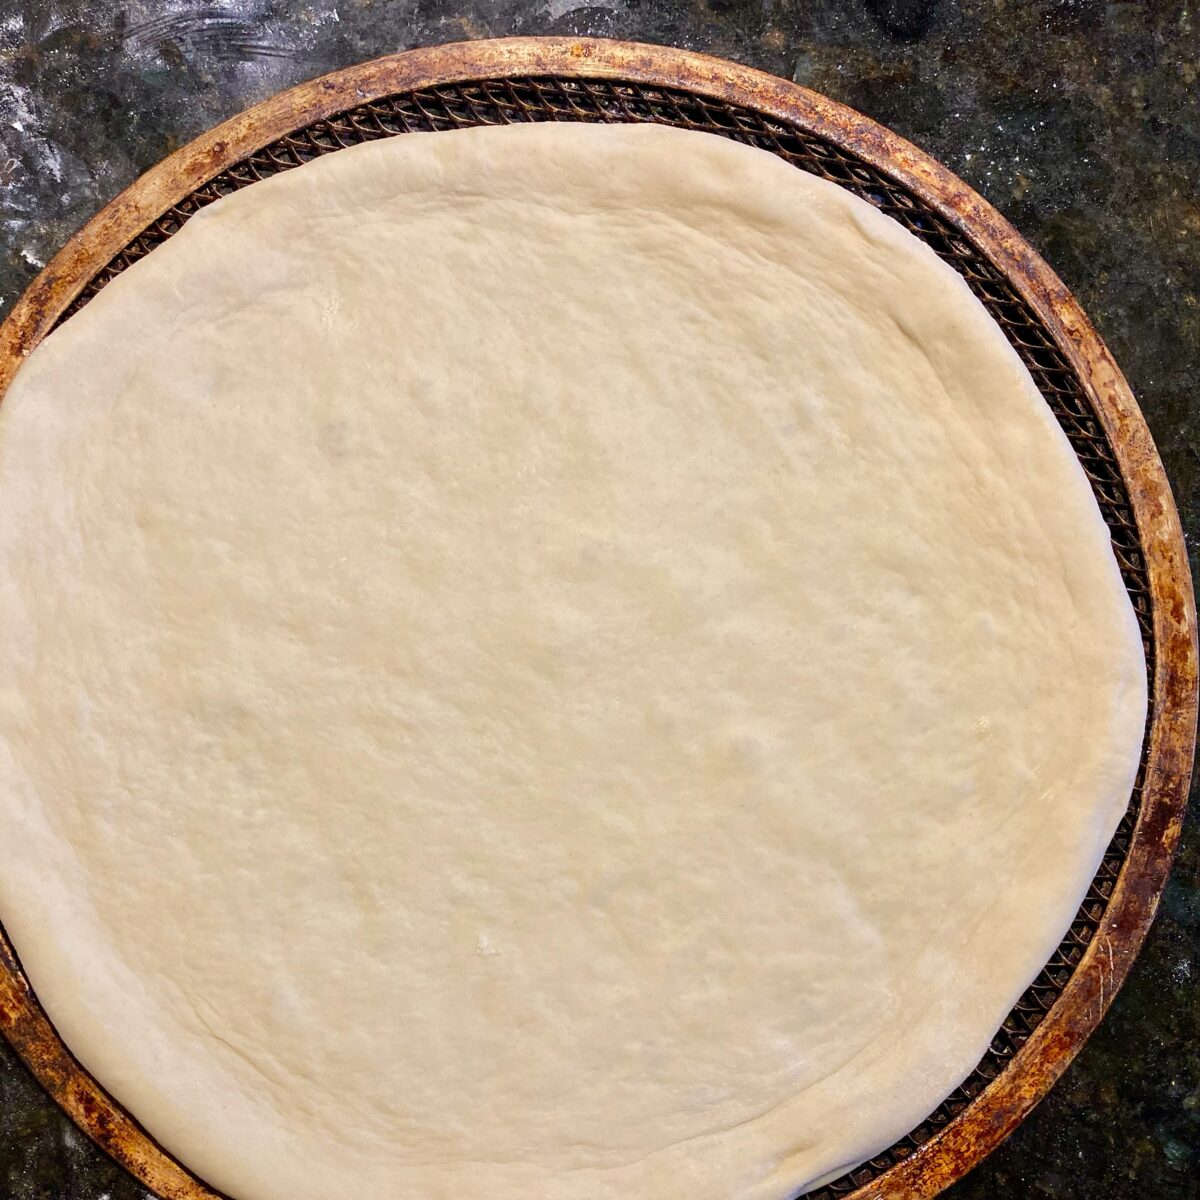
I bake my pizzas on aluminum pizza screens.
Do you prefer to bake your pizzas on a stone or pizza steel? Good news! This pizza dough cooks perfectly on those products too.
After I stretch my dough to the desired size, I place it on the pizza screen before topping.
Tips for topping your pizza
Before you start piling on the toppings, let's review some tips, recommendations and words of caution.
Less is more
I get it...Finally you're in charge of how much cheese goes on your pizza.
But trust me, less is more.
Resist the urge to load on the sauce, extra cheese and mountains of meat.
The base of this crust is thin and will not support tons of toppings. Just put on normal amounts to start. You'll be happy you did.
Besides, you have just made an impeccable crust...let it shine!
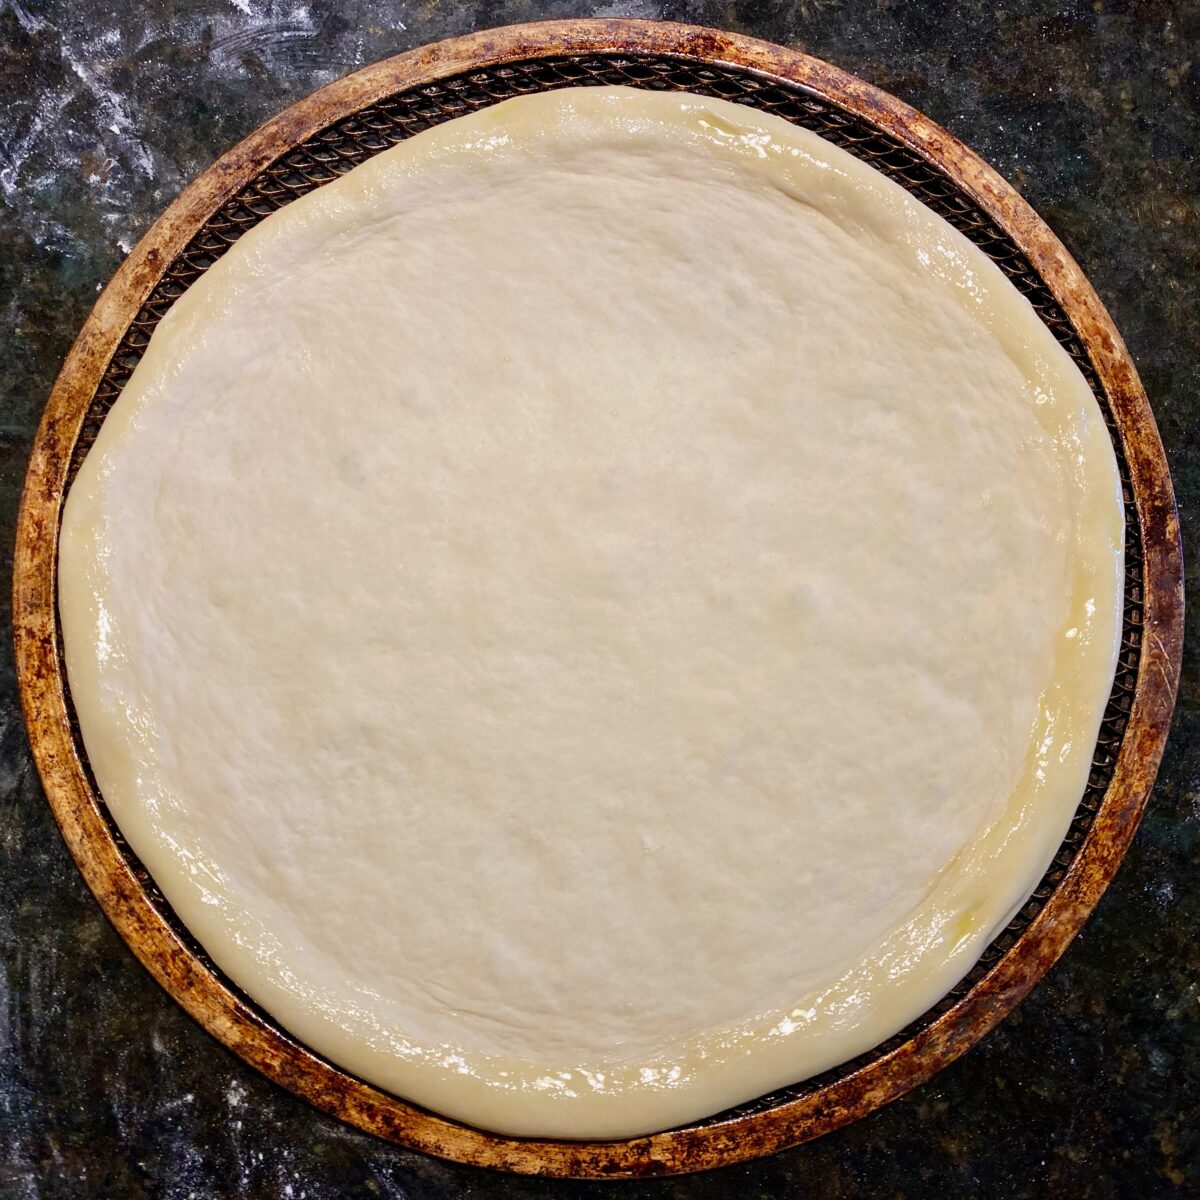
Olive oil the outer crust
Before adding any toppings, brush some olive oil around the outer crust.
This will add good color and provide extra crunch after it is baked.
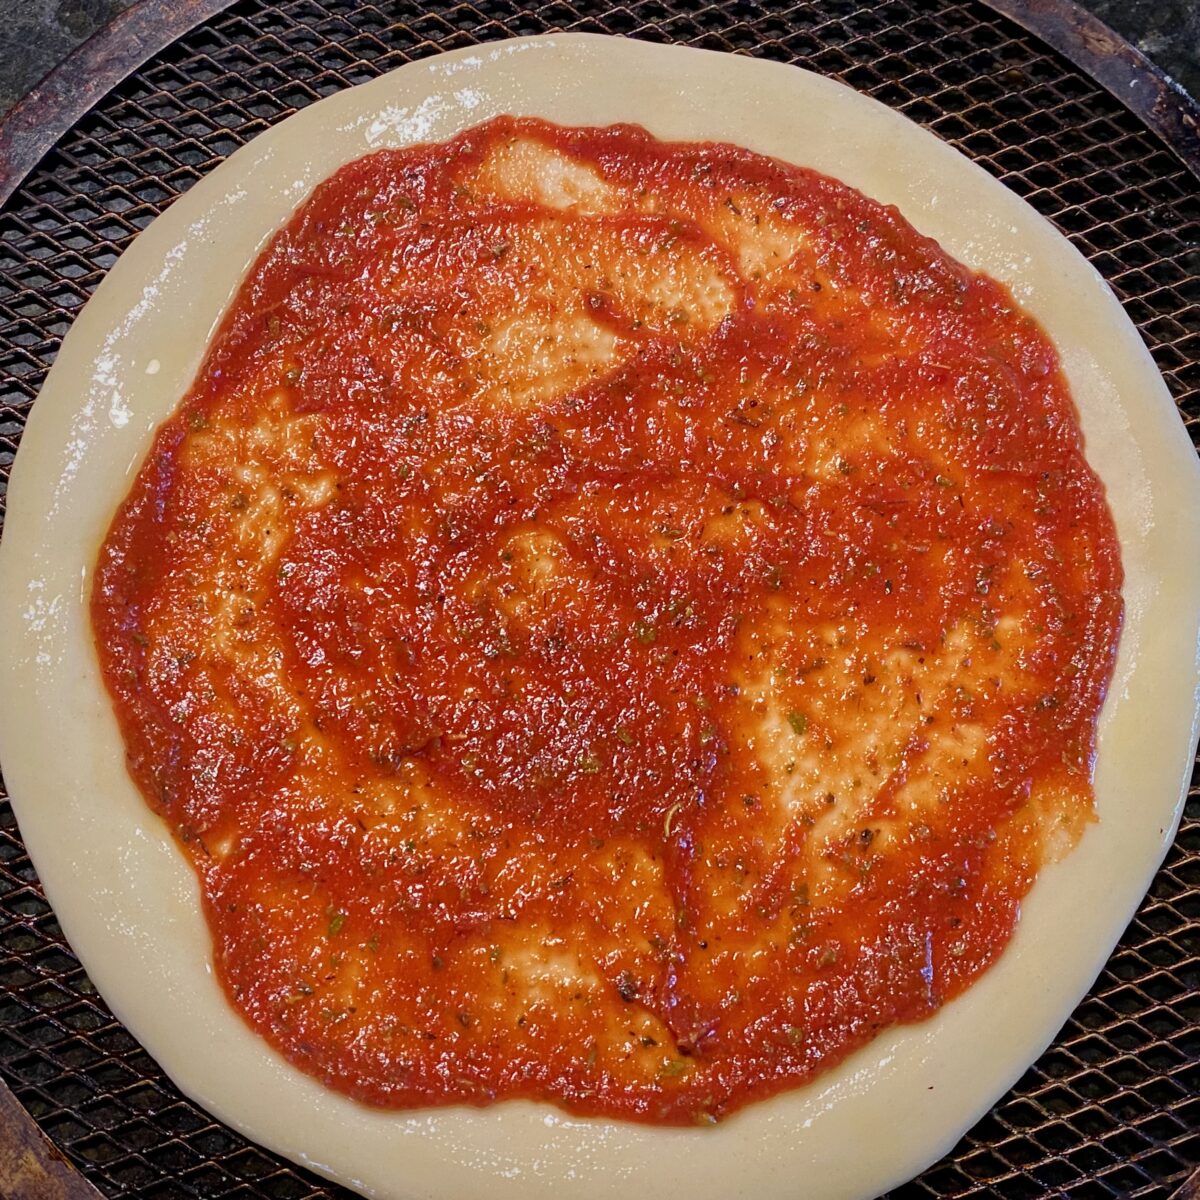
Add the pizza sauce
Regardless of the sauce you use, make sure it isn't too watery. Watery sauces run the risk of making your crust soggy.
My Zesty Pizza Sauce recipe is the perfect thickness, full of flavor and done in under 5 minutes.
Add the cheese
If you want the best pizza, always grate your cheese fresh from a block.
Whether you use mozzarella, provolone, brick, jack, or any combination, make sure to freshly grate it.
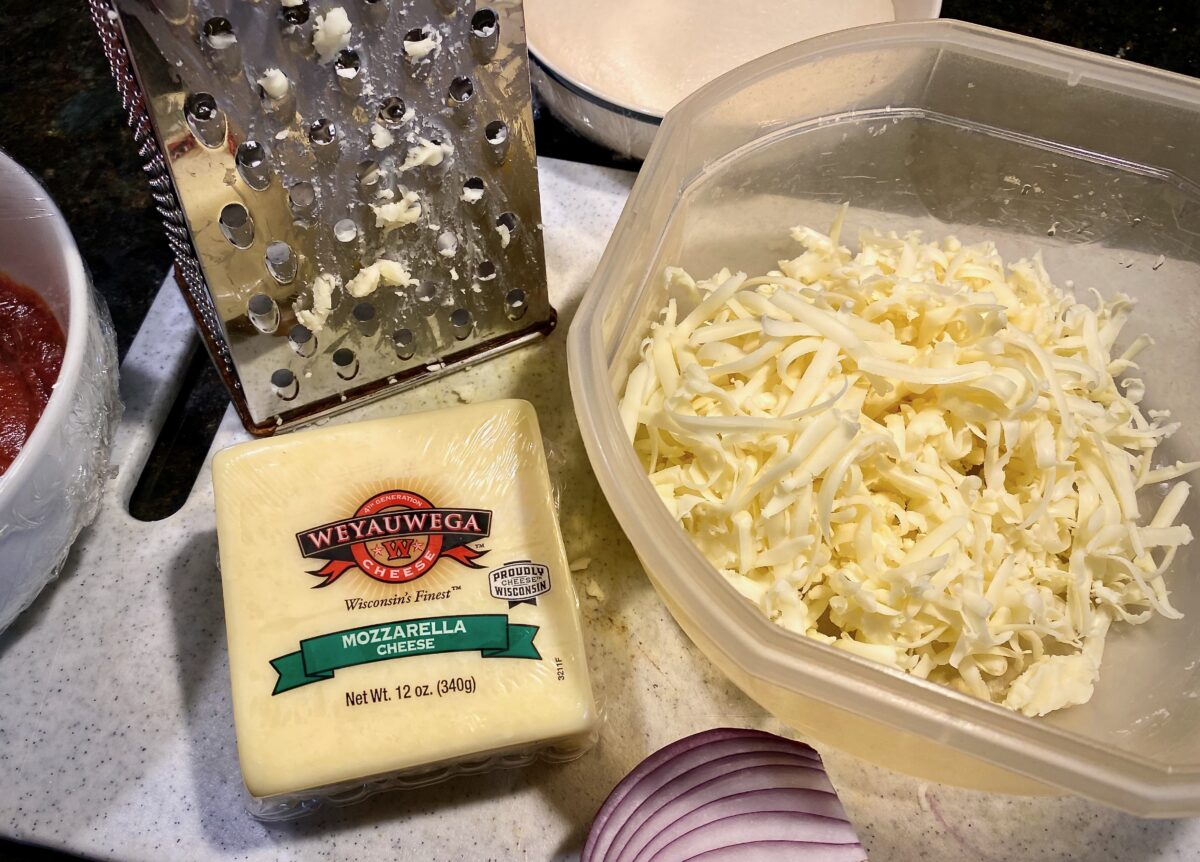
Whatever you do, DON'T USE PRE-SHREDDED CHEESE!
Did you know that the cornstarch added to pre-shredded cheese to prevent clumping also inhibits the ability for the cheese to melt properly? Now you know. Many a cheese sauce has been ruined by pre-shredded cheese!

Finish with the meats and veggies
I always add my meats on top of the cheese, then veggies last. There is one exception to this, though.
If I am adding raw sausage to my pizza, I always add that last. (Try my Hot Italian Sausage Recipe)
Even though I am adding small pieces (~¾ inch in size), I want them exposed to the hot air as much as possible to ensure they cook through.

How to bake the pizza
If you are baking your pizza on a stone or a pizza steel, follow the pre-heating and baking recommendations for those products.
Prepare the oven
Position the cooking grates
Set one rack on the lowest level and another rack on the highest level in your oven.
The lowest level will cook the pizza while the top rack will be available to you, should you want to broil the top a bit more at the end.
Pre-heat the oven
Pre-heat your oven to the hottest temperature it allows. For my oven, that's 550ºF.
Once the oven is pre-heated, wait an additional 15 minutes before adding the pizza. We want the oven thoroughly hot when the pizza goes in.
Baking Tip: Pre-heat your oven after the dough has rested at room temperature for 1 ½ hours. This will ensure your oven is good and hot once your dough has rested the full 2 hours.
Load the pizza in the oven
Place your pizza (still on the screen) onto the lowest rack in your oven. (Note that if you're using a pizza stone or steel, you'll need to top your pizza on a floured pizza peel, then transfer it to the pre-heated stone or steel.)
After 3 minutes, take a peek at your crust. You may have a few excessively large bubbles forming (1-2 inches in height).
If so, use a long knife to pierce the bubbles and press them down. If you don't pop them, they will only expand further and burn.
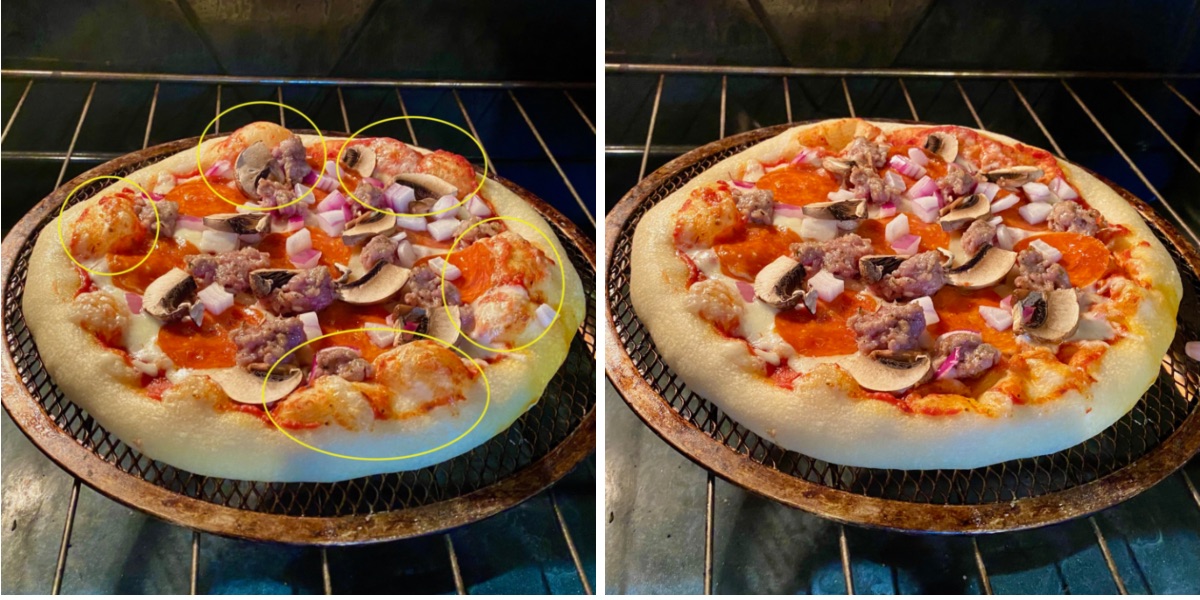
Start checking for doneness at the 6 minute mark.
When is the pizza done?
The total cook time is 6 - 10 minutes.
The pizza is done when the crust is golden brown with a few dark leoparding spots.
If you want your toppings and cheese a bit more browned, put it right under the broiler for 30-60 seconds. Just keep your eye on it!

Pizza Baking Tip: Only open your oven door when necessary. Use the oven light and glass panel in the door to monitor the progress of your pizza. The hotter the oven, the better.
Let it rest!
Once it is done, immediately place the pizza on a cooling rack.

It's critical to get airflow around the bottom crust immediately after taking it out of the oven.
If you don't, moisture will develop underneath the pizza, resulting in a soggy crust.
Allow the pizza to rest for a minimum of 3 minutes before slicing.
Once rested, transfer to a cutting board, slice and enjoy!

How to freeze pizza dough
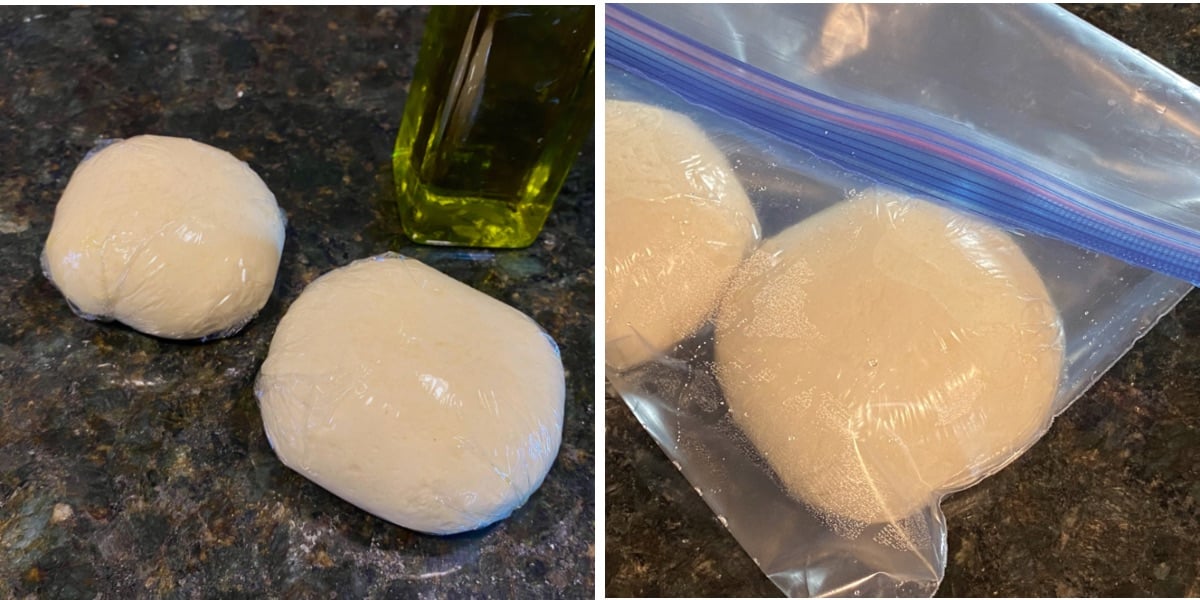
The time to freeze your pizza dough is right after you have formed them into their individual pizza dough balls. The process is as follows:
- Coat the dough ball in olive oil.
- Wrap tightly in plastic wrap.
- Put the wrapped dough balls in a freezer bag.
- Place the bag in your freezer.
The dough will be good for up to 3 months.
FYI: frozen pizza dough comes out just as good as fresh! Don't be afraid to freeze your dough.
How to thaw frozen pizza dough
Thawing frozen pizza dough takes 4 days...so plan ahead.
This extra time includes cold fermenting the dough after it has thawed out.
Steps to thawing out your dough:
- Remove the plastic wrap from frozen dough.
- Place it in a lightly greased bowl and tightly cover it.
- Allow to rest 4 days in your refrigerator.
After it has cold fermented, you can follow the same steps above, under "Pizza Day!".
Best practices
- Use purified bottled water instead of tap water for making your dough.
- Use an instant read thermometer to ensure proper water temperature.
- Form and refrigerate your dough balls within 20 minutes after mixing the dough.
- During cold fermentation, place the dough balls in the back of the refrigerator and on the lowest shelf.
- Make sure your work surface and hands are thoroughly cleaned when working with the dough.
- Use fine sea salt rather than table salt or kosher salt.
- Only bake one pizza at a time.
How to scale the recipe for 1, 2 or 4 pizzas
The table below details the ingredient quantities needed for the number of pizzas you want to make.
The process and cooking instructions are exactly the same.
| Ingredient | 1 'za | 2 'zas | 4 'zas |
|---|---|---|---|
| Bread Flour | 1.15 C | 2 ⅓ C | 4 ½ C |
| Water* | 6.5 Tbsp | 13 Tbsp | 1 ½ C |
| Instant Dry Yeast | ⅛ tsp | ¼ tsp | ½ tsp |
| Sugar | ¾ tsp | 1 ½ tsp | 3 tsp |
| Salt | ¾ tsp | 1 ½ tsp | 3 tsp |
| EV Olive Oil | 1 tsp | 1 ½ tsp | 3 tsp |
Why you need to make homemade pizza
I think that it can bring your family closer together.
Not only can you shop together for the toppings that each person wants, but there is also such great interaction while everyone is making their pizza when the toppings are set out DIY-style. It's just really fun!
And best of all...NO ONE IS LOOKING AT THEIR PHONES!
Let's not forget the BEST reason...THE PIZZA TASTES AWESOME!
Other popular recipes
- Smash Burgers
- Chicago Style Hot Dogs
- Smoked Ribs, Pork Butt & Brisket
- Movie Theater Popcorn & Homemade Kettle Corn
- Prime Rib Roast
- Reverse Sear Filet Mignon & Reverse Seared Ribeye
- Easy Dinner Rolls
Good luck with your pizza-making adventures!
—Phil

Cold Fermented Pizza Dough Recipe
This cold fermented pizza dough recipe produces that airy, flavorful, Neapolitan style crust you dream about when eating a pizza.
Ingredients
Instructions
- IT"S HIGHLY RECOMMEND THAT YOU READ THE POST & WATCH THE VIDEO BEFORE MAKING THIS RECIPE.
- In a stand mixer bowl, add the water, salt, sugar, flour and yeast. In that order, one on top of the other. Use the 'fluff, spoon and sweep' method is using measuring cups for your flour. (see Recipe Note #1)
- Using a dough hook attachment, mix on level 1 for 2 minutes.
- Slowly add 2 teaspoon olive oil, while the mixer is running on level 1. Mix for additional 2 minutes to allow the oil to incorporate into the dough.
- Once the oil has incorporated, increase speed to level 2. Allow this to mix for 8 minutes. (See Recipe Note #2)
- Remove the dough and place onto a clean, smooth work surface and allow it to rest 5 minutes, uncovered.
- After 5 minutes of resting, divide the dough into roughly 3 equal portions.
- Form each piece into a smooth dough ball. See directions how to do this in the post or watch the video.
- Place each dough ball into a lightly greased bowl, seam side down. Then lightly grease the tops of the dough balls. Place into the refrigerator for 2 hours, UNCOVERED. (See recipe Note #3)
- After 2 hours uncovered, cover each bowl of dough with a secure lid or plastic wrap. Allow to rest in the refrigerator for 3 days to cold ferment.
- After 3 days of cold fermentation, take the dough out of the refrigerator to rest at room temperature covered for 2 hours.
- After the dough has rested for 1 ½ hour, prepare the oven. Set one cooking rack to the lowest position and a second rack to the highest position. Then, pre-heat the oven to 550º, or whatever your highest bake setting is. (See Recipe Note #4)
- This recipe is written for baking the pizza on an aluminum pizza screen. If you are cooking on a stone or pizza steel, follow the pre-heating and cooking directions for those products.
- After the dough has rested at room temperature for 2 hours, remove the cover and apply a light dusting of flour to the top of the dough ball.
- To remove the dough from the bowl, turn the bowl over and hover it an inch over a lightly floured work space. It will plop out after about 15 seconds.
- Apply a light dusting of flour on the bottom side of the dough, which is now facing up.
- Remove any excess flour by flipping the dough back and forth in your hands. Then place the dough back down on your floured work space.
- Stretch the dough to your desired size (9-11 inches), but making sure to leave about a ¾ inch raised crust around the dough. See post or watch video on how to stretch the dough.
- Place your stretched dough onto an aluminum pizza screen.
- Brush olive oil around the outer crust, then top your pizza. (see Recipe Note #5 if you're using a pizza stone or steel)
- Bake in a pre-heated 550 ºF oven for 6-10 minutes or until the outer crust is golden brown. (See Recipe Note #6)
- Remove from oven and place onto a cooling rack to rest a minimum of 3 minutes before transferring to a cutting board to slice and serve.
Notes
RECIPE NOTES:
- Be exact with the flour and water measurements. These amounts are critical to achieving the correct hydration level. Also, I recommend using purified bottled water vs. tap water.
- I recommend to periodically (3-4 times) remove the dough from the hook and reposition it back into the bowl. This allows for a more thorough kneading of the dough.
- I recommend using a non-stick spray to grease the bowls and tops of the dough. Olive oil would be okay too.
- Pizzas cook best in a VERY HOT oven (if your oven only goes to 500 ºF, it's still fine: you may just need a few minutes extra to get a golden-brown crust). Allowing your oven to heat an additional 15-20 minutes after it has pre-heated will produce the best results.
- If you're using a pizza stone or steel, you'll need to top the pizza on a floured pizza peel. Then carefully slide the pizza off of the peel and onto the preheated stone or steel to bake.
- If you want to cook the top of your pizza a bit more, turn on your broiler and set the pizza on the highest rack. Broil for 15-30 seconds. KEEP YOUR EYE ON IT.
Recommended Products
As an Amazon Associate and member of other affiliate programs, I earn from qualifying purchases.
Nutrition Information:
Yield: 3 Serving Size: 1Amount Per Serving: Calories: 583Total Fat: 11gSaturated Fat: 2gTrans Fat: 0gUnsaturated Fat: 9gCholesterol: 0mgSodium: 1166mgCarbohydrates: 102gFiber: 3gSugar: 3gProtein: 17g
Nutrition data provided here is only an estimate: if you are tracking this information for medical purposes, please consult a trusted external source. Thanks!


Holly says
I don't have any of your suggested pans. Would a cast iron skillet work?
Phil F says
I think so. If I understand your questions, you don't have any pizza screens to cook it on and you want to cook it in a cast iron pan? If occorect, I say try it. I would stretch the dough then place in a 1 Tbsp oiled cast iron pan. Then dress the pizza. Put it on your largest burner and set the heat to high and let the pizza cook 60 seconds. This just gives the pan a head start on heating up. Then place it into your pre-heated oven. Should be good. I may want to try this. Let me know how it turns out.
Karen says
Question, I just made the dough and put it in the fridge for the 3 days. Does the 3 days include the day you made the dough. For example, I made the dough Monday at 1130 am. Should the pizza be cooked on Thursday or Friday? Just want to be sure so I get the best crust. Thank you.
Phil F says
Thursday at 11:30 will be 3 days (72 hours). Don't feel the need to be exact, you can go a few hours longer or shorter and it should be great.
Mike Sr says
This is a very well-written step-by-step recipe. It looks like you didn't leave anything out. The photos are a great addition and help. I will be trying your way out. I have 2 steels in my oven to handle the task. But like others have noted, I went through the post from top to bottom a few times and if there is a link to a video it is very well hidden. I've seen references to videos but no link to them except one for stretching the dough made by Ooni otherwise all I found were these two others (not links). "Last step is to simply place the dough ball on the counter, seam side down, and roll it around on the counter a few seconds with your hand to smooth out the seam on the bottom. (watch the video to see this in action)" and one other "There are tons of process shots and an accompanying video. I recommend watching the video. It walks you through every step from start to finish". I would love to watch a hands-on video, so if there is one please be so kind as to point out exactly where it can be located. Great post otherwise, thank you!
Phil F says
I checked again. The video is not in the writen part of the post but rather located at the very end. After the recipe ingredients and detailed instructions. It will be right before recommended products and comments.
Jeanette says
You won't see the video if you have an ad blocker installed.
Erwin says
What do I do it I want to make 2 pizza, but change my mind and only make 1. Will the other crust be okay the next day after it has been stretched?
Phil F says
I think you will be fine. Just wrap the stretched pizza skin with plastic wrap and let it rest in your fridge until the next day. Let me know how it turns out.
Michael says
You have an inconsistency in the measurement vs. weight of water. Towards the top in the percentages chart you have 1 1/4 cup equalling 298 grams, but at the end where the recipe is listed you have 1 1/2 cup equalling 298 grams. I assume 1 1/4 cup is correct since that weighs 298 grams and that weight is listed in both places. Fingers crossed.
Phil F says
Good catch. I updated the recipe card to 1 1/4 C water. Thank you.
Glorianne Gooding-Jones says
Can you freeze the ucooked balls for later asssembly and cooking?
Phil F says
Yes. First wrap them plastic then place into a freezer bag, then ultimately into the freezer. Allow them to rest in the fridge for 4-5 days to thaw out and cold ferment. Take them out 1-2 hours before shaping the dough and baking your pizza.
Janey says
If we are doing a 72-hour cold fermentation, does the clock start when the dough comes out of the freezer or when the dough is completely thawed?
Phil F says
I would start the clock after it comes out of the freezer. And because it is frozen, I would add an extra 24 hours to allow it to thaw. So 4 days from taking it out of the freezer.
Christina says
I would really love to watch the video on how to make this pizza - especially since the recipe #1 says: IT"S HIGHLY RECOMMEND THAT YOU READ THE POST & WATCH THE VIDEO BEFORE MAKING THIS RECIPE.
However there is no video link anywhere! A review response says it is located at the top and near the bottom of this post, but I have gone through this 4 times and no video!!! Please post the video because this looks so good!!!
Phil F says
The video is located near the end of the post in the recipe card AFTER the ingredients and instructions. The video is no longer near the top and only at the bottom of the post.
Barb says
Would this recipe work for an ooni oven? 00 flour?
Phil F says
It will if you keep the temp around 550º. If I had your Ooni, I would set it to 700-750º and omit the oil and sugar and reduce the water content to 58%. You still can cold ferment and follow the same process.
If you do that, let me know how it comes out.
Mark Perkins says
what are the weights for the 4 pizza recipe?
Phil F says
640g flour
397g water
1.3g instant yeast
13.3g sugar
18.6g salt
12g oil
Geraldine says
Hello, can this recipe be used if you’re baking in a pizza oven where the temperature gets above 550 degrees? We have a Blackstone pizza oven and find that baking around 600 degrees gives us the best results. Thank you.
Phil F says
Yes, it should work great at 600º.
Judy M says
This is an excellent pizza dough. Easy to work with and great taste.
Phil F says
Glad it worked out so well. We love it too!
Mike says
Hey I was just wondering, what do you think is the main factor in achieving those micro blisters that you get all over your crust? For my pizza I do a poolish that cold ferments in the fridge 24 hours and then make the dough and cold ferment for another 48 hours. The flavor and texture are awesome but I haven't gotten the micro blisters which you seem to have gotten.
Phil F says
To be honest, I am not sure why I get them. When I make my 24-hour room temperature ferment dough, I don't seem to get them. If I had to guess (from things I read from various sources) it could be due to a slightly under fermented dough.
Caro says
I had so much trouble getting these to stretch to a 10-12 inch crust. I could only get like a small personal-pan sized pizza. I need to review the instructions again, I think, and make sure I have TIME to make the pizza appropriately. Read ALL the directions top to bottom before you start. I thought this would take a few hours and just rise in the fridge. I didn't realize it took at least a day to three days. The crust and sauce recipes were so very good, but I just didn't follow directions very well.
Phil F says
Hi Caro,
Yes, while the dough is easy to make, it does require a minimum of a 24 cold ferment in the fridge. Also, equally important is to let the dough rest at room temperature for 2 hours before stretching the dough into your pizza. It is in the room temperature fermentation where the dough really softens and expands. I hope you have better luck next time.
Maurice Allsopp says
I am interested in how big of a pizza does one of the 3 dough balls make.
Phil F says
Each dough ball will stretch into a 10-12 inch pie. It just depends how thin you make the crust.
Philip says
where is the video link. i am not able to find it
Phil F says
It is embedded in the post, near the top. Also, it is towards the bottom inside the recipe card.