Learn everything you need to know about how to smoke on a charcoal grill. I cover everything…equipment needed, charcoal set up, smoke wood placement, good smoke vs. bad smoke, temperature control…and much more.
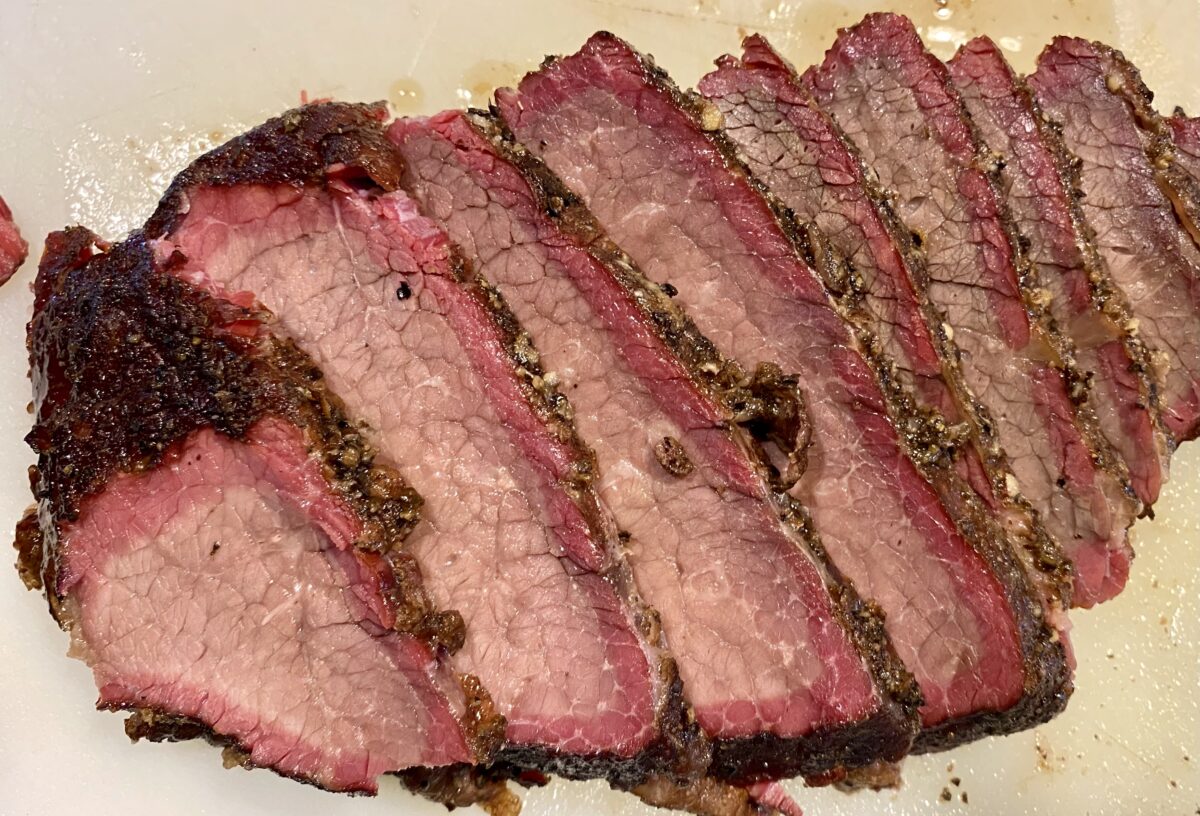
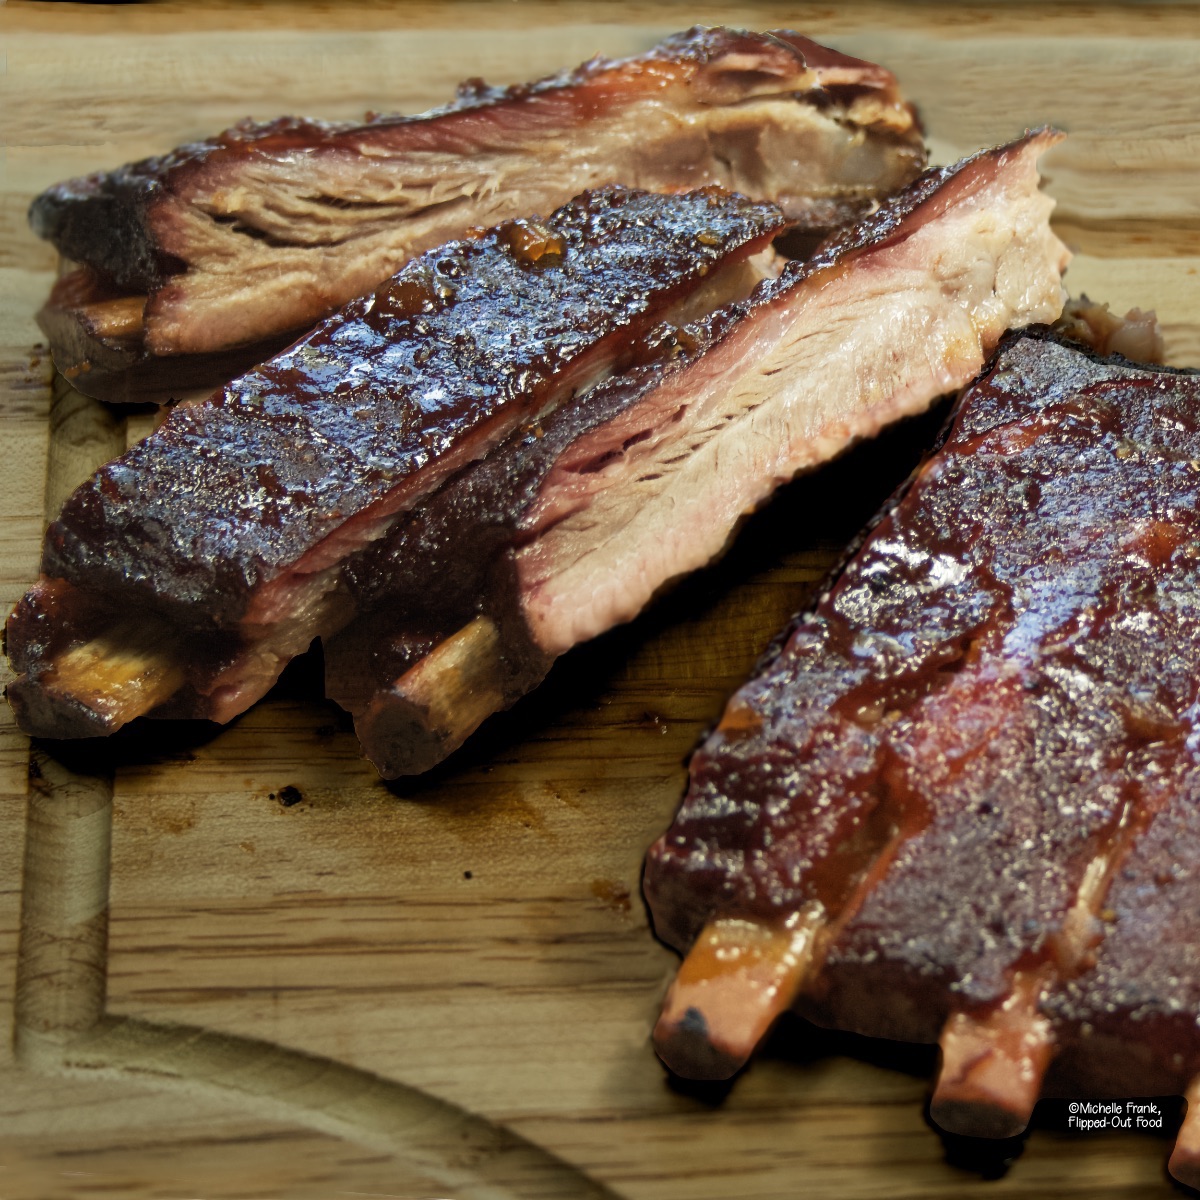
Who doesn’t love smoked ribs, pulled pork or brisket? The tender meat, the rub, the sauces...and, oh yeah, the smoke flavor.
Amazing stuff.
Think you need a fancy smoker to cook these? As you may have guessed from Michelle's intro, you don’t. All you need is a basic charcoal grill or Weber kettle.
Stick around: I'll teach you every detail (with pictures) on how to smoke on a charcoal grill.
If you're willing to learn how to smoke on a charcoal grill, I bet you would love to make awesome homemade pizza. My Homemade Pizza Dough recipe will have your basic home oven turning out that perfect Neapolitan type crust that is airy and light and simply amazing.
Below is a linked outline of topics we will be covering. Feel free to jump around or just follow along in order.
Jump to:
- 👨🏻🍳 My BBQ background
- 🍖 What is smoking meat?
- What do I need?
- Grill set up (Charcoal Snake Method)
- ♨️ How to light the coals
- 🌡️ Where to position the grill temp probe
- Temperature variations inside the grill
- Target grill temperature
- Pre-heat the grill
- Temperature control by adjusting vents
- Good smoke vs. bad smoke
- Finally, let’s add the meat
- How to fix wind concerns
- Perfected smoke recipes
- Final thought
- How to Smoke on a Charcoal Grill
👨🏻🍳 My BBQ background
I am your basic backyard griller who has been bitten by the "smoking bug." I have smoked hundreds of ribs, pork butts, and briskets on various types of smokers.
These include a pellet grill (Green Mountain Grill), a vertical water smoker (Weber Smokey Mountain), and a ceramic Komado grill (Big Green Egg). They all produced good results, but they're complicated and expensive...and I was always left wanting more.
This is common with just about everyone who starts smoking meat. The conversations go something like this…
Guest: “Wow, these ribs are great!”
ANYONE who smokes meat: “Yeah, they were alright, but they could be better. I just need to tweak a few things.”
It’s a never-ending pursuit of perfection. Always wanting more...if I just had a new smoker...if I just tweak the recipe a bit...on and on. I dream about this stuff.
It is this constant thinking and experimentation that led me to try smoking on a charcoal grill.
The results were awesome. I loved how the smoked meats turned out. So much so, that I am now sticking with my Weber kettle for all my smoking needs.
This ole kettle turns out the best smoke flavor compared to my other grills. I believe in it so much that I am selling all my other smokers. Added bonus: I now have a lot more room in my garage.
🍖 What is smoking meat?
Smoking meat is when you grill meat over indirect heat for a long period of time at a consistent, low temperature between 225º – 275º F.
Wood is positioned over the hot coals, which produces clean smoke that absorbs into the meat.
A smoke session typically goes for many hours until your meat reaches internal temperatures North of 200ºF. This allows the fat and collagen to break down, leaving you with tender, flavorful smoked meat.
What do I need?
Charcoal grill
My grill of choice is a 22-inch Weber kettle. Any brand is fine, but make sure that it's at least 22 inches. The smaller grills don’t provide a large enough cooking space or charcoal chamber.
Charcoal
I use briquettes because they are uniform in shape and allow for more consistent temperatures. I prefer Royal Oak Chef's Select: they have fewer chemicals than many other brands.
You can opt for lump charcoal if you like, but your grill temps will fluctuate a bit more due to their irregular shapes.
Chimney starter
We never want to use lighter fluid or Match Light charcoal to ignite the coals. It will leave an off-putting taste on the meat. A chimney starter is the only way to go.
Smoke Wood Chunks (3–5 pieces)
I prefer wood chunks over wood chips. The ideal size is 1–2 inches in thickness. Whether you use apple, hickory, oak, pecan, etc. is up to you and your recipe.
To soak or not soak the wood chunks…I am a no-soak guy. I find that the smoke from wet wood can produce an off-putting smell.
Grill Thermometer
This is critical. To smoke properly, you need to know the grill temperature at the grate level. Therefore, you need a good grilling thermometer. It’s also a good idea to get a unit that manages multiple temperature probes because you will likely need another thermometer that goes into the meat you're smoking.
I realize that you may have a dome thermometer on your lid. Don’t rely on that. These are typically very poor quality and inaccurate. Besides, this is measuring temperature at the dome, which is very different than at the grate.
Water pan
I use a disposable tin foil water pan that sits inside the coal chamber to help maintain the grill temp and also provides added moisture during the long cook.
Tongs
I use tongs to strategically place hot coals from the chimney starter onto the unlit coals. Because we are handling coals, opt for stainless steel heads that won't melt.
Almost forgot! A recipe.
Make sure to check out my perfected smoke recipes at the end of this post. All the pictures used and instructions assume the use of a charcoal grill.
Whether you follow my recipe or someone else's, the directions here walk you through everything you need to know on how to smoke on a charcoal grill.
Grill set up (Charcoal Snake Method)
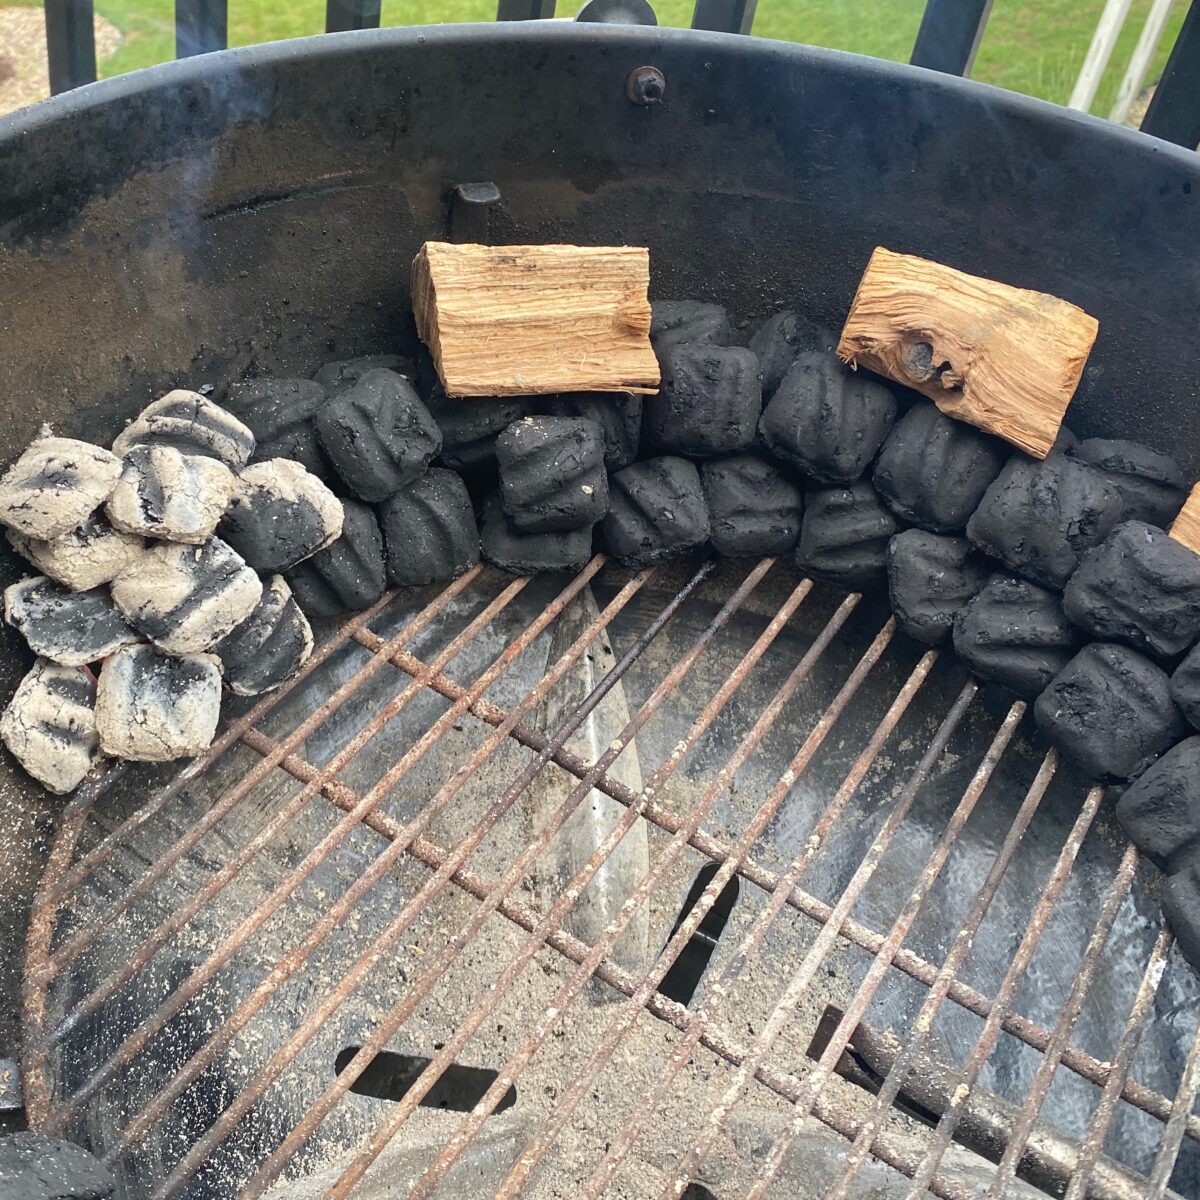
In order to smoke on a charcoal grill, we need to strategically set up the coals and smoke wood so that it will cook for a long period of time at low temperatures. To accomplish this, we will be using a technique called the charcoal snake method.
This set-up will enable us to smoke for 8+ hours, without having to add more charcoal or wood, and will generate a temperature range between 225ºF and 275ºF.
Charcoal placement
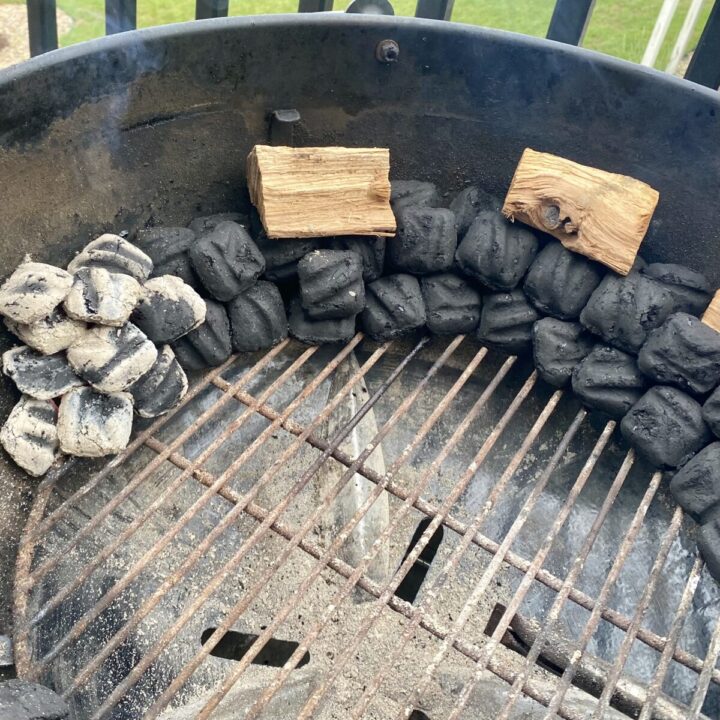
The charcoal snake method involves arranging your coals uniformly around the extreme outer edge of your charcoal chamber which resembles . . . you guessed it...a snake. This set-up leaves a large indirect cooking space in the middle.
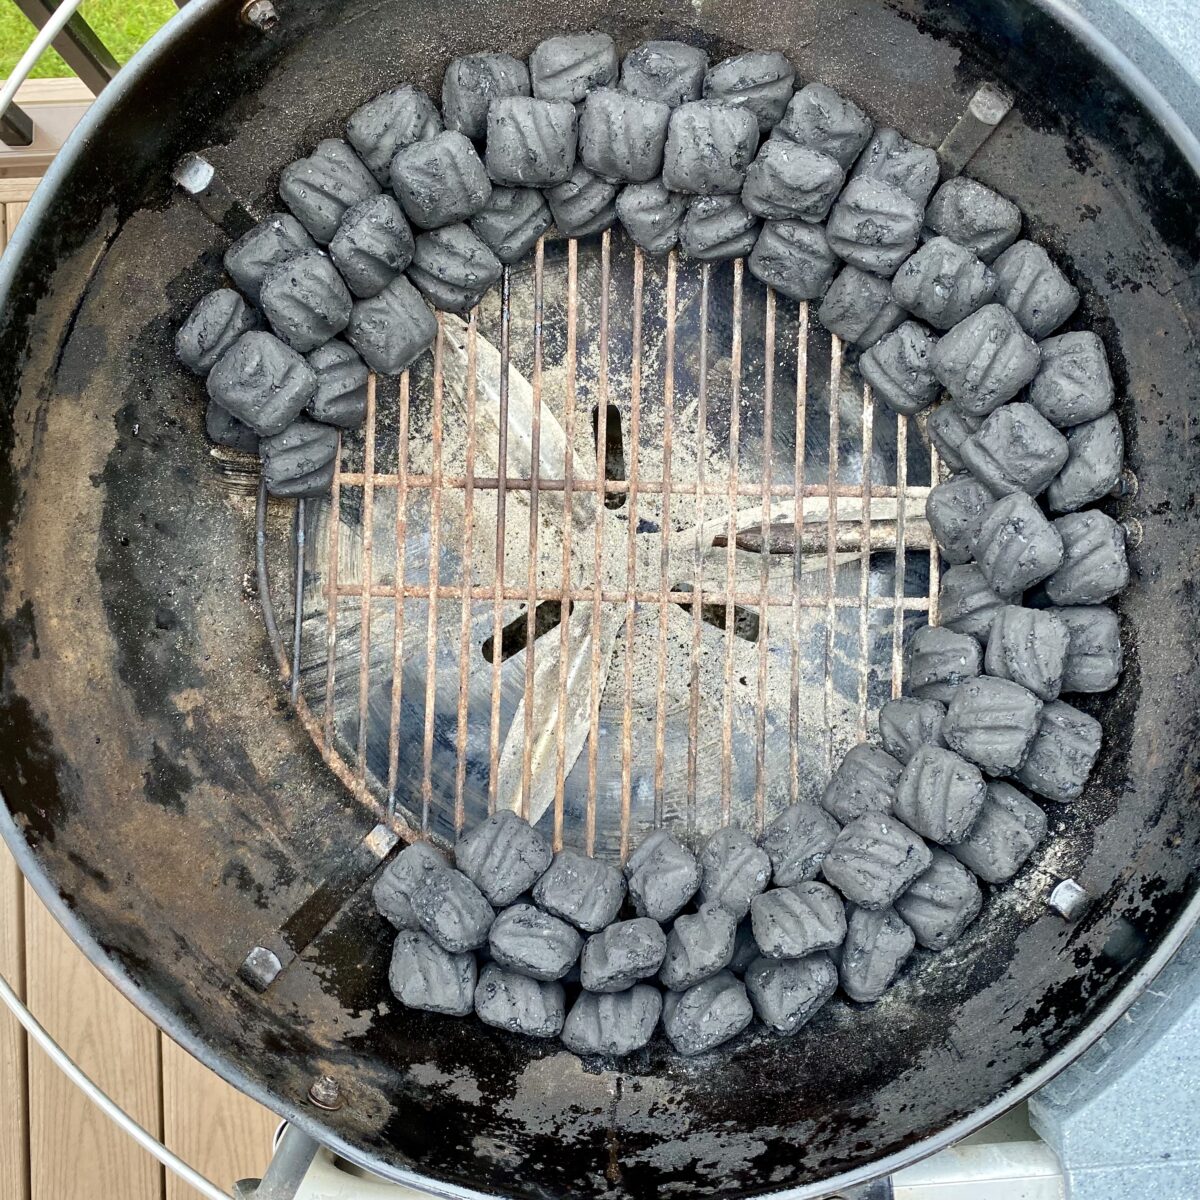
Once the "head" of the snake is lit, it slowly burns around the entire charcoal chamber, keeping a low, consistent temperature the entire time.
To do this, stack the coals in a 2 x 2 method, with two rows of two coals each are stacked on top of each other.
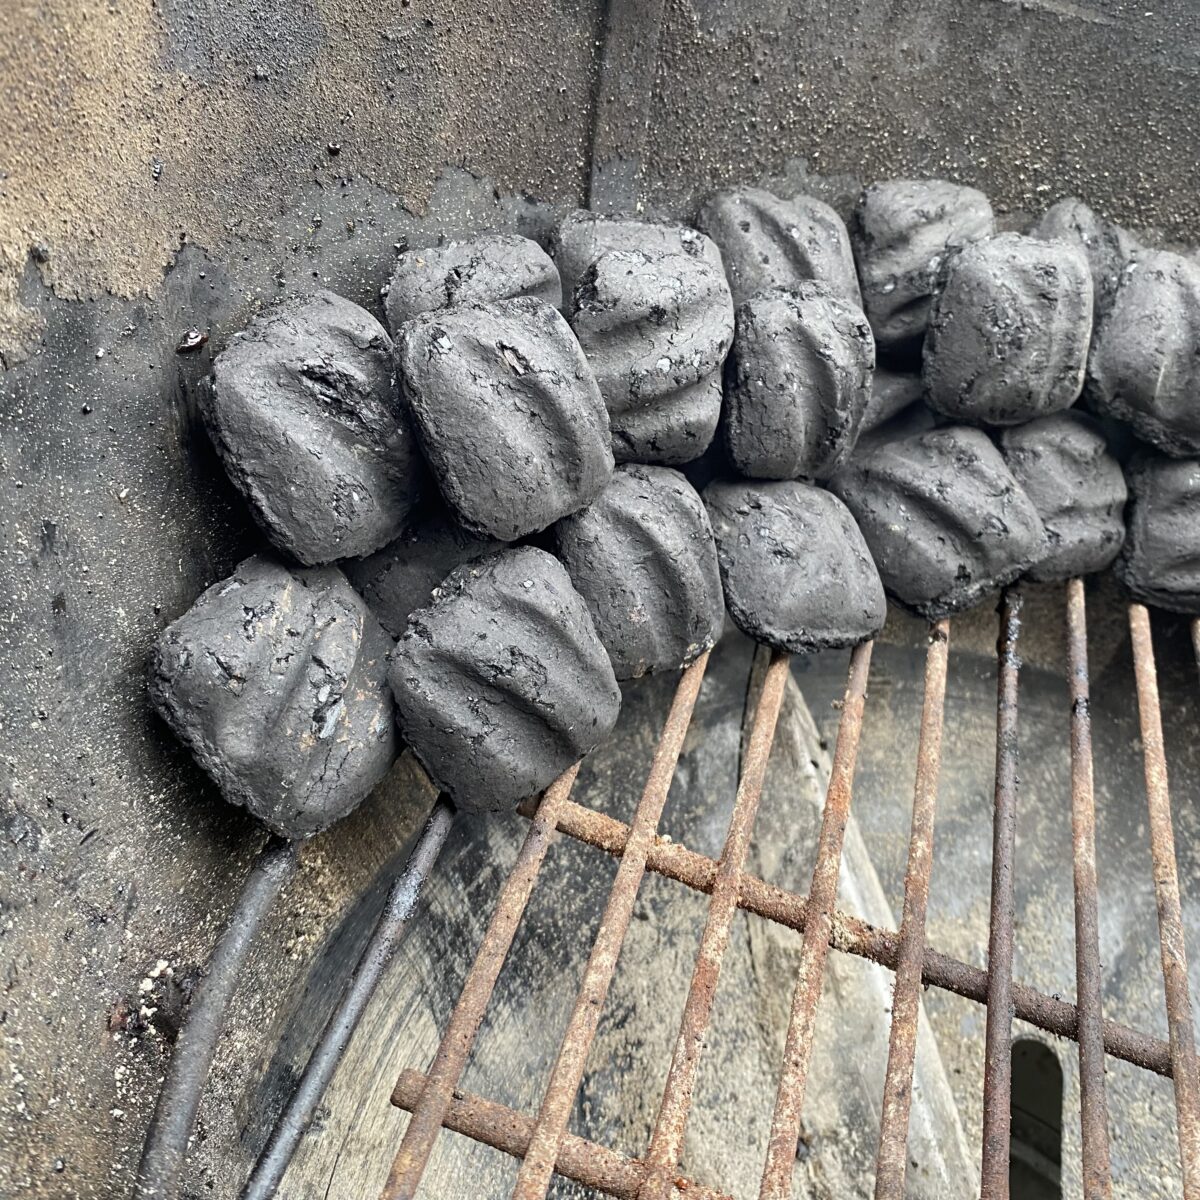
I encourage you to set up a full chamber for each smoke session. It's better to have them available so that you don't have to load more coals mid-cook. Once the grill is shut down, any unlit coals can always be used again.
Smoke wood placement
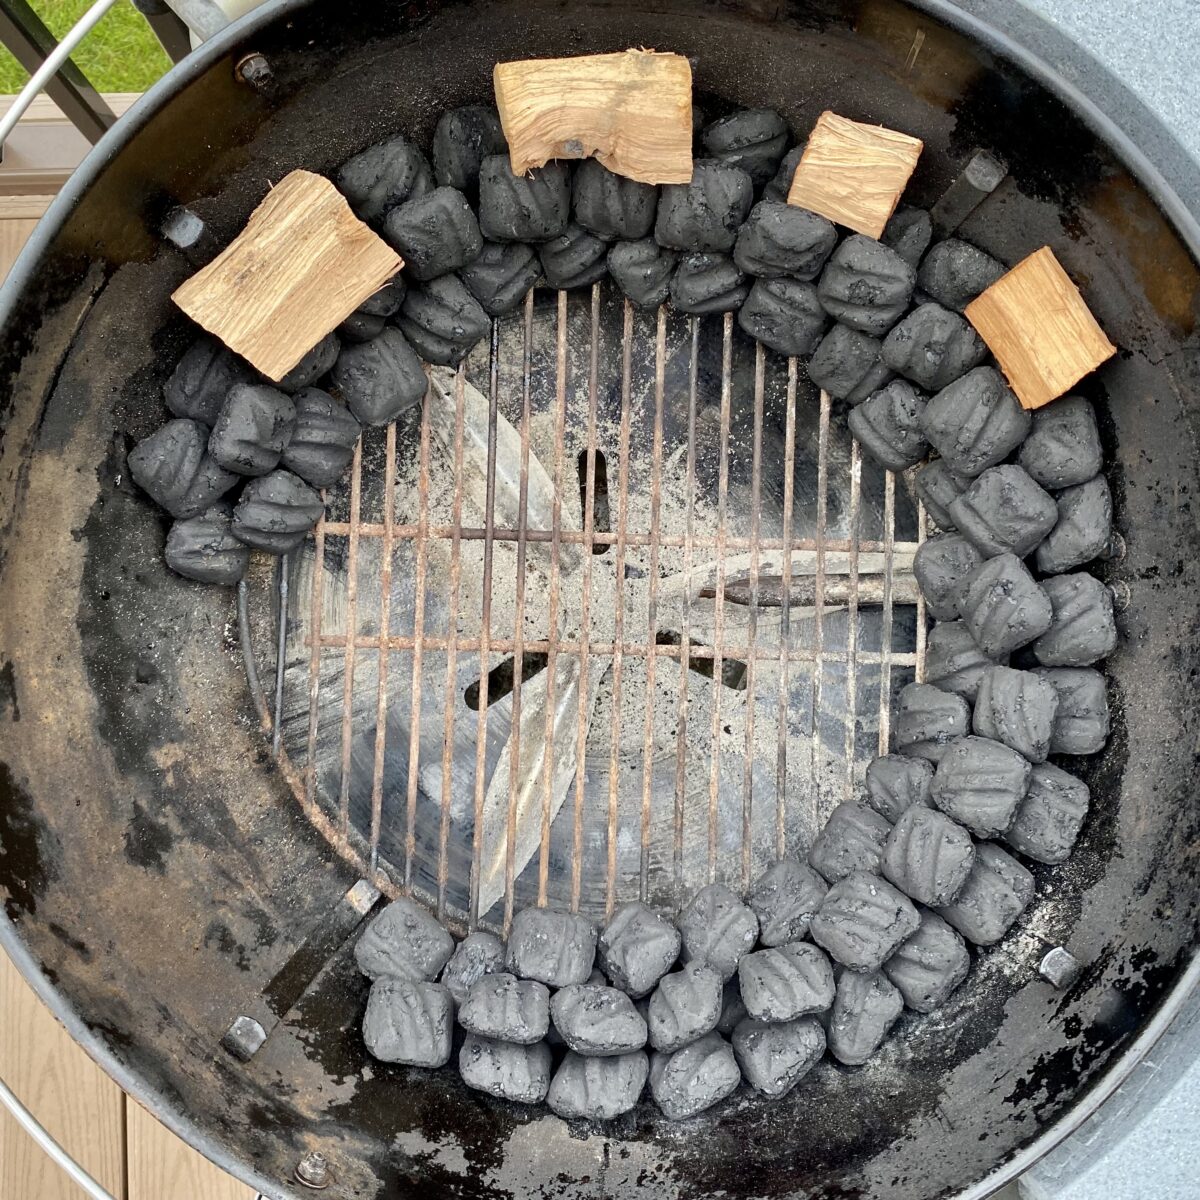
Now that the coals are positioned, we want to add wood chunks on top of them. I prefer pieces that are about 1–2 inches thick.
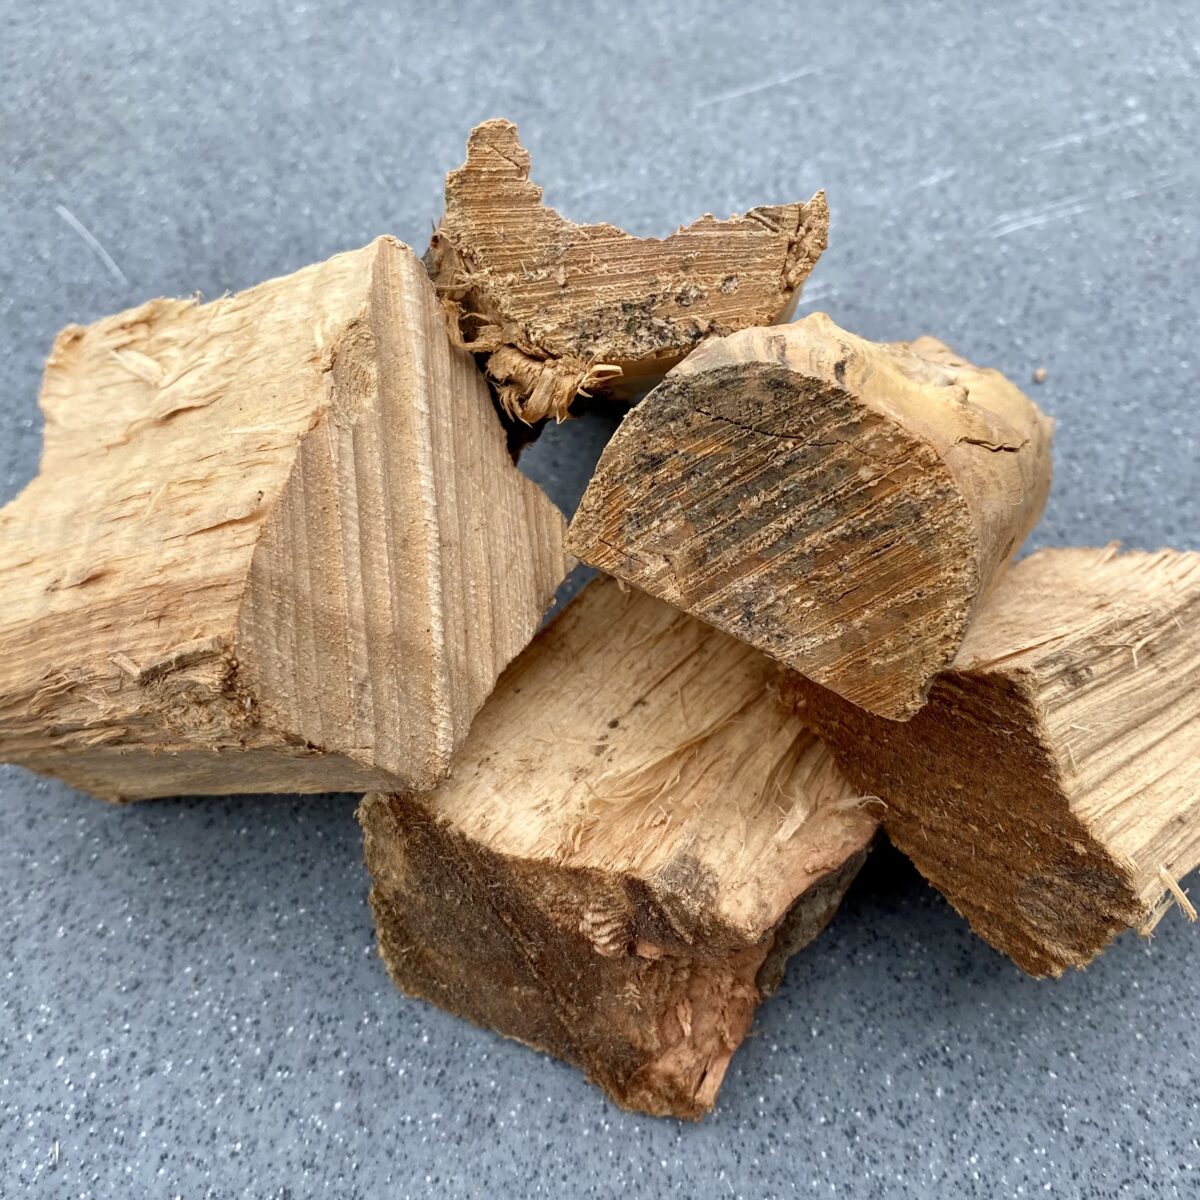
Place the first chunk about 3 inches from the head of the snake. Then continue to place wood chunks around the snake, keeping them about 2 inches apart from each other. Place enough wood chunks so that about ½ of the length of the snake is covered.
Water pan placement
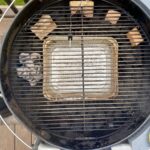
Place a water pan in the middle of unlit coals. This will be filled with boiling water right after lighting the coals.
Top tip: the hotter the water, the less the coals have to work (or burn) to get the grill up to temperature.
The water pan serves two purposes. One, it holds heat, which helps maintain a consistent grill temperature. Two, it adds moisture to the meat during the long cooking process.
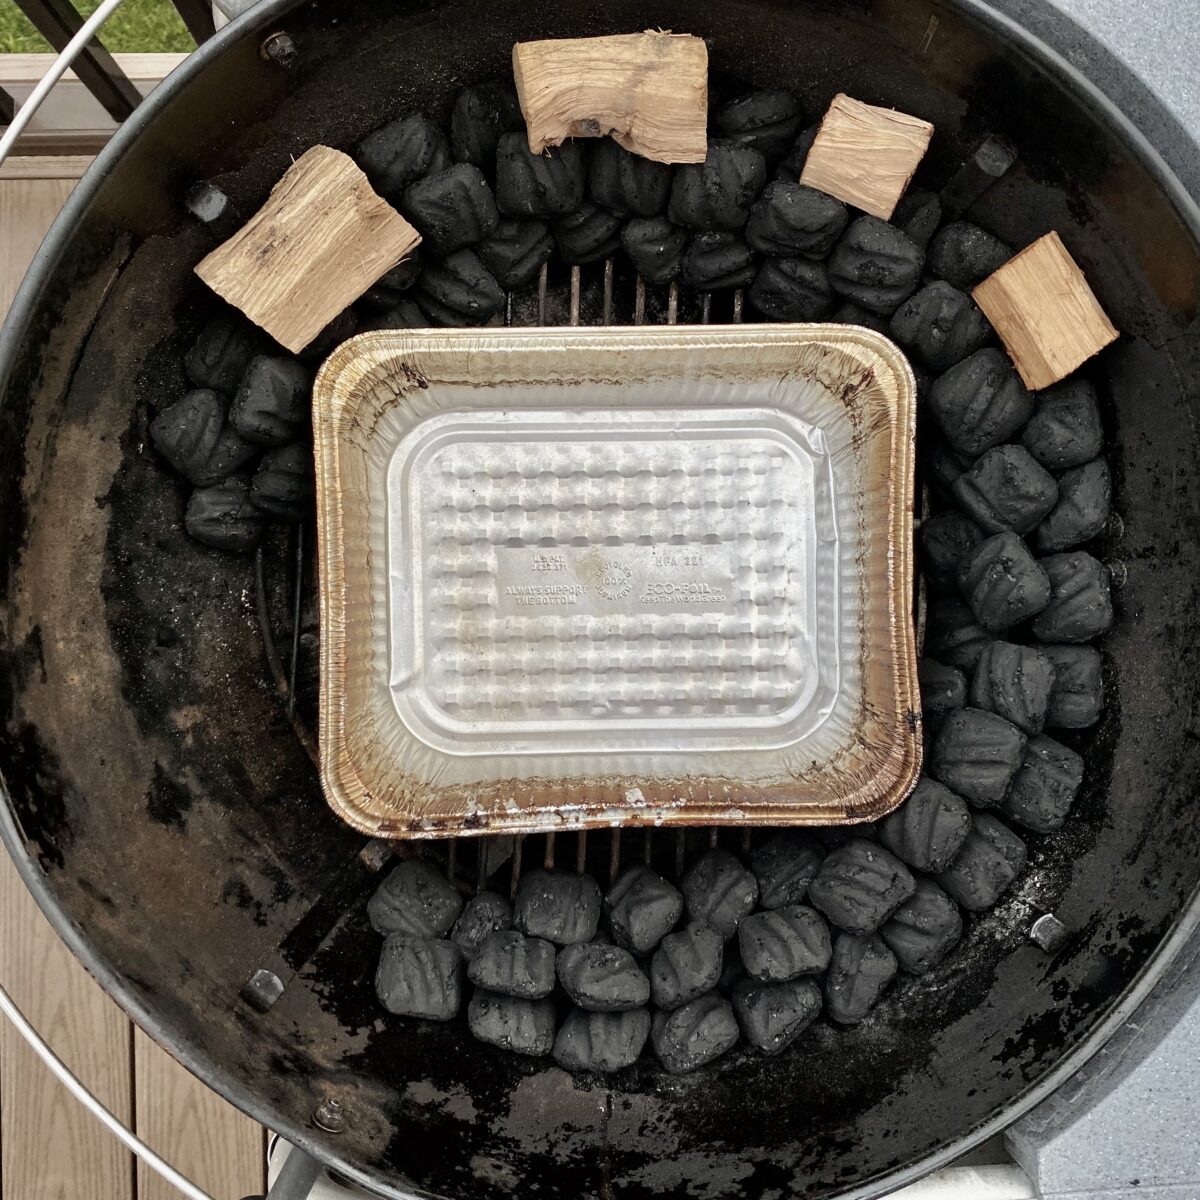
♨️ How to light the coals
Make sure all vents are fully open at this point.
Light 12 coals in a chimney starter. Let these burn until they are mostly ashed over and are red hot (about 15 minutes).
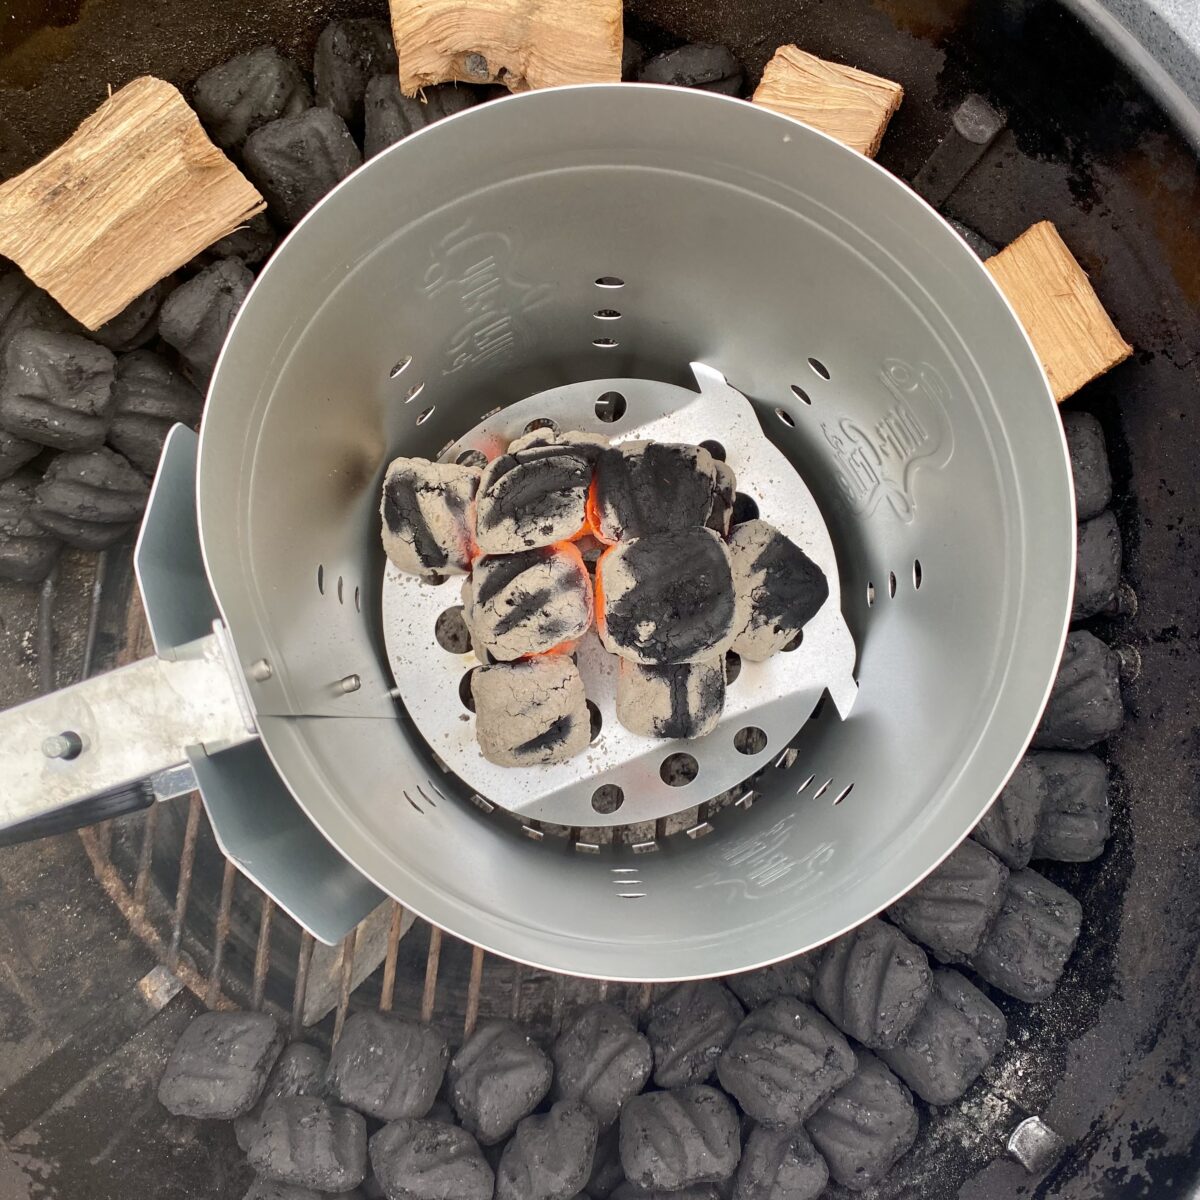
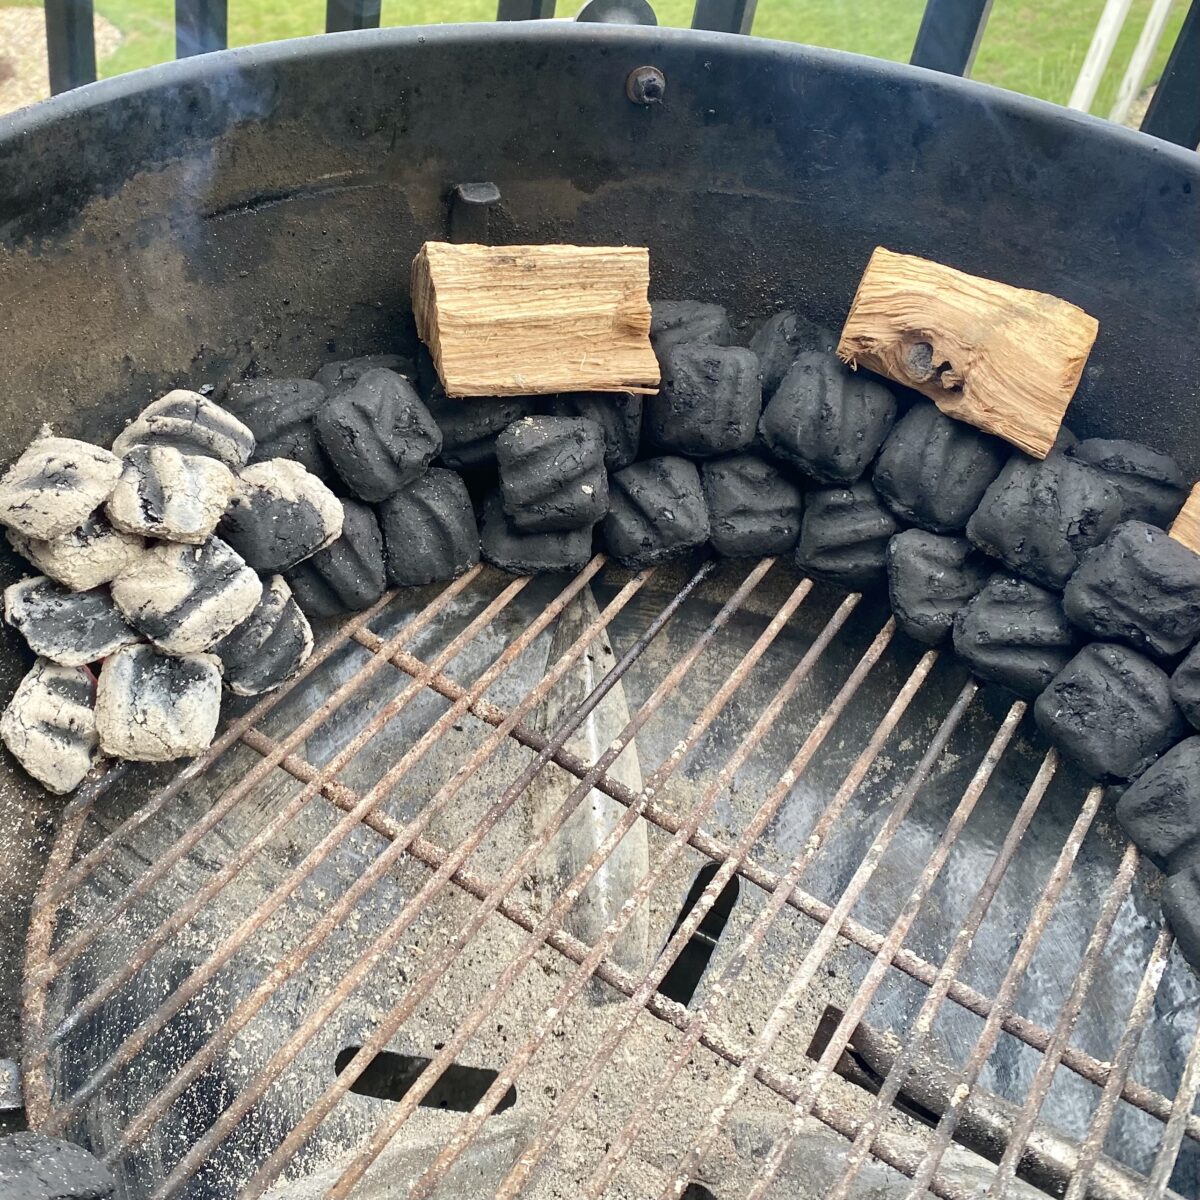
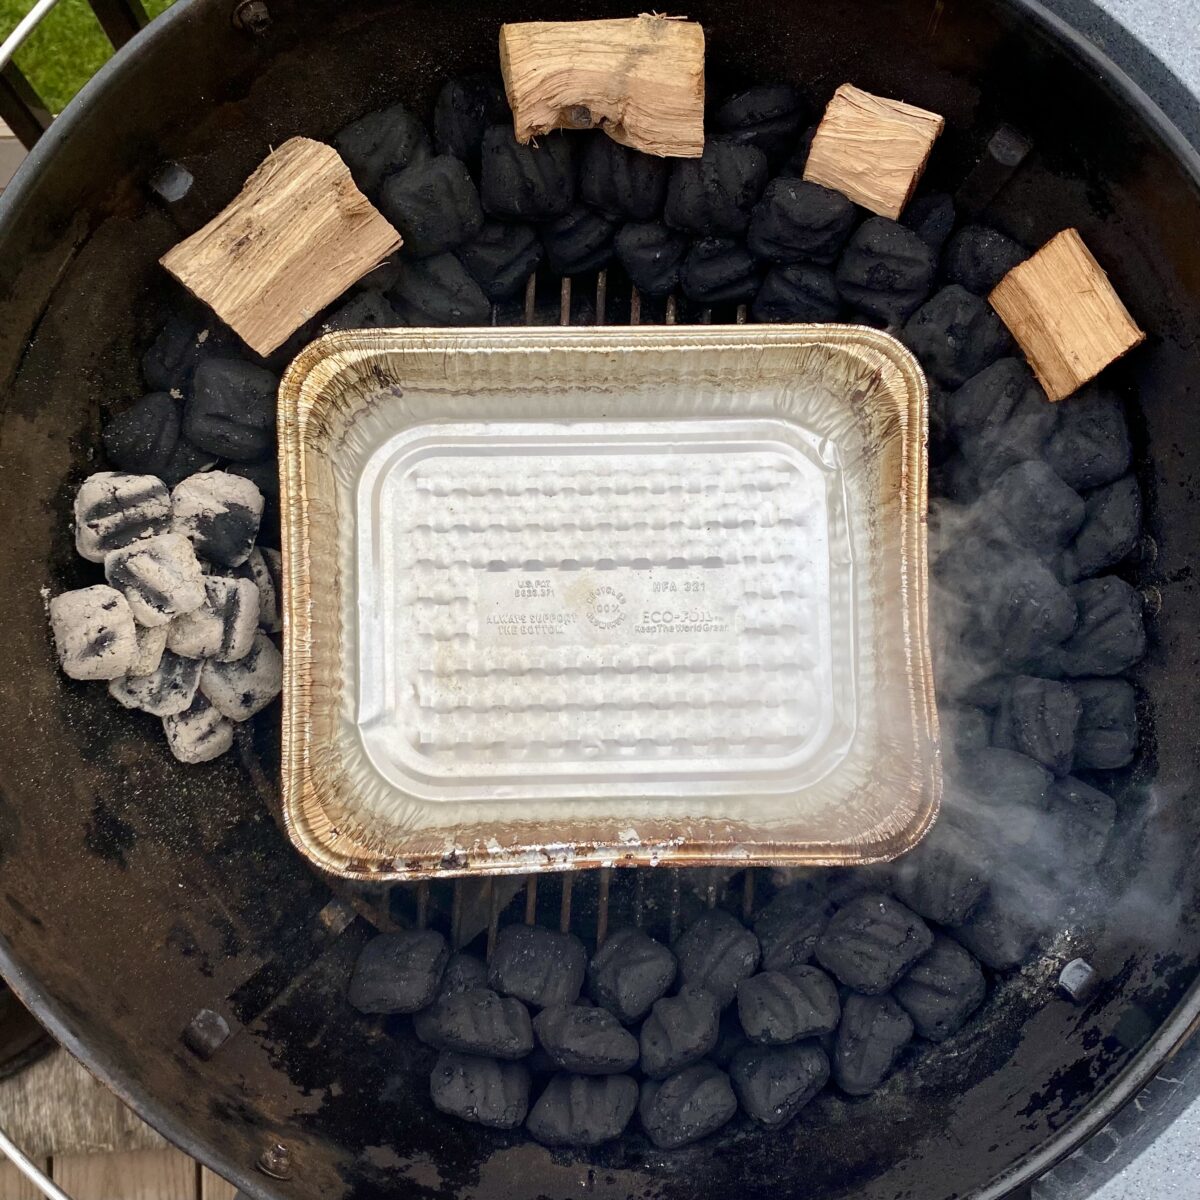
Once the coals are red hot, carefully stack them at the head of your snake using a set of tongs. Make sure some of them are resting against the unlit coals.
Place your water pan in the middle of the coals and add the boiling water until ¾ of the pan is full.
Now put on your cooking grate and prepare to position your grill temp thermometer.
🌡️ Where to position the grill temp probe
You want to position the temperature probe between the hot coals and where you'll place your meat.
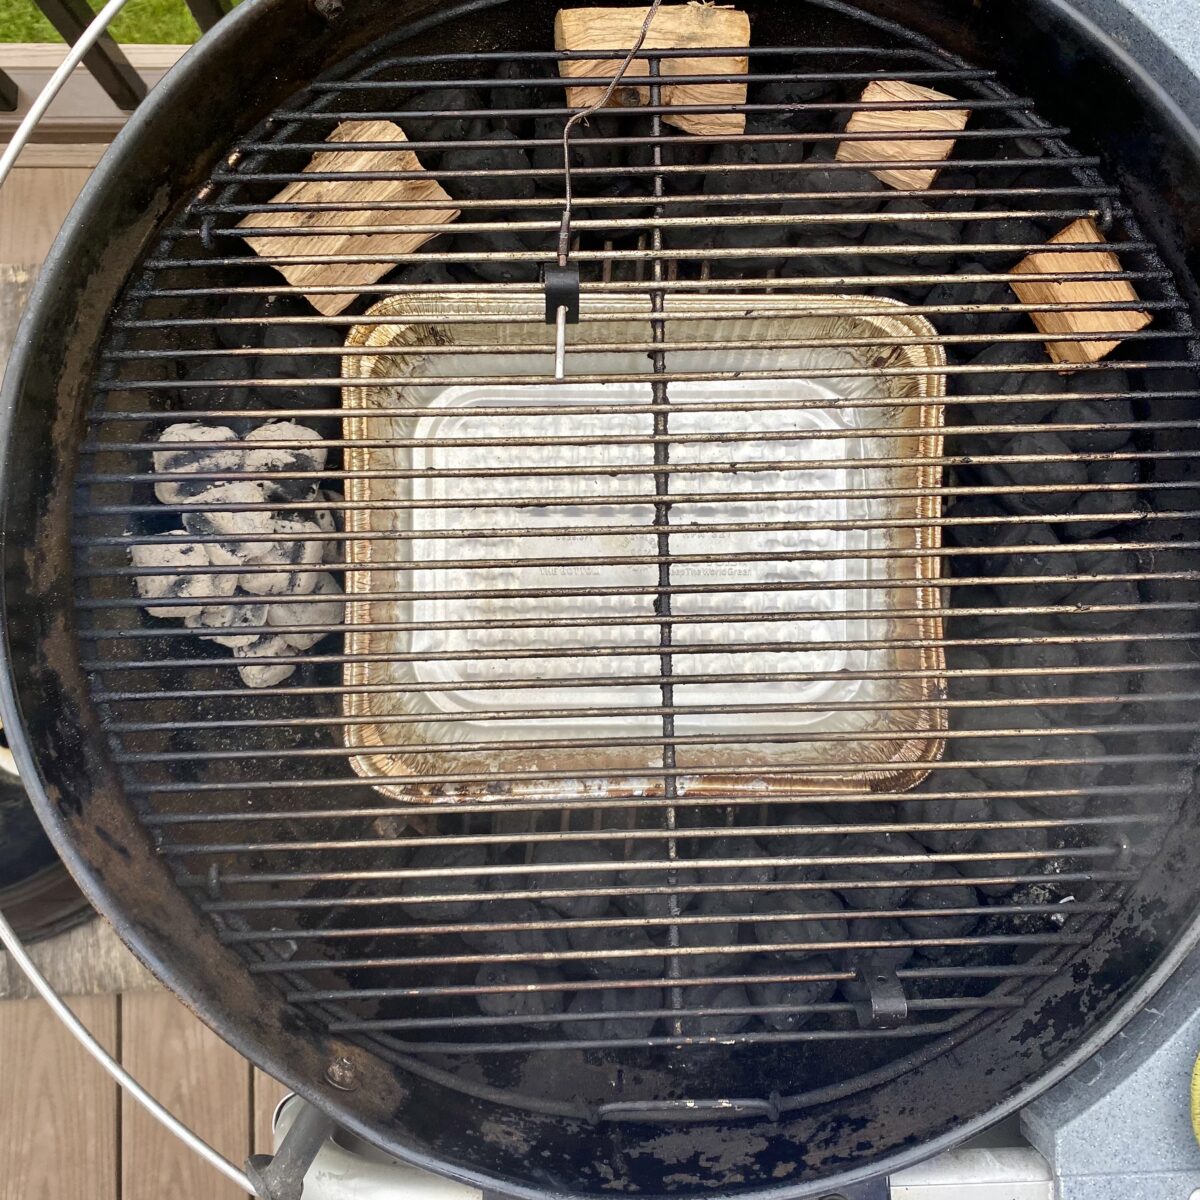
Note that the coals will slowly burn around the chamber, which means that the probe will be out of place at times. Not to worry: we discuss later how it is necessary (and easy) to rotate your cooking grate periodically during the cook.
Importance of monitoring grill temperature
Monitoring your grill temperature is critical. Smoking on a charcoal grill is all about having a consistent temperature throughout the cook process.
The only way to accurately monitor grill temperature is by taking the temperature at the cooking grate level.
Temperature variations inside the grill
Indirect cooking with charcoal grills will always have temperature variations inside the grill. Temperatures closer to the hot coals are hotter than temperatures further away. Well, duh!
This means that our probe placement will be reading the highest temperatures in the grill. Meat that is further away from the coals will be cooking at a lower temperature. The temperature difference can be as much as 35º F.
But don't let this alarm you: later, we'll discuss the importance of rotating your meat so both sides have equal time towards the hot coals.
Given this temperature variation, you might be asking yourself, “What grill temperature should I target, then?”
Target grill temperature
All recipes will provide you with a target grill temperature to maintain. But because our probe is reading the highest temperature in the grill, only the side of meat facing this probe will get that temperature. The other side will be cooking at anywhere from 10 – 35 degrees lower, depending on how far away it is.
Because of this, I always add 15 degrees to the target temperature called for in the recipe. The example below does a good job of explaining why I do this.
EXAMPLE: A pork butt recipe calls for a grill temp of 225º F.
This means we should target our grill temp probe to read 240º F. (225 + 15). The side closest to the coals will cook at 240º, while the other side—further away from the coals—is cooking at approximately 210º. If I rotate my meat so that each side has about the same amount of time towards the hot coals, my average temperature for the entire cook will be 225º. Viola!
Admittedly, this is a bit of a guessing game when determining the temperature as you move away from the coals. Just trust that the 15 degree increase will work perfectly every time.
With smoking, you just have to be close, not perfect.
Pre-heat the grill
At this point, your coals are lit, smoke wood is positioned, hot water pan is placed, cooking grate is on and you have your grill temperature probe placed. Now lid the grill and begin monitoring the temperature.
Our next step is to pre-heat the grill to your recipe’s target temperature (+15 degrees, as discussed).
All vents should be wide open at this point. This allows the grill to heat up as quickly as possible.
As you monitor your grill temperature during this pre-heat stage, it will begin to rise at a relatively slow pace. Keep your eye on it, though: the temperature will increase quickly as more coals light.
Once the grill is 25 degrees from your target temperature, we need to slow down the rate at which the grill temp is rising. We want to hit our target temperature at a gradual, controlled rate. We do this through vent adjustments.
Temperature control by adjusting vents
Let’s start with a quick Grill Vents 101 class. On your grill, you have top vents and lower vents. Each serves a specific purpose.
The top vent is the exhaust vent. It allows smoke, gasses, and heat to escape.
The lower vents allow air into the grill. As gases escape through the top vents, it creates low pressure inside the grill, which pulls air in through the lower vents. This intake of air fuels the coals.
Lower vents that are more open allow more air into the grill. This results in hotter coals and thus hotter temps. As you partially close these lower vents, you restrict air flow. This results in lower grill temps.
These lower vents are the main ones you will be tinkering with throughout the cook to maintain your target grill temperature.
Once your grill temp is 25 degrees from your target temp, leave your top vent 100% open and close your bottom vents to 50% open.
Continue to monitor your grill temps to verify that the temperature continues to increase, but at a slower rate. The goal is to reach your target temperature gradually.
Important: Vent adjustments can take up to 5 minutes to take effect. Closely monitor your grill temperature after each vent adjustment to ensure that the temperature is rising (or falling) at the pace you want.
Continue to slightly close the bottom vents until you hit your target temperature. I am talking just fractions of an inch on these adjustments. If your temperatures start dropping before reaching your target, then you would very slightly open these bottom vents.
The fractional closing and opening of these vents is something you'll have to do frequently to maintain your grill temp. The good news is that when you do finally get your grill established at a temperature, that tinkering slows down quite a bit.
So to recap, always remember:
- Slightly closing vents will lower grill temp
- Slightly opening vents will raise grill temp
Will I ever have to adjust my top vents?
Top vents are the last vents to adjust for temperature control. I always want them open as much as possible to allow good air flow out of the grill.
I adjust my top vents only after I have closed my lower vents as far as I can, which means they are just a sliver open. If the temp continues to rise past my target, I will then begin partially closing the top vents to halt the temperature rise.
Additional vent info
Even after you hit your target temperature, expect temperature fluctuations. I promise you will have them. Just continue continue to monitor the grill temperature and make tiny vent adjustments when you see a big variation. My goal is always to stay within 10 degrees (high or low) of the target temperature.
Once you're maintaining your target temperature, vent adjustments should be just tiny fractions of an inch opening or closing your vents.
Don’t be surprised if your lower vent is only open a sliver once you are successfully maintaining your target temperature.
Never fully close your top or bottom vents while cooking. It will smother your coals and leave a foul flavor on your food. Only fully close all vents when shutting down your grill.
The "Lower Vent Hack"
On many grills, you can’t see how open or closed your vents actually are, especially when loaded up with coals and food. Here's a great hack to get around this:
When your grill is empty, mark on the outside of your grill the 100%, 75%, 50%, 25% and what I call “just a sliver” open positions. This is good information to know as you make your tiny vent adjustments.
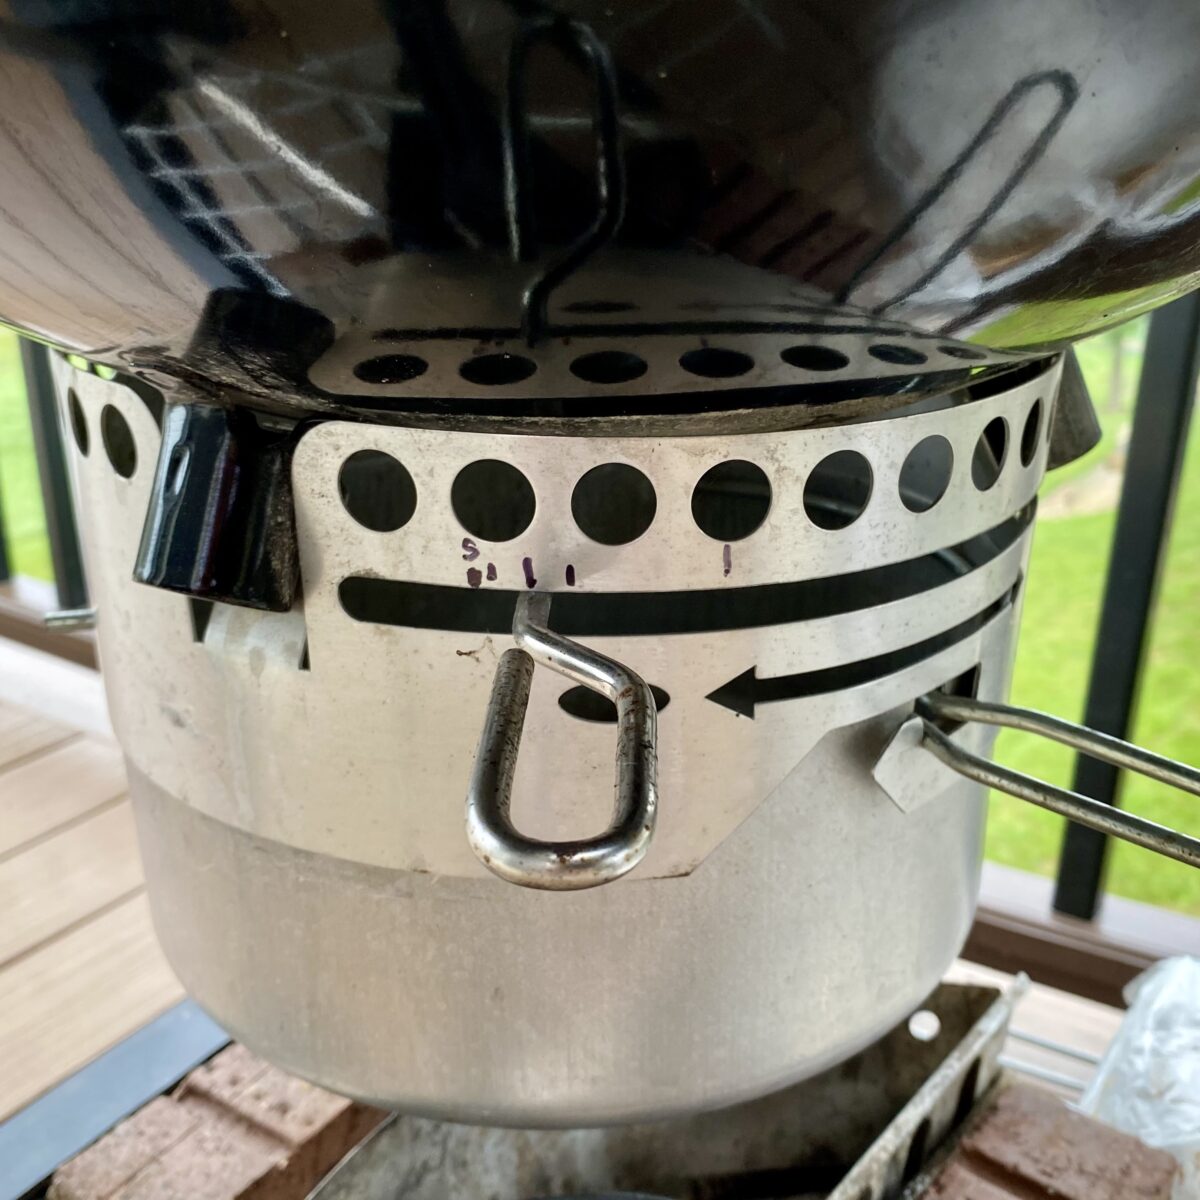
It's almost time to smoke…but before we can throw the meat on, we have to discuss an important element: the smoke itself.
Good smoke vs. bad smoke
At this point, the lid should be on and you have just established your target grill temperature.
Before adding the meat, we need to evaluate the smoke coming from the grill. There is such a thing as bad smoke and we want to avoid that like the plague.
Bad smoke is thick and billowy. It can be white, gray, or black. Thick smoke of any color means the coals and wood are not burning in the correct manner and will leave your food tasting bitter. Can you say creosote?
Good smoke will be very thin and white, with a blueish hint a times.
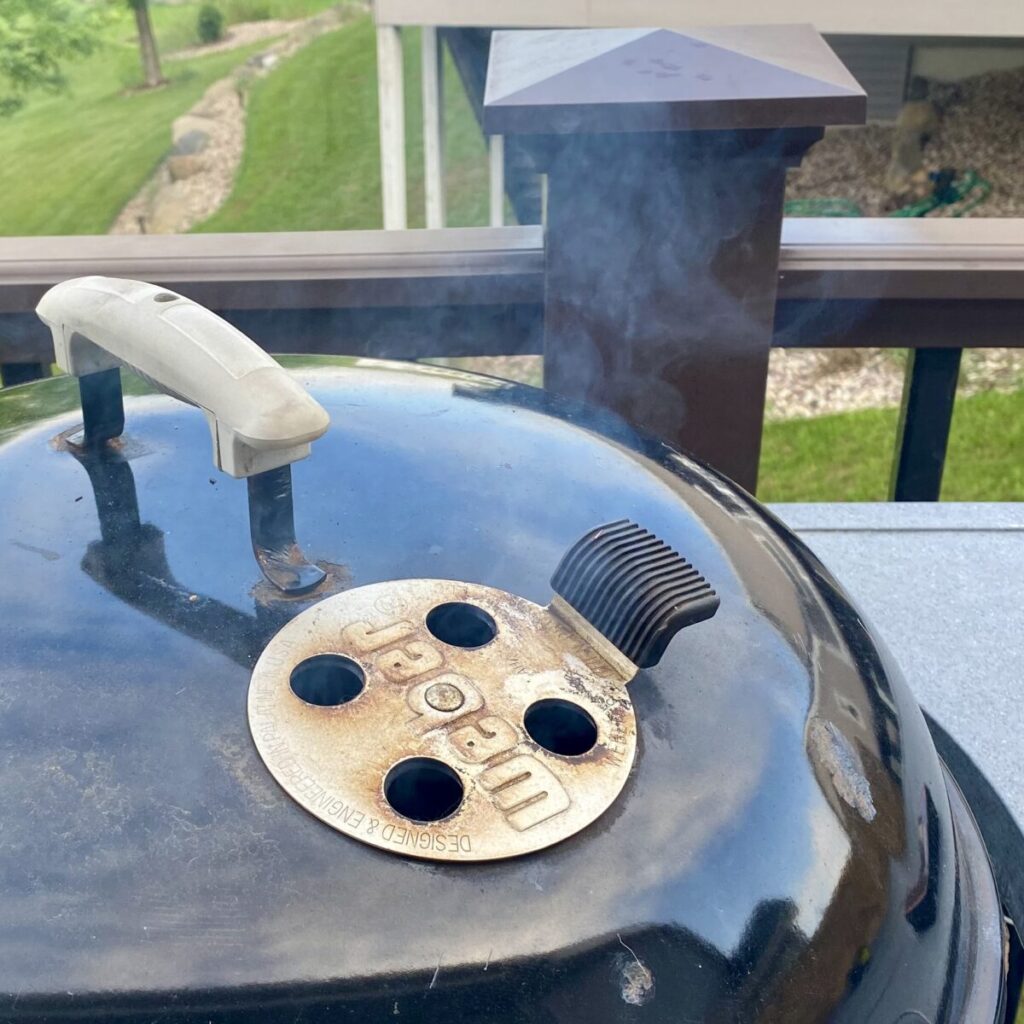
Be aware that as your snake burns, it will light new wood chunks. As these light, it will temporarily produce some thicker white smoke. This is normal and subsides after a just few minutes.
It is very likely that you already have good smoke blowing at this point and can proceed with adding your meat, but if you don’t have good smoke…
What to do if you have thick smoke
If you dialed in your grill to your target temperature and you still notice thick smoke coming out, don’t worry. Just continue to maintain the target temperature and monitor the smoke. I am confident that the thick smoke will subside in 15 minutes or less.
Finally, let’s add the meat
We are at a stage now where the grill is pre-heated to the target temp and the smoke is coming out thin and bluish-white.
Open your lid and position your meat about one inch from your grill temp probe and centered on the indirect cooking space in the middle of the grill.
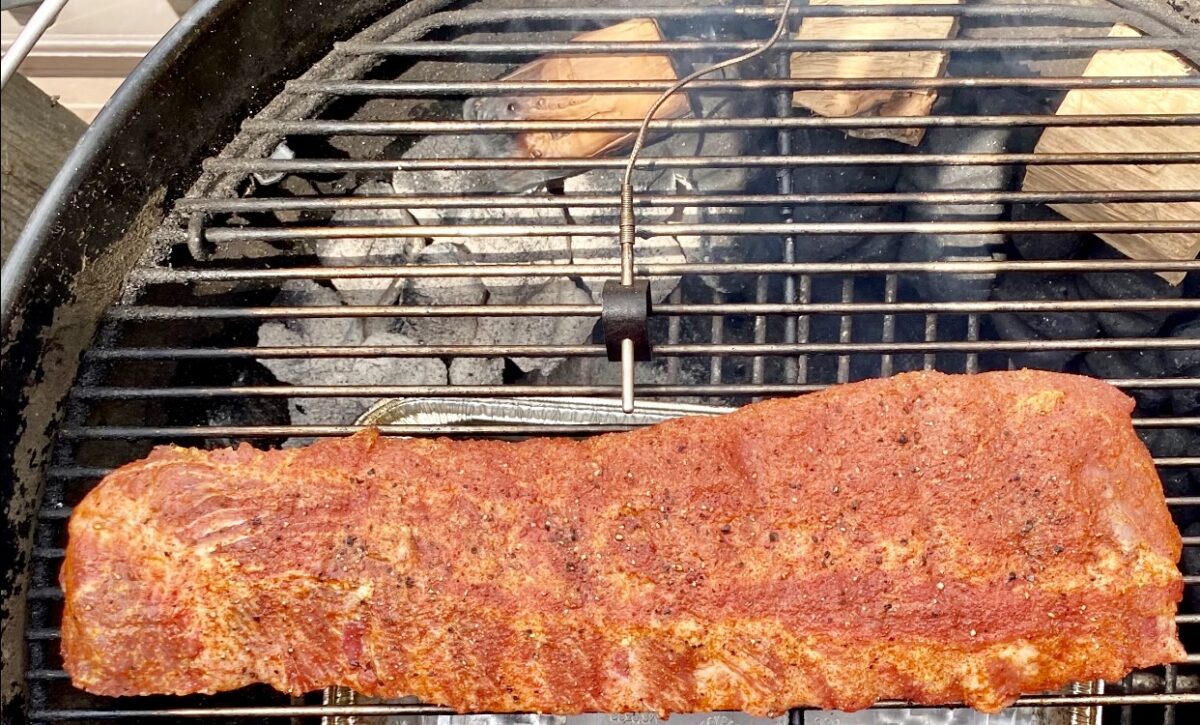
Important: Whenever you're replacing your grill lid, always make sure the top vents are opposite where the hot coals are. This allows the smoke to pass over the meat during the cook.
Rotating the meat and cooking grate
As discussed earlier, there are temperature variations inside the grill. We want both sides of your meat to have equal time towards the grill probe (or hot coals). It’s best to rotate your meat throughout the cook every 1-2 hours. There are exceptions to this (see below).
At the same time you rotate your meat, slightly turn your cooking grate so that the grill temperature probe stays positioned between the hot coals and the meat. Remember, your charcoal snake is slowly burning around the grill, so this adjustment keeps the temperature probe aligned.
Exceptions to rotating your meat
If my meat is a wonky shape with one side much thicker than the other, like a whole brisket packer, I don't rotate the meat. The thinner side will be fine at these lower temps. It is still important to keep rotating the grate, though. We want to ensure the thick end is always toward the coals.
How to fix wind concerns
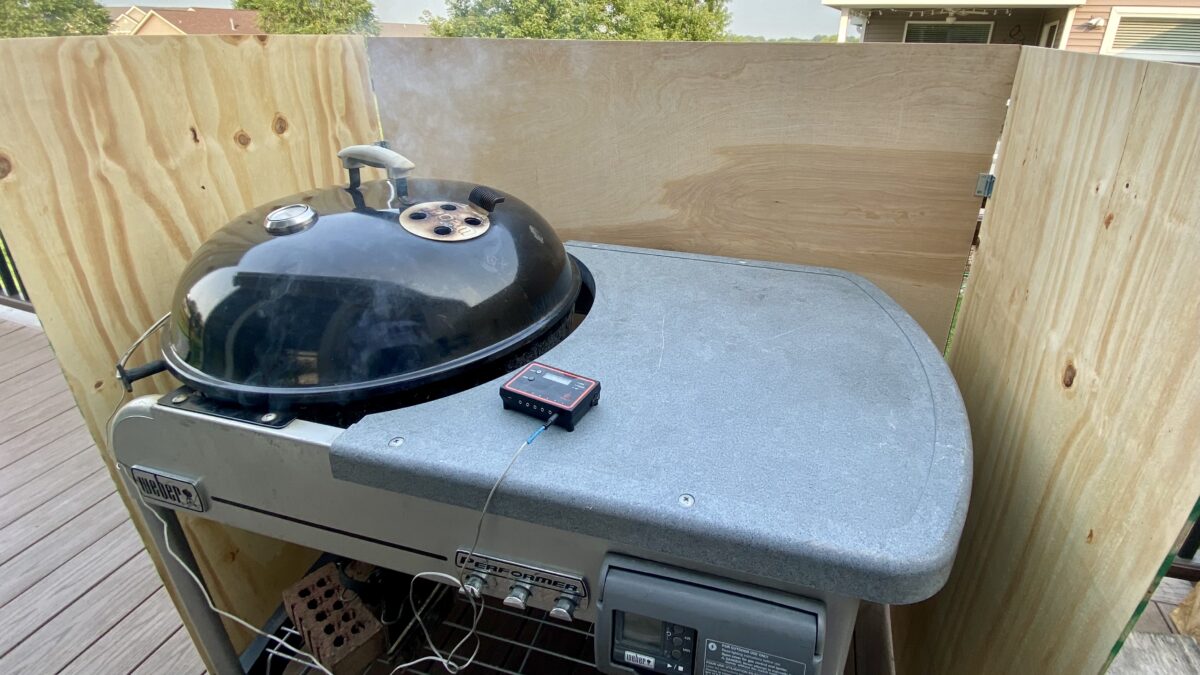
Wind is your enemy when you're smoking on a charcoal grill. It creates coal flare ups and sucks all the heat out of the grill. Not good—especially because smoking requires you to maintain a consistent low temperature throughout the cook process. To solve this problem, I've come up with an easy answer:
Make a wind shield! I made the one below from one 4’ x 4’, and two 2’ x 4’ pieces of plywood (which I bought pre-cut). Then installed some cheap hinges so it will fold up and store easily. This took me all of about 30 minutes to assemble and cost me less than $50.
Perfected smoke recipes
The recipes below are written for smoking on a charcoal grill. I follow the same, exact steps outlined here each and every time I smoke—I always get great results. Pay attention to the red-shaded boxes in the recipes.
The red shaded boxes are additional instructions you'll find in these recipes that are specifically for smoking on a charcoal grill.
Perfected smoke recipes include:
- Smoked Ribs
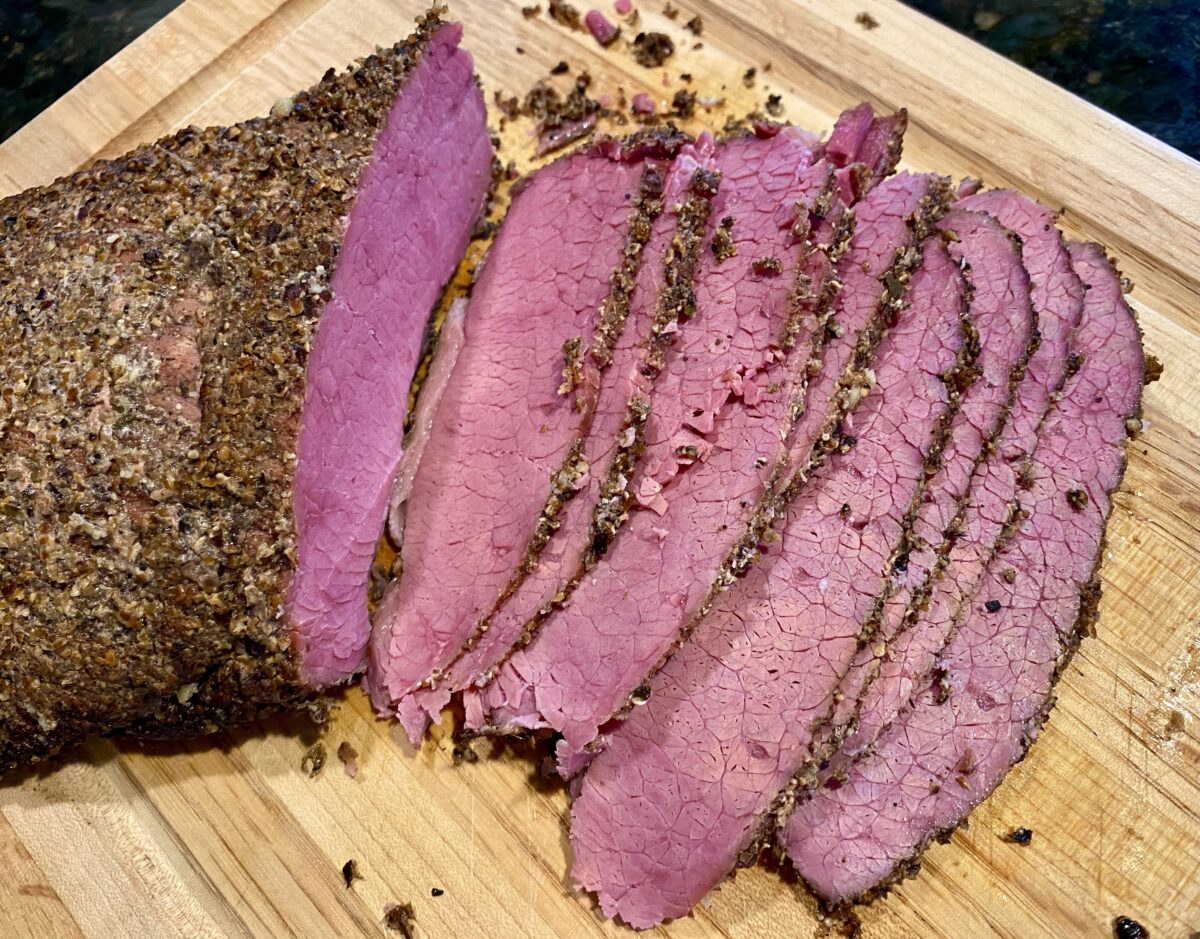
- Smoked brisket
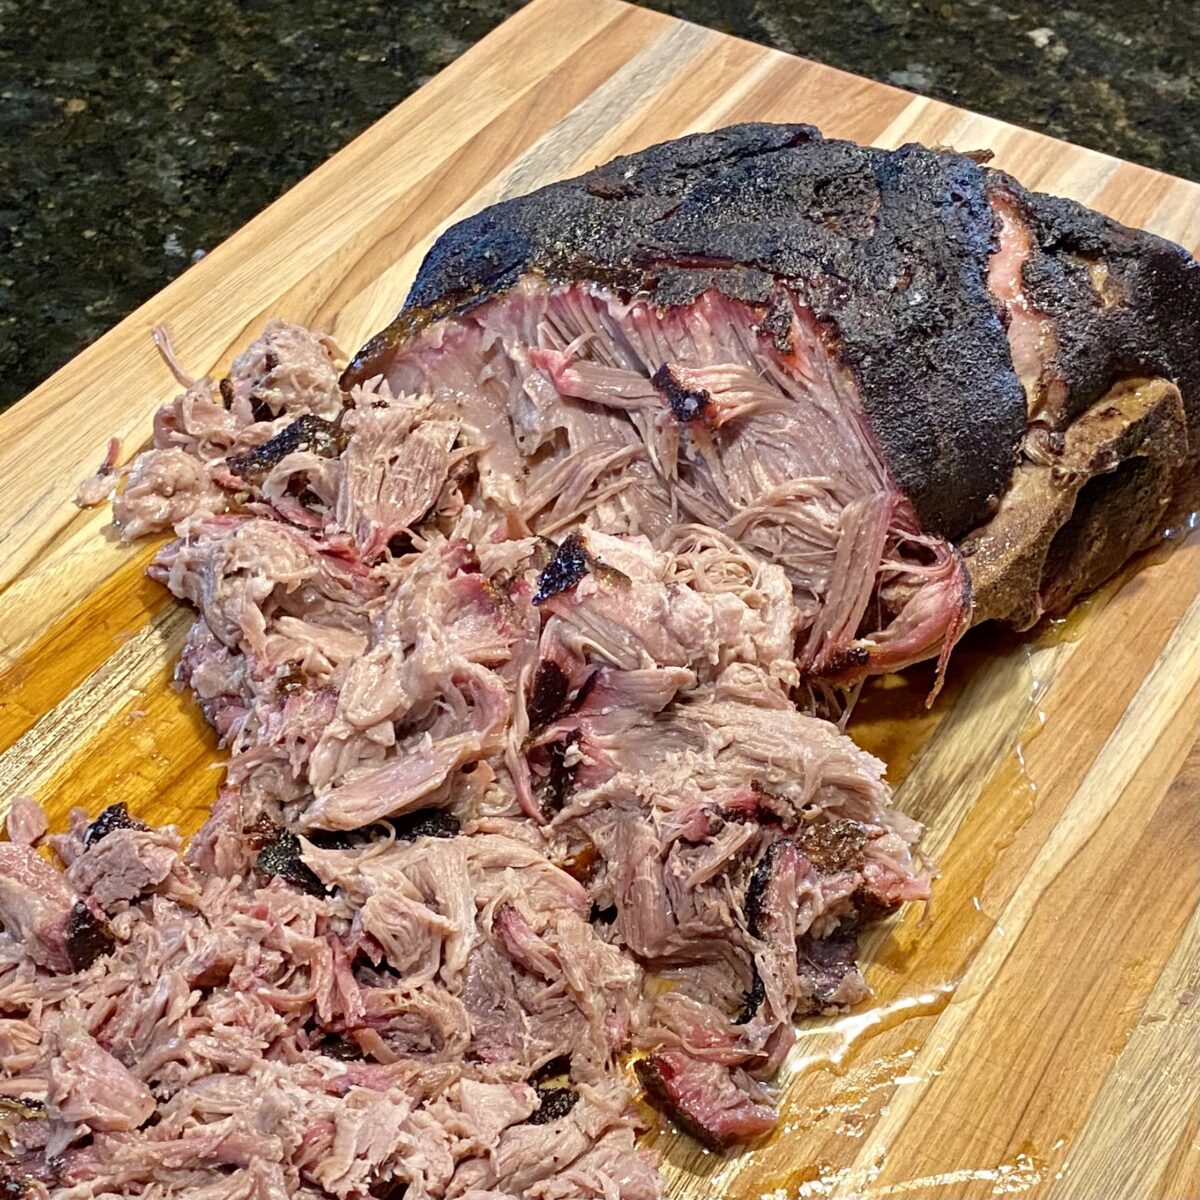
- Smoked pork butt (pulled pork)
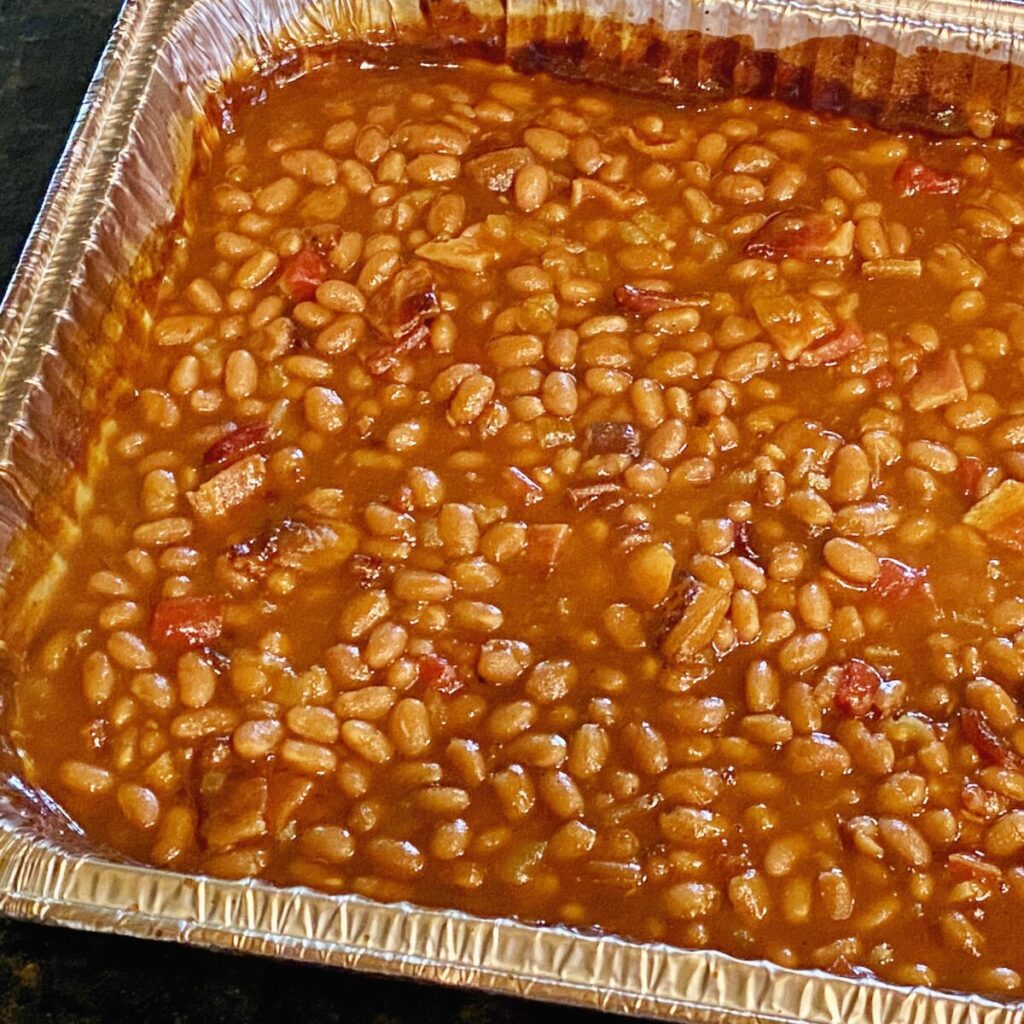
- Smoked Baked Beans
Final thought
Smoking is a process. It allows life to slow down a bit. Take this time to enjoy the weather and hang out with friends and family over a few beers. And have fun with it!
Good luck and happy smoking!
PS: Please leave a comment sharing how your smoking session went. I would love to hear about it.
How to Smoke on a Charcoal Grill
Learn how to smoke on a charcoal grill. Easy step by step instructions (with pictures) covering every detail you need to know.
Materials
Instructions
- Stack the coals around the charcoal chamber using a 2 x 2 method: two rows of two coals each stacked on top of each other. It should wrap around ¾ of the chamber (this is called the snake method).
- Place the first chunk about 3 inches from the head of the snake. Then
continue to place wood chunks around the snake, keeping them about 2
inches apart from each other. Place enough wood chunks so that about ½
of the length of the snake is covered. - Place an empty water pan in the middle of unlit coals.
- Light 12 coals in a chimney starter. Let these burn until they are mostly ashed over and are red hot (about 15 minutes).
- Carefully stack the hot coals at the head of your charcoal snake using a set of tongs, making sure that some are resting against the unlit coals.
- Fill the water pan ¾ full with boiling water.
- Add the cooking grate; position the temperature probe between the hot coals and the location where you'll place the meat.
- Lid the grill, making sure that all vents are fully open to preheat the grill to your target temperature. Determine your target temperature by adding 15º F to the temperature specified in your recipe.
- When the grill is 25º F from your target temperature, close bottom vents to 50% (see Note 1). Continue to slightly close the bottom vents until you hit your target temperature (see Note 2).
- Be sure that smoke coming out of the grill is thin and white (even slightly blue).
- Open lid and position meat about one inch from temperature
probe and centered on the indirect cooking space in the middle of the
grill. - Replace the lid, making sure that the top vents are on the opposite side of from the lit coals.
- Smoke meat according to your recipe, keeping within 10 ºF of the target temperature calculated in step 8.
- Rotate meat every 1-2 hours. At the same time, slightly turn cooking grate
to keep the temperature probe positioned between the hot coals and the meat.
Notes
- Because the cooking meat and coals can obscure your view of the bottom vents in some grills, it's often helpful to use a Sharpie to mark the positions where the vents are open to 100%, 75%, 50%, 25% and "just a sliver." Vent adjustments should be tiny (fractions of an inch).
- If your temperature begins to fall before you reach your target, open the bottom vents very slightly.

Marc says
Thank you for this great article. I am about to employ this method today. However, in this video (https://youtu.be/CdVBhjMZp2g?t=138) he mentions the "bad smoke" that newly lit charcoal briquettes can produce and to wait for the chimney to produce "white smoke". With the method in this article, it seems this billowy (bad) white smoke would be produced throughout the entire cooking session. Since I am new to charcoal, I am not sure if this is a genuine concern. What are your thoughts on this potential issue and/or ways to address the concern? Thank you!
Phil F says
I understand your concern but the 'snake method' which i describe in my post should not cause this bad smoke.
After adding the hot coals to lite the snake, establish your temperature around 250ºF. Anywhere within 25º of this is fine. Once this temp is established, the smoke coming from the grill should be light in color, that is what you want.
Yes, the snake continues to light new coals as it burns but when at a low temp, it doesn't cause bad smoke. This is also known as the minion method.
Catherine Giesbrecht says
I utilized this method today to cook a small (whole) brisket of about 7 pounds on my 22 inch kettle grill. This worked very well and I was very pleased with it. I was able to keep the temperature within a good, slow cook range, and the end result was delicious! BUT I do have a question: after 5 or so hours the temperature started to diminish and the whole snake of charcoal was pretty well finished; I reopened all the vents, but couldn't get the temp to rise above 200 degrees. As it was, 5 hours was fine for my small brisket, but what should I have done if I'd needed more time? Add hot coals? Add unlit coals? A combination of both? I want to use this method again, but would like to know how to handle the need for additional cook time.
Phil F says
Great question Catherine. If you notice the snake coming to an end, you will need to add more unlit coals to the end of the snake so it can continue to burn. I use a hinged cooking grate that allows me to easily do this. Just rotate the hinge portion of the grate over the part of the kettle where more coals are needed and add your coals. Keep rotating and add coals as necessary. Also, when you add the extra coals this way, don't worry about keeping the 2x2 stacked coal method. Simply keep the snake about the same width as before and make sure all the coals are touching.
Catherine Giesbrecht says
Great! Thanks!